
While working on this cookie, I came to the realization that this will be my fourth tutorial featuring butterflies. I was so surprised! Don’t get me wrong - butterflies are beautiful and varied. The next thing that occurred to me was that, clearly, there are a million different ways to reimagine the same subject. Sometimes I have this irrational fear that I’ll run out of ideas or that some other cookier must be working on the same idea that I am. But if I can come up with four different ways to represent butterflies without even realizing it, surely the ideas are endless. Surely, if there is some other cookier working on the same idea at the same time, our interpretations will be radically different. It was a comforting thought. If you’re interested, you can find my other butterfly tutorials here, here, and here.
This cookie uses a single classic technique: brush embroidery. For this technique, we will be piping short lines (or blobs) of royal icing and then using a damp paint brush to drag some of the icing away from or through the piped icing. This piping-and-brushing process creates a textured effect that mimics the look of actual embroidery. Brush embroidery is one of my favorite techniques. Aside from its delicate and detailed appearance, I find the process to be so relaxing and also relatively forgiving. You can find my other brush embroidery tutorials here, here, and here.
Supplies:
- Brush Embroidery Butterflies Design document (located in “Files” under “Attachments” at the end of this post)
- 6 x 4 1/2-in (15.2 x 11.4-cm) baked rectangle cookie flooded with blue royal icing (4 parts Navy/2 parts Regal Purple/1 part Super Black )
- Royal icing (I used AmeriColor gel paste coloring to tint the icing):
- Stiff-consistency dark green (3 parts Laurel/2 Taupe/1 part Cypress)
- Stiff-consistency light green (add uncolored icing to the dark green icing above)
- Stiff-consistency pink (Burgundy)
- Stiff-consistency peach (Ivory plus a touch of Burgundy)
- Stiff-consistency burgundy (3 parts Soft Pink/2 parts Plum/1 part Burgundy)
- Tips: PME #1, 1.5, 0 (or equivalents)
- Small paint brush with stiff bristles
- Food-safe marker (ideally burgundy or pink)
Step 1: Pipe and brush-embroider darkest layer of corner designs
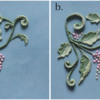
a. If desired, you can project or otherwise reference my sketched design for the corner vines from the Brush Embroidery Butterflies Design document (located in “Files” under “Attachments” at the end of this post). Starting about 5/16 inch (0.8 centimeter) inset from a corner of the cookie, pipe the larger vines of the design using stiff-consistency dark green royal icing and a PME #1 tip (or equivalent).
b. With the same icing and a PME #1.5 tip (or equivalent), pipe a teardrop on top of the curling end of one vine.
c. Using a damp small paint brush, drag through the icing of the teardrop (i) to create a textured scroll shape. Continue to drag the icing along the vine piped in Step 1a to blend the narrow end of the scroll into the vine (ii).
d. Repeat Steps 1b and 1c to create the remaining four scrolls in the design.
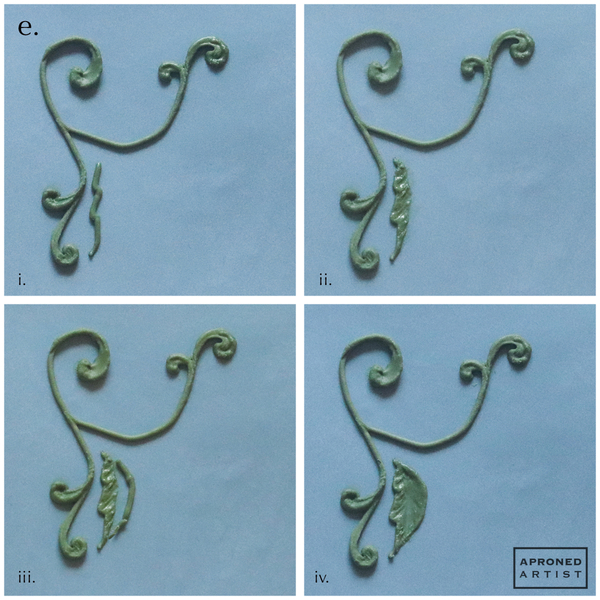
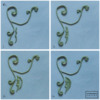
e. Using the same dark green royal icing and a PME #1 tip (or equivalent), pipe half of the border of one leaf (i). Use a damp paint brush to drag some of the icing in toward the center of the leaf at an angle that would follow the veins of the leaf (ii). Repeat to pipe and brush-embroider the other side of the leaf (iii and iv).
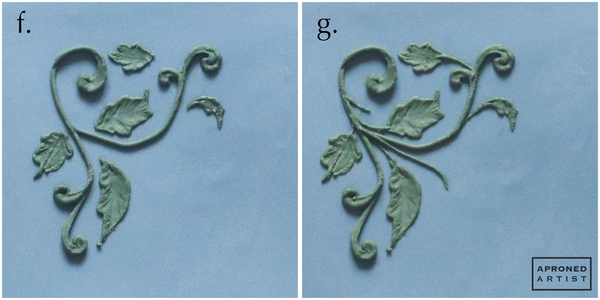
f. Repeat Step 1e to pipe and brush-embroider the remaining four leaves in the corner design.
g. Using the same dark green royal icing and a PME #0 tip (or equivalent), pipe stems to attach the leaves to the vines. Use a damp paint brush to smooth the ends of the stems into the vines. Make sure to include the two stems in the design that will attach to the flowers.
Step 2: Pipe and brush-embroider highlights of corner designs
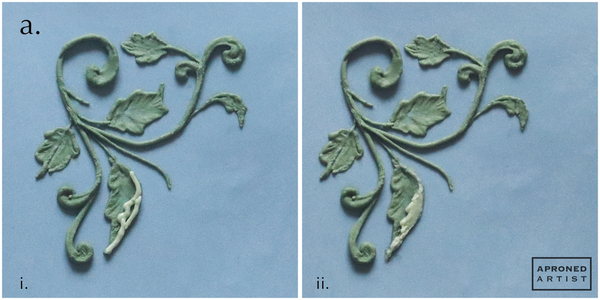
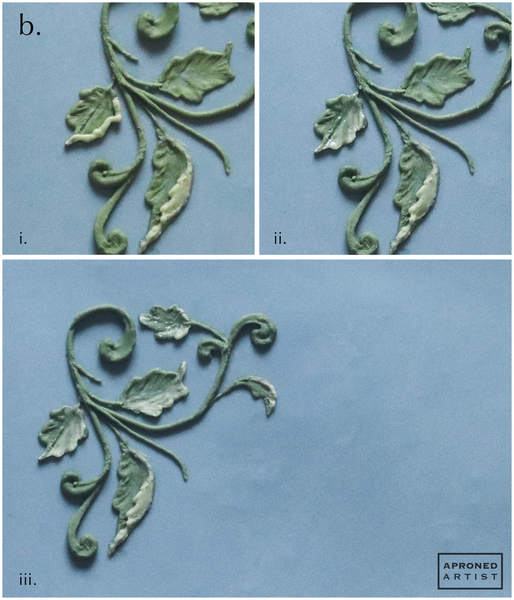
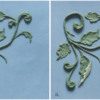
a. Use stiff-consistency light green royal icing and a PME #1 tip (or equivalent) to pipe the highlights. For the large leaf with a folded edge, pipe an outline of the folded section (reference the Brush Embroidery Butterflies Template document for the exact shape) (i). Use the damp paint brush to dilute and spread the icing to cover the entire folded section. Drag some of the icing of the jagged edge toward the rounded edge of the folded section to add the brush-embroidered texture (ii).
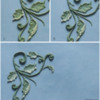
b. For the remaining leaves, imagine there is a light source in the center of the cookie. Pipe icing along the edge of a leaf (on top of the dark green icing) where the leaf would catch the light (i). Use the damp paint brush to drag some of the icing toward the center of the leaf, following the direction of the leaf’s veins (ii). Repeat to highlight the remaining leaves (iii).
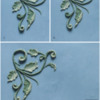
c. Use the same stiff-consistency light green royal icing and a PME #1 tip (or equivalent) to add highlights to the scrolls. Pipe a short line over the curved section of a scroll (i). Drag the damp paint brush along the inside edge of the line to soften the highlight and blend its tail into the dark green icing of the vine beneath it (ii). Repeat to highlight the remaining four scrolls (iii).
Step 3: Pipe flowers of corner designs
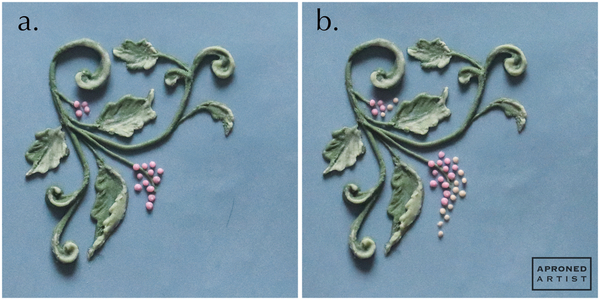
a. Using stiff-consistency pink royal icing and a PME #0 tip (or equivalent), pipe a cluster of small dots at the end of the two flower stems. Pipe just a couple of dots for the small flower tucked in between the scroll and the leaf. Pipe a larger mass of dots (like a small cluster of grapes) for the other flower.
b. Using stiff-consistency peach royal icing and a PME #0 tip (or equivalent), pipe a couple of small dots at the end of the small flower. For the larger flower, extend the shape of a cluster of grapes, adding the peach dots closer to the imaginary light source at the center of the cookie.
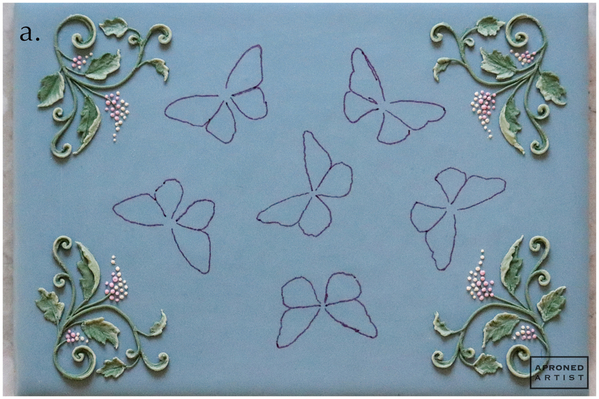
Repeat Steps 1, 2, and 3 to create the same design in each corner.
Step 4: Pipe and brush-embroider center butterfly
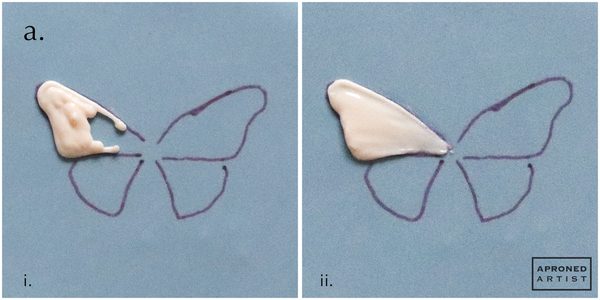
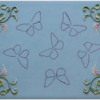
a. Use a food-safe marker to draw six butterfly silhouettes on the cookie. (Reference the Brush Embroidery Butterflies Design document to see the silhouettes I used.)
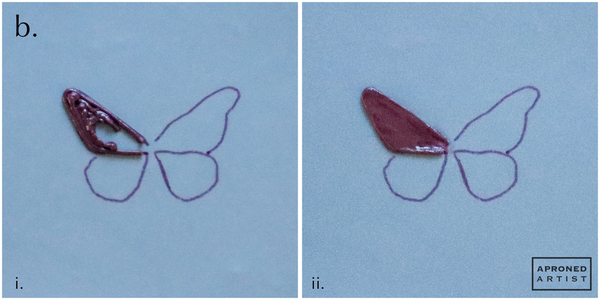
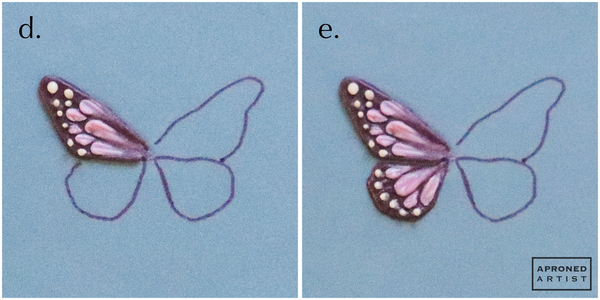
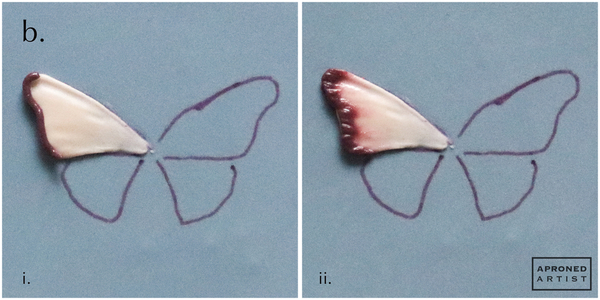
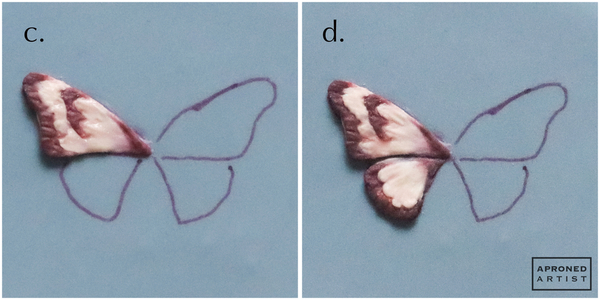
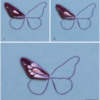
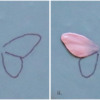
b. Using stiff-consistency burgundy royal icing and a PME #1 tip (or equivalent), pipe icing to fill the outside half of a top wing of the center butterfly silhouette (i). Use a lightly wet paint brush to drag the icing toward the center of the butterfly. Continue painting the icing toward the center until the icing is relatively smooth with gentle ripples (ii).
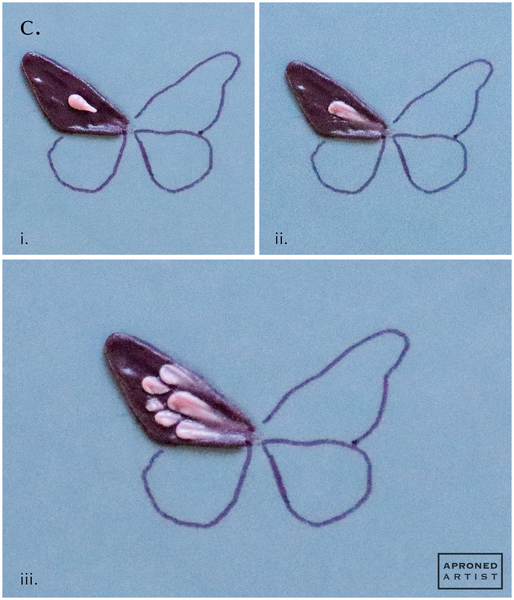
c. Using stiff-consistency pink royal icing and a PME #1 tip (or equivalent), pipe a teardrop of icing in the center of the wing pointing toward the butterfly’s center (i). Use a damp paint brush to drag from the center of the fat end of the teardrop though its tail (ii). Repeat to pipe and brush-embroider several more teardrops to fill the inner portion of the wing, leaving a border around the outer portion of the wing (iii).
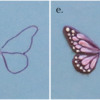
d. Using stiff-consistency peach royal icing and a PME #1 tip (or equivalent), pipe small dots along the outer wing.
e. Repeat Steps 4b through 4d to create a similar pattern on the lower wing. Mirror the patterns on the opposite upper and lower wing.
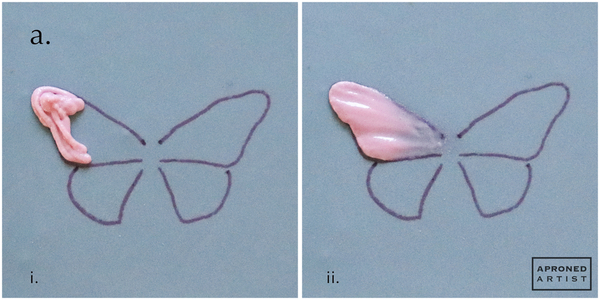
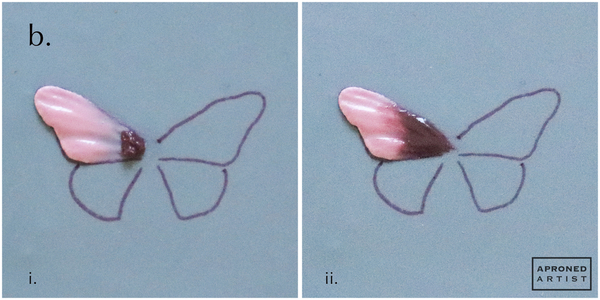
Step 5: Pipe and brush-embroider butterfly at 1 o’clock position
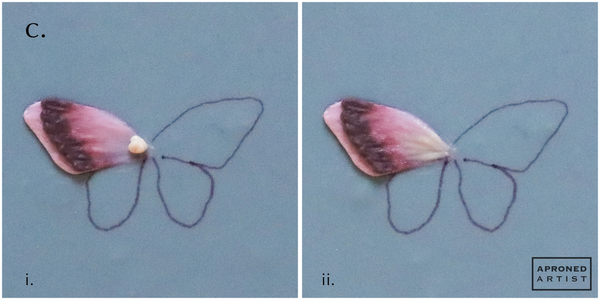
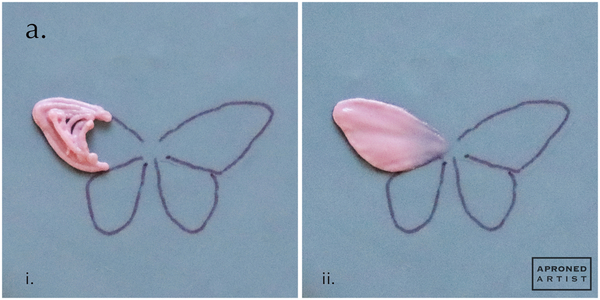
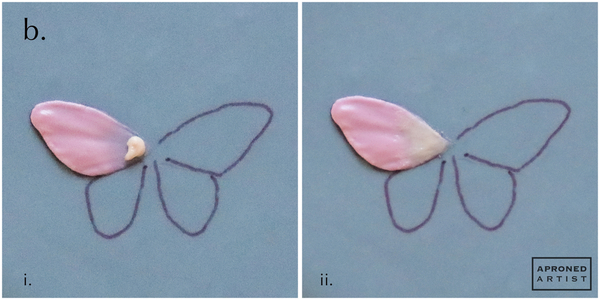
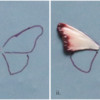
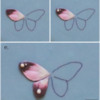
a. Using stiff-consistency peach royal icing and a PME #1 tip (or equivalent), pipe icing to fill the outside half of a top wing (i). Use a lightly wet paint brush to drag the icing toward the center of the butterfly. Continue painting the icing toward the center until the icing is relatively smooth with gentle ripples (ii).
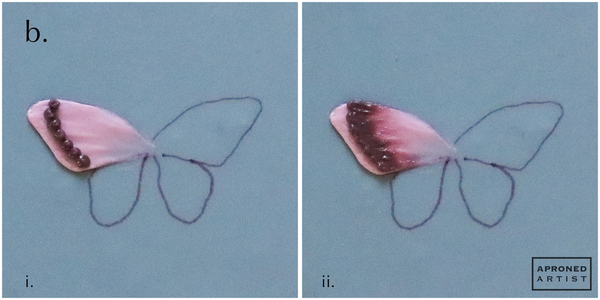
b. Using stiff-consistency burgundy royal icing and a PME #1 tip (or equivalent), pipe a line of icing along the outside edge of the wing (i). Use a damp paint brush to drag some of the burgundy icing toward the center of the butterfly (ii).
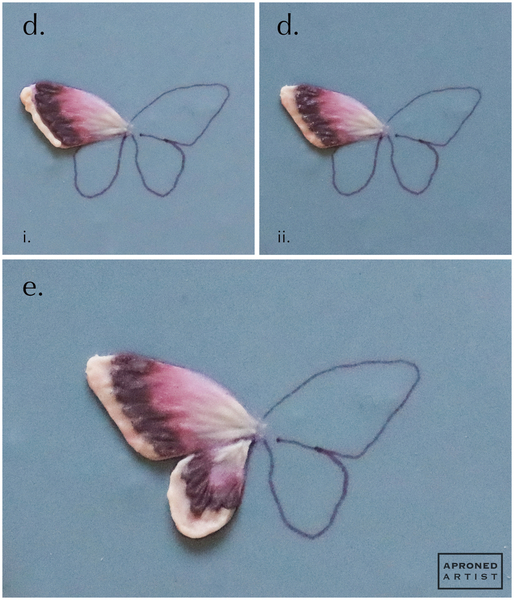
c. Using the same icing and tip, pipe and brush-embroider a similar, shorter stripe of burgundy icing parallel to the first. Add a small amount of burgundy icing near the butterfly’s center, and use the damp paint brush to drag the icing toward the stripes.
d. Repeat Steps 5a, 5b, and 5c to create a similar pattern on the bottom wing. Mirror the patterns on the opposite upper and lower wing.
Step 6: Pipe and brush-embroider butterfly at 3 o’clock position
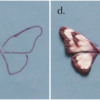
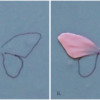
a. Using stiff-consistency pink royal icing and a PME #1 tip (or equivalent), pipe icing to fill the outside half of a top wing (i). Use a lightly wet paint brush to drag the icing toward the center of the butterfly. Continue painting the icing toward the center until the icing is relatively smooth with gentle ripples (ii).
b. Using stiff-consistency burgundy royal icing and a PME #1 tip (or equivalent), pipe some icing near the center of the butterfly (i). Use a lightly wet paint brush to drag the icing toward the pink outer wing. Allow the burgundy icing to overlap the pink icing slightly (ii). Use gentle brush strokes so as not to disturb the ripples of the pink icing.
c. Using stiff-consistency peach royal icing and a PME #1 tip (or equivalent), pipe a line along the top two-thirds of the wing’s outer edge (i). Use a damp paint brush to drag some of the peach icing toward the butterfly’s center (ii).
d. Repeat Steps 6a, 6b, and 6c to create a similar pattern on the bottom wing. Mirror the patterns on the opposite upper and lower wing.
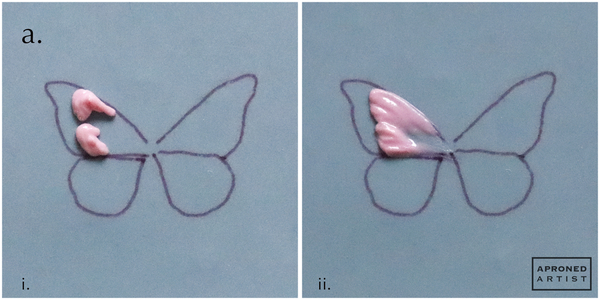
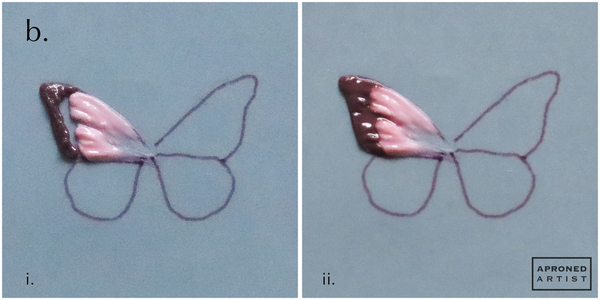
Step 7: Pipe and brush-embroider butterfly at 6 o’clock position
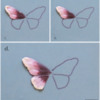
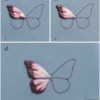
a. Using stiff-consistency pink royal icing and a PME #1 tip (or equivalent), pipe two mounds of icing near the middle of a top wing (i). Use a lightly wet paint brush to drag the icing toward the center of the butterfly. Continue painting the icing toward the center until the icing is relatively smooth with gentle ripples (ii).
b. Using stiff-consistency burgundy royal icing and a PME #1 tip (or equivalent), pipe icing along the outer edge of the wing. Use a lightly wet paint brush to drag the burgundy icing to meet the pink icing. Drag a line of burgundy icing in between the two sections of pink icing (ii).
c. Using stiff-consistency peach royal icing and a PME #1 tip (or equivalent), pipe some icing near the center of the butterfly (i). Use a lightly wet paint brush to drag the icing toward the pink middle of the wing. Allow the peach icing to overlap the pink icing slightly (ii). Use gentle brush strokes so as not to disturb the ripples of the pink icing.
d. Repeat Steps 7a, 7b, and 7c to create a similar pattern on the bottom wing. Mirror the patterns on the opposite upper and lower wing.
Step 8: Pipe and brush-embroider butterfly at 9 o’clock position
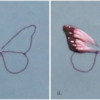
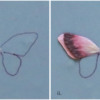
a. Using stiff-consistency pink royal icing and a PME #1 tip (or equivalent), pipe icing to fill the outside half of a top wing (i). Use a lightly wet paint brush to drag the icing toward the center of the butterfly. Continue painting the icing toward the center until the icing is relatively smooth with gentle ripples (ii).
b. Using stiff-consistency burgundy royal icing and a PME #1 tip (or equivalent), pipe dots adjacent to one another to create a line that is inset slightly but parallel to the outer edge of the wing (i). Use a damp paint brush to drag some of the burgundy icing from each dot toward the butterfly’s center (ii).
c. Using stiff-consistency peach royal icing and a PME #1 tip (or equivalent), pipe some icing near the center of the butterfly (i). Use a lightly wet paint brush to drag the icing toward the pink middle of the wing. Allow the peach icing to overlap the pink icing slightly (ii). Use gentle brush strokes so as not to disturb the ripples of the pink icing.
d. Using the same peach icing and tip, pipe a line along the outer edge of the wing (i). Use a lightly wet paint brush to drag the peach icing to meet the burgundy icing (ii).
e. Repeat Steps 8a through 8d to create a similar pattern on the bottom wing. Mirror the patterns on the opposite upper and lower wing.
Step 9: Pipe and brush-embroider butterfly at 11 o’clock position
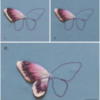
a. Using stiff-consistency pink royal icing and a PME #1 tip (or equivalent), pipe icing to fill the outside half of a top wing (i). Use a lightly wet paint brush to drag the icing toward the center of the butterfly. Continue painting the icing toward the center until the icing is relatively smooth with gentle ripples (ii).
b. Using stiff-consistency peach royal icing and a PME #1 tip (or equivalent), pipe some icing near the center of the butterfly (i). Use a lightly wet paint brush to drag the icing toward the pink outer wing. Allow the peach icing to overlap the pink icing slightly (ii). Use gentle brush strokes so as not to disturb the ripples of the pink icing.
c. Using stiff-consistency burgundy royal icing and a PME #1 tip (or equivalent), pipe some icing along the pointed tip of the outer wing. Use a lightly wet paint brush to drag the icing toward the center of the butterfly. Allow the burgundy icing to overlap the pink icing slightly. Use gentle brush strokes so as not to disturb the ripples of the pink icing.
d. Using stiff-consistency peach royal icing and a PME #1 tip (or equivalent), pipe one larger dot and one smaller dot on top of the burgundy section.
e. Repeat Steps 9a through 9d to create a similar pattern on the bottom wing. Mirror the patterns on the opposite upper and lower wing.
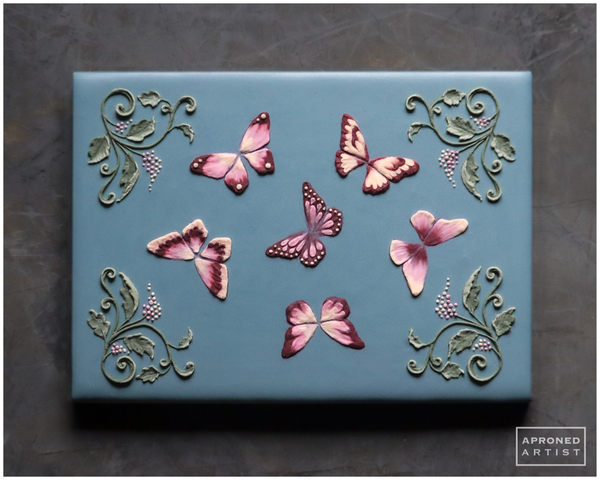
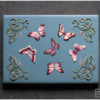
Finished! A granny chic butterfly cookie to celebrate spring.


Samantha Yacovetta began cookie decorating in 2013. While working at a local bakery, Samantha became captivated by cookie art when a customer requested princess-themed cookies. Attracted initially to the precision of cookie decorating, Samantha soon found that the limitless design opportunities turned it into her artistic passion. Samantha began regularly stocking the bakery case with decorated cookies and for several years sold cookies through her own company, Aproned Artist, a cottage food operation. Having retired from the business life, Samantha now enjoys making cookies just for fun from her home in San Jose, California, USA. To learn more about Samantha, please check out her Cookie Connection portfolio, her Facebook page, and her past Every Little Detail tutorials here.
Photo and cookie credits: Samantha Yacovetta
Note: Every Little Detail with Aproned Artist is a monthly Cookie Connection blog feature written by Samantha Yacovetta focused on the special little details that make big statements in cookie design. This article expresses the views of the author, and not necessarily those of this site, its owners, its administrators, or its employees. To read all of Samantha's past Every Little Detail tutorials, click here. And to see all of Cookie Connection's tutorials, click here.
















Comments (10)