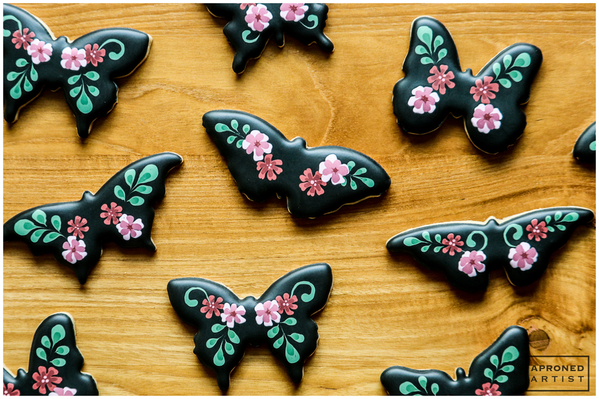
 Following a particularly wet winter, California is officially drought-free! I think any native Californian meets this news with both gratitude as well as a little skepticism. I’ve lived here most of my life, and I can’t remember a time when we weren’t experiencing some degree of drought. As a child, I remember collecting and redistributing the meager puddle of water from the rain barrels we set up around the yard. By my teenage years, I’d perfected the art of the five-minute shower (thanks to constant nagging from my mom). And just two years ago, I watched all of the lawns in my neighborhood dry up and die when the county imposed mandatory rationing. But this winter (and spring), the rain just kept on falling. It’s been glorious! I had to make some cookies to celebrate, of course: cookies with dark backgrounds (because we’ve had more than our share of dark, stormy skies), vibrant blooms (because the trails around my house have virtually exploded with wildflowers), and butterflies (because everything is buzzing with life). Before long, I know the hillsides will return to the dry, golden landscape I remember, but until then, I’m cherishing every moment.
- 3 1/2-inch (9-cm) baked butterfly cookie (I used a cutter from this set.)
- Royal icing (I used AmeriColor gel paste to color the icing)*:
- Medium-consistency black (Super Black)
- Flooding-consistency black (Super Black)
- Flooding-consistency light red (2 parts Maroon/1 part Tulip Red)
- Flooding-consistency dark red (2 parts Maroon/1 part Tulip Red/1 part Electric Purple)
- Flooding-consistency dark pink (Add a very small amount of the the dark red icing above to uncolored icing until you reach the desired shade.)
- Flooding-consistency light green (Add a small amount of the dark green icing below to uncolored icing.)
- Flooding-consistency dark green (3 parts Leaf Green/1 part Gold/1 part Royal Blue/1 part Super Black)
- Flooding-consistency light pink (Add a small amount of the dark pink icing above to uncolored icing.)
- Tips:
- Scribe tool (or equivalent)
*Notes on consistencies: For medium-consistency, the icing should behave like egg whites beaten to a soft peak (pretty stiff but with a little droop). For flooding-consistency, I aim for about 15 seconds, meaning the "tracks" left by the icing when dropped into the icing bowl disappear in about 15 seconds.
Before getting started, you might find it helpful to read Manu's and Julia’s tips for successful wet-on-wet cookies here.
Step 1: Outline and flood cookie
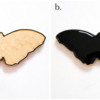
a. Usually I don’t bother outlining, however, I think it’s a worthwhile step when making wet-on-wet cookies as it minimizes the likelihood the icing will spill over the sides when you add more layers of wet icing on top. To outline the cookie, use medium-consistency black royal icing and a PME #1 tip (or equivalent).
b. Using black flooding-consistency royal icing and a Wilton #3 tip (or equivalent), flood the area within the outline. Take care not to overfill, so there is still some room to accommodate the icing for the flowers we're going to add in the next step. Also, if you add too much icing at this stage, the flowers will mound on top of the flooding icing rather than settling into a smooth, uniform surface.
Step 2: Pipe red flower
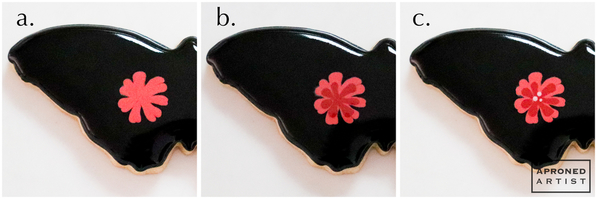
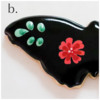
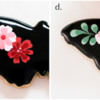
a. Immediately, pipe a flower shape in the lower portion of one wing using the light red flooding-consistency royal icing and a PME #1 tip (or equivalent). Mirror this light red flower on the lower portion of the opposite wing.
b. Working quickly, use a PME #1 tip (or equivalent) to add a teardrop of dark red flooding-consistency royal icing within each petal of the first flower piped in Step 2a. The pointed ends of the dark red teardrops should meet in the center, creating a smaller dark flower shape within the light red flower. Repeat on the flower on the other wing.
c. Using a PME #1 tip (or equivalent), add a few small dots of dark pink flooding-consistency royal icing to the center of the flower on both wings.
Step 3: Pipe foliage
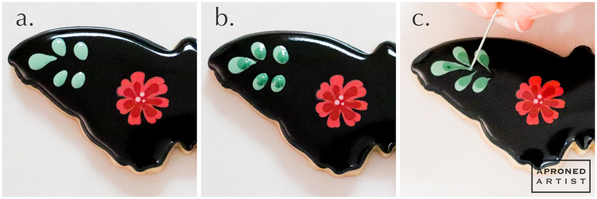
a. Using light green flooding-consistency royal icing and a PME #1.5 tip (or equivalent), pipe a large teardrop of icing near the tip of the wing (with the pointed end facing toward the butterfly’s center). Add two sets of smaller teardrops below and to either side of the large teardrop, with the pointed ends facing inwards. Mirror the teardrops on the opposite wing.
b. Immediately pipe dots of dark green flooding-consistency royal icing on the pointed half of each teardrop using a PME #1.5 tip (or equivalent).
c. With a scribe tool (or equivalent), drag the icing from the four lower teardrops diagonally down towards the center of the wing. Then, drag the icing from the larger teardrop at the top to create a stem heading in the direction of the red flower. (The stem does not have to reach all the way to the red flower, as we will cover this empty section with another flower.) Repeat this process on the opposite wing.
Step 4: Pipe pink flower
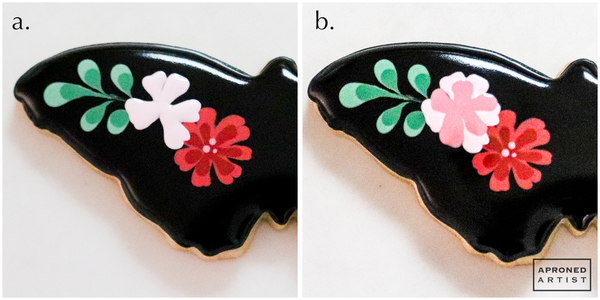
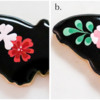
a. In the empty space between the foliage and the red flower, pipe a few loose petals with the light pink flooding-consistency royal icing and a PME #1 tip (or equivalent). Mirror these petals on the opposite wing.
b. Using the dark pink flooding-consistency royal icing and a PME #1 tip (or equivalent), add dark petals between the light pink petals on each flower.
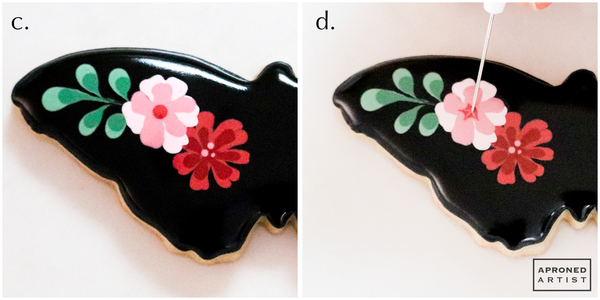
c. Add a dot of light red flooding-consistency royal icing to the center of the pink flowers with a PME #1 tip (or equivalent).
d. Use a scribe tool (or equivalent) to drag out points of the light red icing to create a tiny star shape in the center of each flower.
Allow the icing to dry completely.
I don’t often make exclusively wet-on-wet cookies, but I’m reminded now of how fun they are. Not only are they fast, but they encourage me to relinquish some of my fussy, perfectionism. Despite the rain, I still live in a relatively dry climate and my cookies crust within just a couple of minutes. There is no time to overthink. The result feels surprisingly effortless and adaptable.
Give it a try. The flowers and foliage can easily be rearranged to fit any butterfly cookie.







Comments (29)