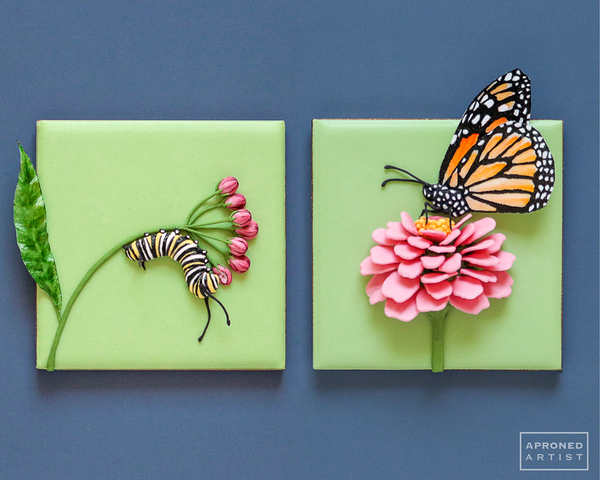
 To my surprise, rice paper has become one of my favorite elements to incorporate into new designs. It’s such a versatile material. Rice paper can be molded (to create a balloon), imprinted (with the veining of a bumblebee wing), or kept flat (like the windows of a tiny cabin). It can be transparent (like a ghost) or painted (to make colorful leaves). The possibilities are endless. Here, once again, rice paper is the star, serving perfectly to mimic the thin, vibrant wings of a butterfly, and to make a graceful leaf.
Supplies:
- Parchment paper
- Monarch Templates (See “Files” under “Attachments” at the end of this post.)
- Royal icing (I used AmeriColor gel paste coloring to tint the icing.):
- Stiff-consistency white
- Stiff-consistency yellow (1 part Lemon Yellow/1 part Gold)
- Stiff-consistency black (Super Black)
- Stiff-consistency dark pink (3 parts Electric Pink/1 part Burgundy)
- Stiff-consistency green (3 parts Gold/1 part Leaf Green/dab Olive)
- Stiff-consistency light pink (Add white icing to the dark pink icing above.)
- Tips:
- Wilton #12, 7 (or equivalents)
- PME #1.5, 3, 2, 00 (or equivalents)
- Medium flat angled paint brush
- Tiny liner paint brush
- AmeriColor (or equivalent) gel paste colorings for painting: Bright White, Burgundy, Laurel, Electric Orange, Red Red, Super Black
- Acetate
- Scribe tool (or equivalent)
- Kitchen shears
- Rice paper
- Silicone leaf veiner (If your leaf veiner has two halves, either side can be used; I used the side with indented veins.)
- Various props such as small cookies, small desiccant packs, or crumpled pieces of aluminum foil
- 2 (3-in/7.6-cm) square cookies flooded with light green royal icing (3 parts Gold/1 part Leaf Green)
- Heavy, flat-bottomed object (like a cast iron skillet or large box of plastic wrap) to weigh down rice paper while drying
Note: For clarity’s sake, I have structured this tutorial in two sections: one section for the caterpillar cookie and one section for the butterfly cookie. If you are making both cookies and want to ensure maximum freshness, I recommend making all of the transfers for both designs before baking, flooding, and assembling the cookies.
For Caterpillar Cookie
Step 1: Pipe caterpillar and filament transfers
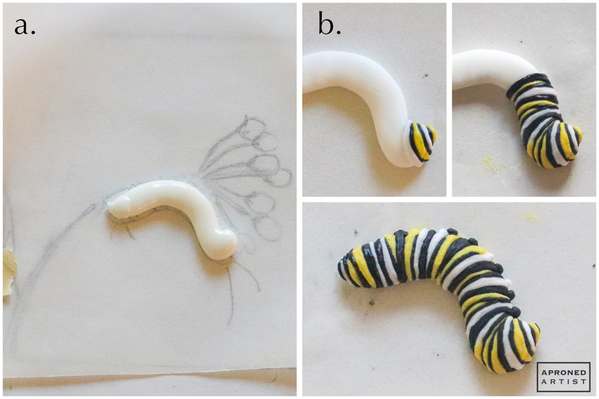
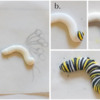
a. Tape a square of parchment paper over the caterpillar on the Monarch Templates document (located in “Files” under “Attachments” at the end of this post). Using stiff-consistency white royal icing and a Wilton #12 tip (or equivalent), pipe over the template. Allow the icing to dry completely.
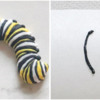
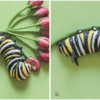
b. Prepare three icing bags with PME #1.5 tips (or equivalents) - one with stiff-consistency yellow royal icing, another with stiff-consistency black royal icing, and another with stiff-consistency white royal icing. Begin piping somewhat irregular stripes that follow this pattern: yellow, black, white, black. (Reference photos of monarch caterpillars for more direction.) After piping each stripe, flatten it slightly with a dry flat paint brush. Continue the pattern until the entire caterpillar is covered, adding a few bumps along the belly using the corresponding stripe color. These bumps will be attachment points for legs that will be added in Step 4c.
c. Using the black icing, pipe two lines about 1/2 inch (1.3 centimeters) long extending from the caterpillar’s rump to create the rear filaments (similar in appearance to antennae). Pipe two curving lines about 1 inch (2.5 centimeters) long on a square of parchment paper for the front filaments.
Step 2: Pipe and paint milkweed bud transfers
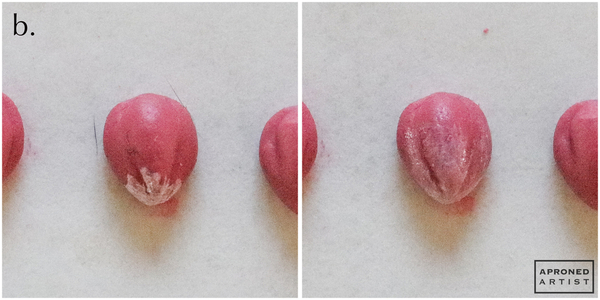
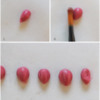
a. Place a square of parchment paper over the milkweed bud section of the Monarch Templates document. Using stiff-consistency dark pink royal icing and a Wilton #7 tip (or equivalent), pipe a teardrop of icing to cover one bud template (i). Gently press a dry flat paint brush against the sides of the icing to smooth and shape the bud. Use the side of the brush to indent a “V” in the bud to create the impression of petals (ii). Repeat this process to create about six buds. Pipe one more bud, but instead of creating the “V”, mash the right side with the bristles of the brush so that it appears half eaten (iii). Allow the bud transfers to dry completely.
b. Using a tiny liner paint brush, brush undiluted Bright White gel paste coloring (or equivalent) onto the pointed base of the bud. Dampen the liner paint brush with water, and blend the white paint upward.
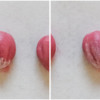
c. Use the tiny liner paint brush to paint two lines of undiluted Burgundy gel paste coloring (or equivalent) from the top of the bud down into the two indentations of the “V”. Add a faint line in the center of the petal (i). For the half-eaten bud, dab undiluted Bright White gel paste coloring over the mashed portion of the bud, leaving a border of unpainted pink icing around the outside. Outline the edge of the mashed section with undiluted Burgundy gel paste coloring (ii).
Step 3: Create rice paper leaf
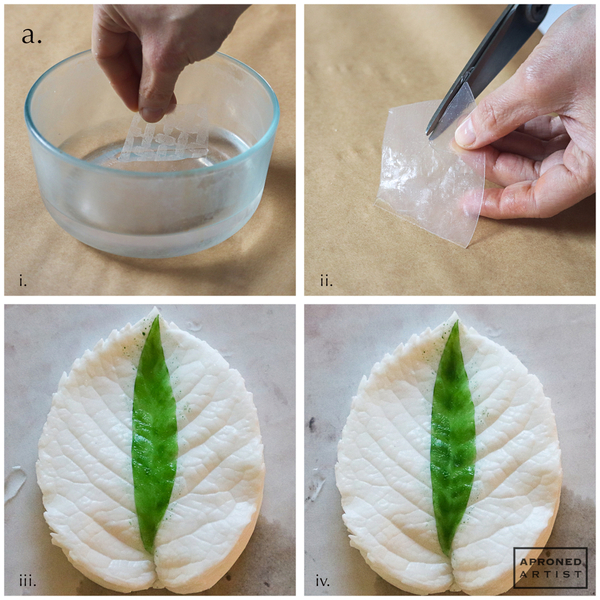
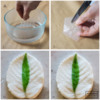
a. Place a small piece of acetate over the leaf portion of the Monarch Templates. Use a scribe tool (or equivalent) to trace around the leaf and score the image into the acetate. Cut the scored shape out of the acetate with kitchen shears. Dip a piece of rice paper into cold water for about ten seconds or until the rice paper is no longer brittle (i). Place the soaked rice paper on top of the acetate leaf template, and cut around the acetate leaf shape with kitchen shears to remove the excess rice paper (ii). Peel the rice paper off of the acetate, dip it back into the water to lubricate it, and place it over a silicone leaf veiner. Using a flat paint brush, paint the leaf with diluted Laurel gel paste coloring (or equivalent) (iii). Add another coat of the green paint in the sections between the veins (iv). Allow the leaf to dry completely.
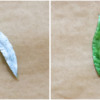
b. Paint the back side of the leaf (the side that was in contact with the silicone) with undiluted Bright White gel paste coloring. Flip the leaf so that the white side of the leaf is face down on a piece of parchment paper, and place the veiner on top of the green side of the leaf to weigh it down while the paint dries. (Weighting will prevent the leaf from curling excessively, and painting the back with white coloring will make the once-translucent leaf opaque.) Once dry (in my dry climate, this takes about 10 minutes), remove the veiner.
Step 4: Assemble caterpillar cookie
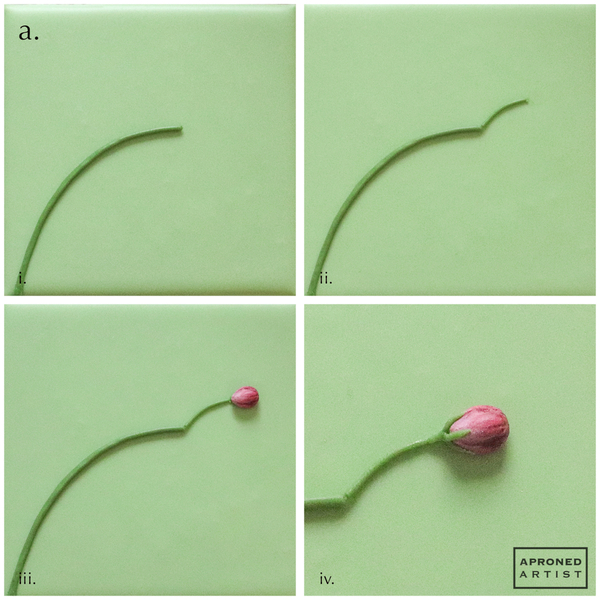
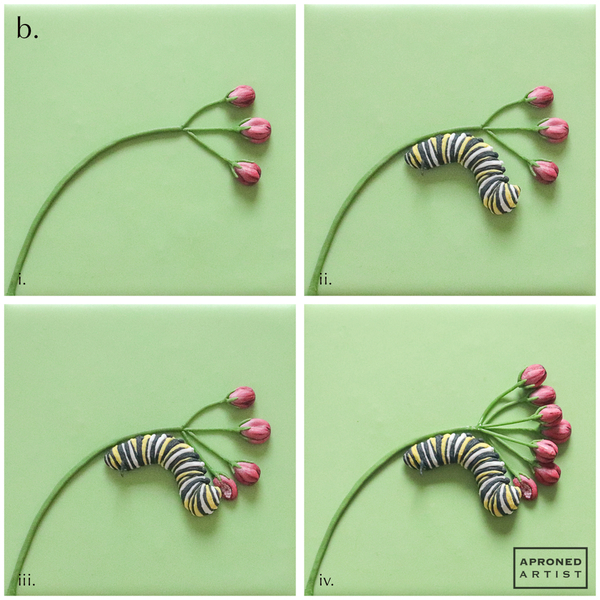
a. Using stiff-consistency green royal icing and a PME #3 tip (or equivalent), pipe a long arching stem for the milkweed flowers (make sure the stem roughly follows the shape of your caterpillar transfer; see Monarch Templates for specific size and placement) (i). With the same icing and a PME #2 tip (or equivalent), pipe a curving line for the stem of an individual bud (ii). Attach a bud transfer at the end of the stem (iii). Pipe three short lines starting at the base of the bud to form the calyx (iv).
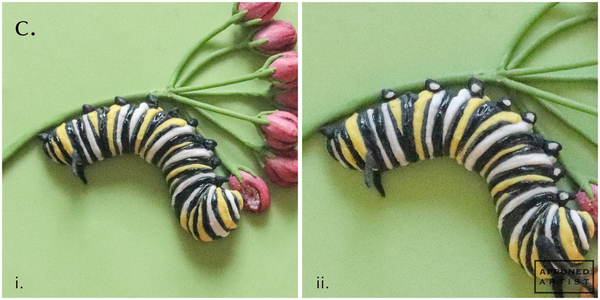
b. Add two more small stems, buds, and calyces, leaving a small amount of space in between each one to accommodate the next tier of buds that will be layered on top (i). Attach the caterpillar with a small dab of icing so that his lower body sits against the bottom of the main stem (ii). Attach the half-eaten bud so that it is adjacent to the caterpillar’s mouth, pipe a small stem from the half-eaten bud to the main stem, and pipe a calyx (iii). (Fun fact: Monarch caterpillars only eat milkweed!) Attach three more buds in a second tier with a taller dab of icing so that they are slightly more raised. Pipe small stems from the base of each bud to the main stem (these stems will hover and may not make contact with the flood icing on the cookie). Finally, add a calyx for each new bud (iv).
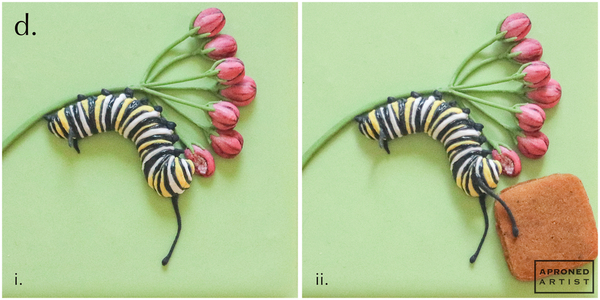
c. Using stiff-consistency black royal icing and a PME #2 tip (or equivalent), pipe small legs, attaching the bumps along the caterpillar’s belly to the milkweed stem (i). Allow the icing to set for a few minutes. Using stiff-consistency white royal icing and a PME #00 tip (or equivalent), pipe a small white dot on each of the legs (except the last leg on his rump). Flatten the icing gently with a dry tiny liner paint brush (ii).
d. Carefully peel the parchment paper away from the filament transfers piped in Step 1c. Because these transfers are so delicate, it’s best not to hold them with your fingers. Slide a small piece of acetate beneath one filament transfer. Add a bead of black icing to the top of the caterpillar’s head, and use a dry paint brush to slide the end of the filament from the acetate onto the wet icing (i). Slide the acetate beneath the other filament transfer, and place a small prop (such as a small cookie) below the caterpillar’s head. Pipe a bead of icing on the middle of the caterpillar’s head, and use a dry paint brush to slide the end of the filament from the acetate onto the wet icing. Gently pull away the acetate so that the top of the filament rests on the prop (ii).
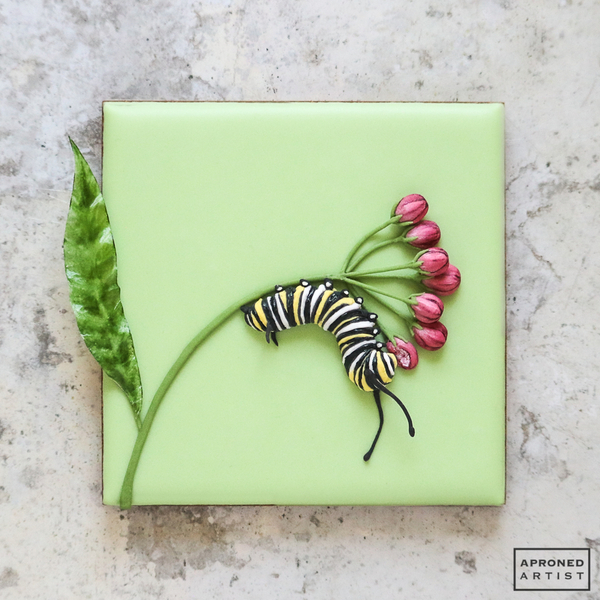
Allow the icing to dry completely before removing the prop. Using a dab of stiff-consistency green royal icing, attach the rice paper leaf made in Step 3 to the left side of the long arcing stem.
For Butterfly Cookie
Step 5: Create zinnia transfer
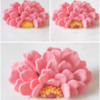
a. Place a square of parchment paper over a zinnia petal template on the Monarch Templates document. Using stiff-consistency light pink royal icing and a PME #2 tip (or equivalent), pipe the outline of the petal and a few lines within the outline (i). Use a damp medium flat paint brush to spread the icing to fill the outline (ii). If necessary, add a little more icing, however try to maintain a thin, even layer. Repeat to create about a dozen of each petal size (small, medium, and large, as marked on the Monarch Templates document) (iii). Allow the petal transfers to dry completely before carefully peeling the parchment paper away from the transfers. (Note: if you are more comfortable with flooding-consistency icing, you can use that consistency to pipe the petals. I favor stiff-consistency icing because I find that it gives me a thinner, flatter petal with more defined edges.)
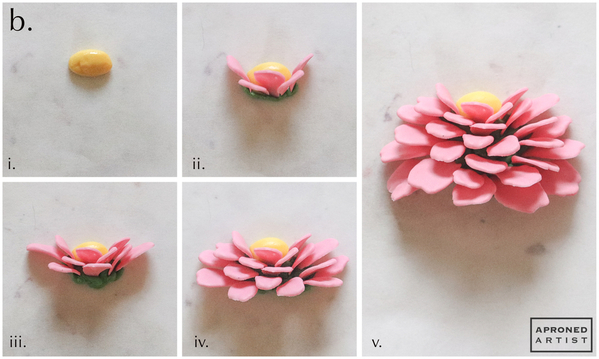
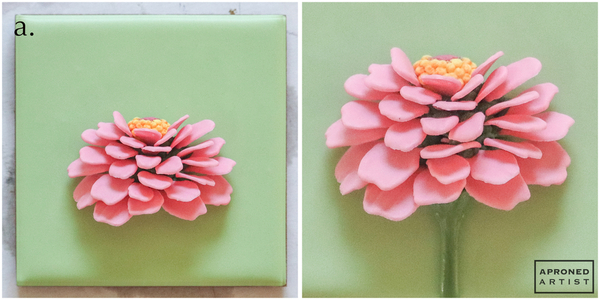
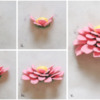
b. Using stiff-consistency yellow royal icing and a Wilton #7 tip (or equivalent), pipe an oval about 1/2 inch (1.3 centimeters) long on a clean square of parchment paper (i). (Note: I didn't allow any drying time, as a still-wet center helps the petals to adhere in the next step.) Using a PME #3 tip (or equivalent), pipe a dot of stiff-consistency green royal icing beneath the left side of the yellow oval. Insert the narrow end of a small petal transfer into the icing. Repeat to add a petal to the right side, and then a few more petals in the center (ii). For every petal, add a dab of green royal icing which connects to the icing near it. Add another tier of small petal transfers beneath the first; again, work from the outside of the flower in toward the center (iii). (Note: I attached the petals from the outside in because that seemed to give me the most access. I found it really easy to bump one of the newly inserted petals when I worked from the inside out.) Next, add a tier of medium petal transfers (iv). Finally, add a tier of large petal transfers (v). I used roughly ten small petals, eight medium petals, and 12 large petals to create my zinnia transfer.
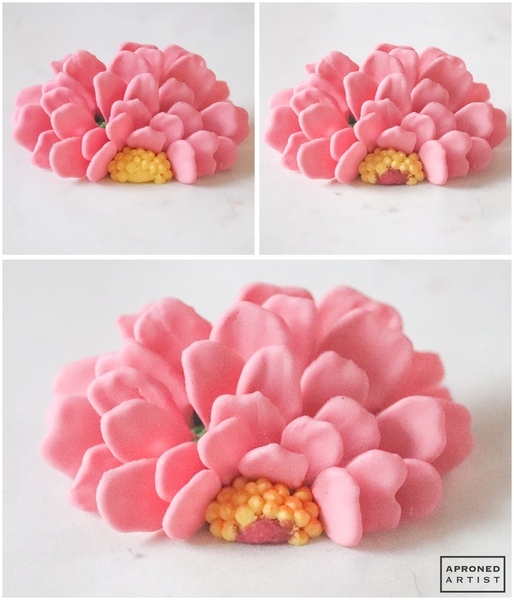
c. Using stiff-consistency yellow royal icing and a PME #1.5 tip (or equivalent), pipe a few layers of small dots around the edge of the yellow zinnia center (i). Pipe a small amount of stiff-consistency dark pink icing in the center, and use a tiny liner paint brush to gently spread the icing to cover the rest of the yellow center (ii). Allow the icing to dry until crusted. Dilute a drop of Electric Orange gel paste coloring (or equivalent), and paint the creases between the yellow dots with a tiny liner paint brush (iii). Set aside the zinnia transfer for now.
Step 6: Create rice paper butterfly wings
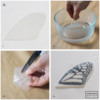
a. Place a small piece of acetate over the top of the butterfly forewing portion of the Monarch Templates. Use a scribe tool (or equivalent) to trace around the wing and score the image into the acetate. Cut the scored shape out of the acetate with kitchen shears. This piece will be used as a cutting guide when trimming the rice paper in Step 6a(iii) (i). Tape a large piece of acetate over both the forewing and hindwing templates on the printed Monarch Templates document. This piece will serve as drying area and a painting guide after the cut rice paper is set on it. Dip a small piece of rice paper into cold water for about ten seconds or until the rice paper is no longer brittle (ii). Place the soaked rice paper on top of the acetate forewing template, and cut around the acetate shape with kitchen shears to remove the excess rice paper (iii). Peel the rice paper off of the acetate, dip it back into the water to lubricate it, and place it over the acetate-covered Monarch Template forewing (iv). Brush the rice paper with a wet flat paint brush to remove any air bubbles.
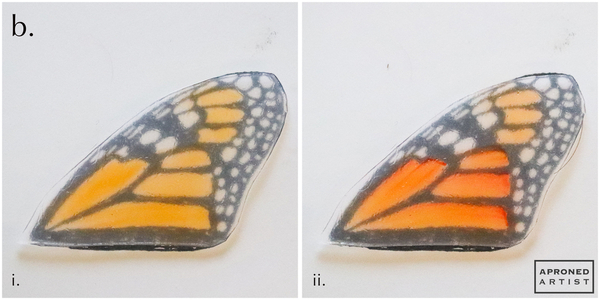
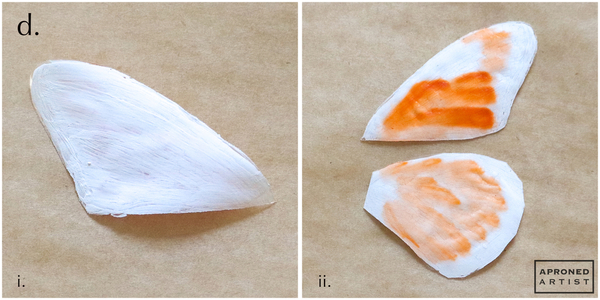
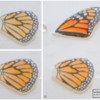
b. Dilute a drop of Electric Orange gel paste coloring (or equivalent) until it is very watery and translucent, and paint the colored sections of the rice paper butterfly wing (i). (Reference my photo so that you can see which sections should be orange.) Keep your brush very wet so that it doesn’t tear the rice paper. Use long brush strokes that start at the end of the section (nearer the outside of the wing) and end toward the point (nearer the inside of the wing where it attaches to the butterfly’s body). (Note: I wanted the darkest parts to be on the outer edge. If you want the point of the wing to be darker, you could reverse the painting direction.) Don’t worry too much about staying within the lines as the black bordering areas will be covered later. Dip just the tip of the wet angled flat paint brush into undiluted Red Red gel paste coloring (or equivalent), and add some thin darker lines down the length of the largest section. Clean your brush, and brush water over the section to blend the red coloring slightly. Repeat to add the red coloring to the four largest colored sections (ii).
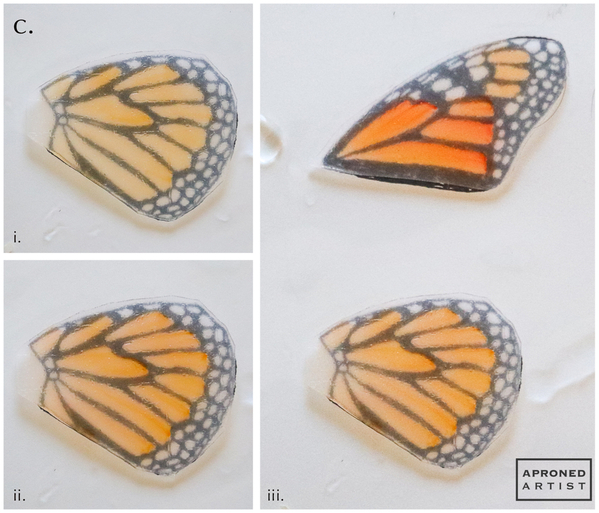
c. Repeat Steps 6a(i-iii) to cut the rice paper hindwing, and then lubricate it again in water and place it over the acetate-covered printed hindwing template. Dilute the Electric Orange gel paste coloring further, and paint over the colored sections (i). Dip just the tip of the paint brush into more concentrated orange paint, and add a few darker lines, blending them with water (just like you did with the red coloring in the previous step) (ii). Try to keep the hindwing coloring noticeably lighter than that of the forewing (iii). Allow the rice paper wings to dry completely; then carefully peel the acetate away from them.
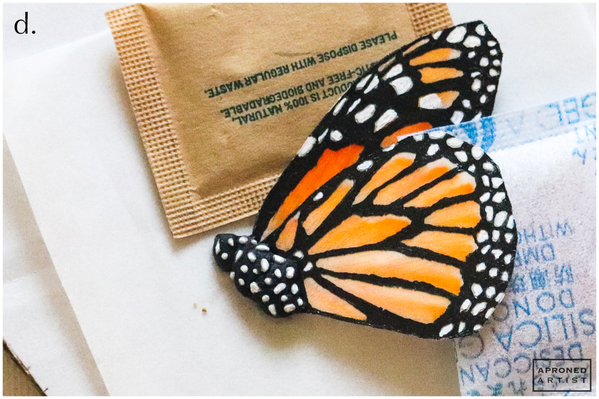
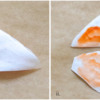
d. Flip the dried rice paper wings over (so that the shiny side that was in contact with the acetate is facing up), and paint the backs with Bright White gel paste coloring (or equivalent) (i). The paint will soften the rice paper, so take the opportunity to trim the wings if you want to refine their shape. Flip the wings back over so that the white side is facing down (ii), and place them in between two sheets of parchment paper. Place a heavy, flat-bottomed object (like a cast iron skillet or a large box of plastic wrap) on top of the parchment paper to keep the rice paper from curling while it dries. Allow the wings to dry for at least an hour.
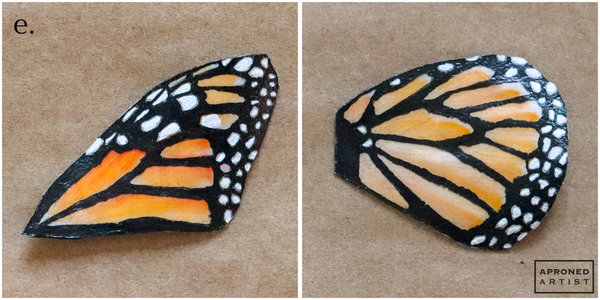
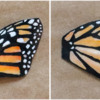
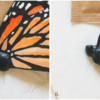
e. Use a tiny liner paint brush and undiluted Super Black gel paste coloring (or equivalent) to paint the black portions of one wing. Again, reference my photos or the Monarch Templates document to see which parts of the wing are black. Weight the wing between parchment paper again while you paint the other wing’s black portions. Use a tiny liner paint brush and undiluted Bright White gel paste coloring to paint the white portions of both wings. These areas will already appear white because the back sides were painted, however, adding a little paint to the top surfaces brightens the spots and hides any errant orange that might have bled into those areas. Weight both wings between parchment paper again, and leave them there while you work on the remaining elements of the cookie. Weighting will keep the wings as flat as possible.
Step 7: Pipe butterfly’s body
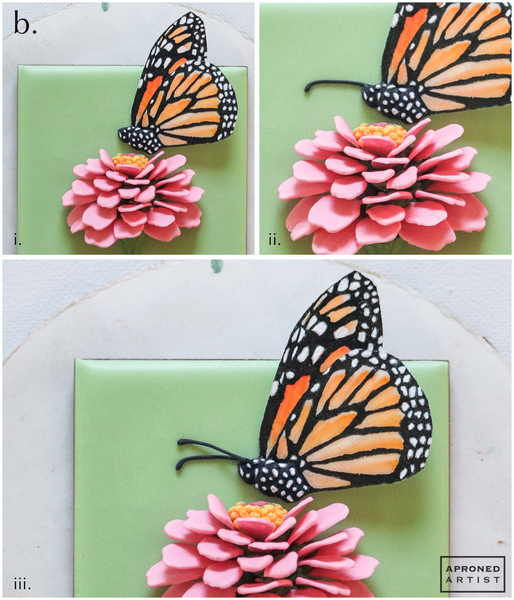
a. Using stiff-consistency black royal icing and a Wilton #7 tip (or equivalent), pipe a rounded teardrop of icing about 3/4 inch (1.9 centimeters) long on a square of parchment paper. Insert the forewing into the top of the narrow end of the teardrop, and rest the wing on top of a thin prop (such as a thin desiccant pack or a crumpled piece of aluminum foil) (i). Insert the hindwing into the icing so that the top of the hindwing covers the bottom half of the forewing, and rest the wing on top of a taller prop so that the hindwing sits noticeably higher than the forewing (ii). Use a dry flat paint brush to reshape the body if it becomes warped after inserting the wings. Allow the icing to set for about 30 minutes.
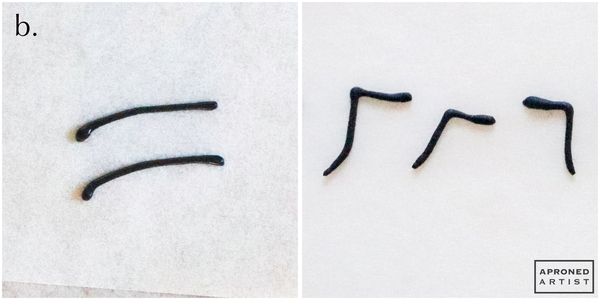
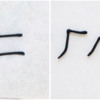
b. Meanwhile, pipe the antennae and leg transfers. Place a square of parchment paper over the antennae templates on the Monarch Templates document, and use a PME #1.5 tip (or equivalent) to pipe two antennae. Place another square of parchment paper over the leg templates, and pipe three legs. Allow the icing to dry completely. (Note: If you’re looking to streamline the butterfly process, skip the leg and antennae transfers. Instead, jump to the next step and insert painted Maifun rice sticks into the wet icing of the butterfly’s head for the antennae.)
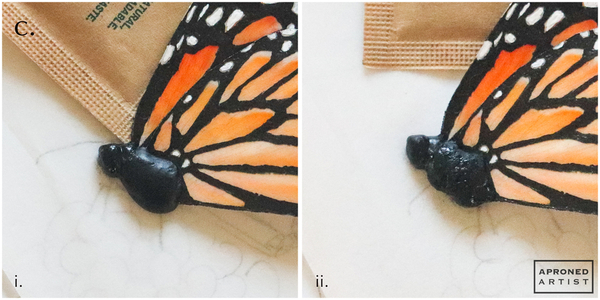
c. Using stiff-consistency black royal icing and a PME #3 tip (or equivalent), pipe the butterfly’s head. Shape the icing with a dry flat paint brush (i).) Pipe some icing on the body to give it a more bulbous shape and bumpy texture. Shape and blend the icing with a damp paint brush (ii). Allow the icing to set until no longer tacky.
d. Using stiff-consistency white royal icing and a PME #1.5 tip (or equivalent), pipe small white dots along the head and body. Flatten the dots slightly with a dry paint brush. Paint the dots with Bright White gel paste coloring and a tiny liner paint brush.
Step 8: Assemble butterfly cookie
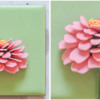
a. Attach the zinnia transfer to the center of a flooded square cookie with a dab of stiff-consistency green royal icing. Use the same icing and a Wilton #7 tip (or equivalent) to pipe a thick stem that starts directly beneath the zinnia transfer and thins as it extends to the bottom of the cookie. Shape the stem with a dry flat paint brush, if necessary.
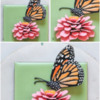
b. Using stiff-consistency black royal icing and a PME #1.5 tip (or equivalent), attach the body of the butterfly transfer above the zinnia (i). Slide one antenna transfer onto a small piece of acetate. Add a bead of icing to the top of the butterfly’s head where it meets the flooded cookie, and use a dry paint brush to slide the end of the antenna from the acetate onto the wet icing so that the antenna points to the left (ii). Again, sliding the antennae and leg transfers, rather than picking them up, will help to prevent breakage. Slide the acetate beneath the other antenna transfer. Pipe another bead of icing on top of the butterfly’s head (next to the first but not contacting the first or the flooded cookie), and use a paint brush to slide the end of the antenna from the acetate onto the wet icing. Gently pull away the acetate so that the other end of the antennae rests on the flooded cookie above the first antenna (iii).
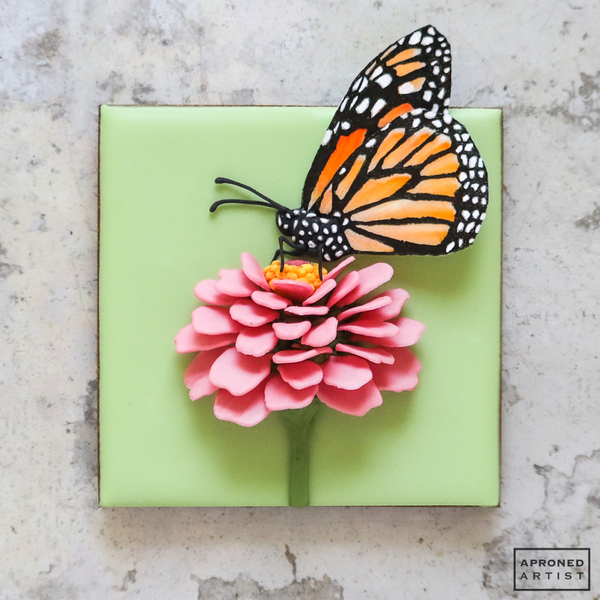
c. Slide a small piece of acetate beneath a leg transfer that has the knee on the left. Pipe a dab of black icing beneath the body, and use a dry paint brush to slide the end of the leg from the acetate onto the wet icing so that the toe of the leg sits beneath the yellow center of the zinnia transfer (i). Slide the acetate beneath the other leg transfer with the knee on the left. Pipe a dab of icing beneath the body, and use a dry paint brush to slide the end of the leg from the acetate onto the wet icing so that the toe of the leg sits on top of the zinnia’s yellow center (ii). Finally, slide the acetate beneath the leg transfer with the knee on the right. Pipe a dab of icing to the right of the other two legs, and use a dry paint brush to slide the end of the leg from the acetate onto the wet icing so that the toe sits to the right of the second leg on top of the zinnia’s yellow center (iii).
That completes the butterfly cookie.
Together, the two make a delightfully vibrant pair!


Samantha Yacovetta began cookie decorating in 2013. While working at a local bakery, Samantha became captivated by cookie art when a customer requested princess-themed cookies. Attracted initially to the precision of cookie decorating, Samantha soon found that the limitless design opportunities turned it into her artistic passion. Samantha began regularly stocking the bakery case with decorated cookies and for several years sold cookies through her own company, Aproned Artist, a cottage food operation. Having retired from the business life, Samantha now enjoys making cookies just for fun from her home in San Jose, California, USA. To learn more about Samantha, please check out her Cookie Connection portfolio, her Facebook page, and her past Every Little Detail tutorials here.
Photo and cookie credits: Samantha Yacovetta
Note: Every Little Detail with Aproned Artist is a monthly Cookie Connection blog feature written by Samantha Yacovetta focused on the special little details that make big statements in cookie design. This article expresses the views of the author, and not necessarily those of this site, its owners, its administrators, or its employees. To read all of Samantha's past Every Little Detail tutorials, click here. And to see all of Cookie Connection's tutorials, click here.



















Comments (16)