 When it comes to creating cookie designs, I find Father’s Day to be one of the most difficult holidays. Every year I look for inspiration, but I seem to find only a handful of ideas, none of which apply to the man I’m trying to celebrate. My husband isn’t passionate about cars; he doesn’t drink or smoke cigars; we don’t even own a barbecue; and I long ago cured him of any interest in sports. That pretty much exhausts the usual themes. This is the point where I usually just give up and make him some brownies. But this time, I decided to repurpose an idea from last year. Mom got her special breakfast. Doesn’t dad deserve one too?
- Silicone mold with small (1 1/4-in/3.2-cm) circular cavities
- Royal icing (I used AmeriColor gel paste to color the icing)*:
- Black (Super Black): flooding consistency and thick flooding consistency
- Forest green (4 parts Forest Green/1 part Leaf Green): medium consistency and flooding consistency
- White: flooding consistency and stiff consistency
- Yellow (2 parts Lemon Yellow/1 part Orange): thick flooding consistency
- Cream (Ivory): thick flooding consistency
- Light brown (5 parts Gold/1 part Chocolate Brown/1 part Regal Purple): stiff consistency, flooding consistency, and medium consistency
- Orange (3 parts Orange/2 parts Lemon Yellow/2 parts Ivory): stiff consistency
- Medium brown (5 parts Gold/2 parts Chocolate Brown/1 part Regal Purple): flooding consistency
- Dark brown (5 parts Gold/5 parts Chocolate Brown/2 parts Super Black/1 part Regal Purple): flooding consistency
- Tips:
- Small paint brush
- Parchment paper
- Scribe tool (or equivalent)
- Gel colorings for painting: Wilton No-taste Red, Brown, Burgundy, Copper, Ivory, and Violet; AmeriColor Bright White
- Alcohol or water for diluting gel coloring
- 1 teaspoon powdered gelatin
- 1/4 teaspoon glycerin
- Small trowel or fine-tipped knife
- Flexible silicone straw
- Coconut oil (or equivalent)
- Isomalt
- Silicone baking mat
- Corn syrup
- Plastic wrap
- 1 (3 1/2-in/8.9-cm) square cookie
*Notes on consistencies: For flooding consistency, I aim for about 15 seconds, meaning the "tracks" left by the icing when dropped into the icing bowl disappear in about 15 seconds. Aim for 25 seconds for thick flooding consistency. For medium consistency, the icing should behave like egg whites beaten to a soft peak (pretty stiff but with a little droop).
Step 1: Pipe cast iron pan royal icing transfer(s)
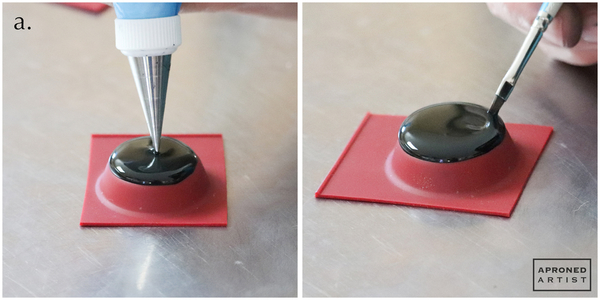
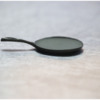
a. Place the circular silicone mold upside down on your work surface. Using flooding-consistency black royal icing and a PME #2 tip (or equivalent), cover only the flat, top surface of the circular mold. To create a lip for the pan, dip a small paint brush into the icing near the edge, and move it in a small circular motion around the entire perimeter to gently nudge the icing a few millimeters over the edge of the mold (just as you might use a scribe tool to coax the icing towards the edge of a cookie). Continue pushing the icing in this manner until the lip is even all around the circle. Repeat so that you have at least two pan transfers. Allow the transfers to dry completely.
b. Once the transfers are dry, carefully remove them by peeling the silicone away from the icing. Flip over the transfers (so the concave side is facing up), and choose the pan you prefer. Flip over the less attractive pan (so the flat side is now facing up), and cover it with a small square of parchment paper.
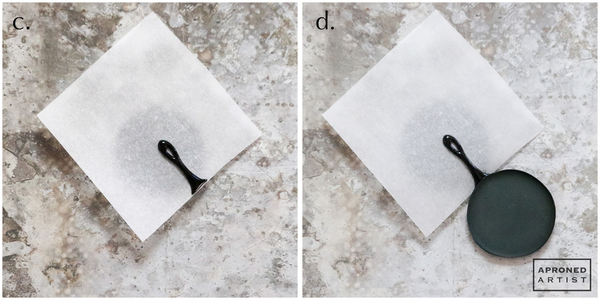
c. Using thick flooding-consistency black royal icing and a PME #1 tip (or equivalent), pipe a pan handle on the edge of the parchment square with a loop on one end and a wider base on the other end where it will attach to the pan.
d. While the icing is still wet, slide the base of the good pan transfer next to the wide end of the handle so it sits slightly on top of the handle.
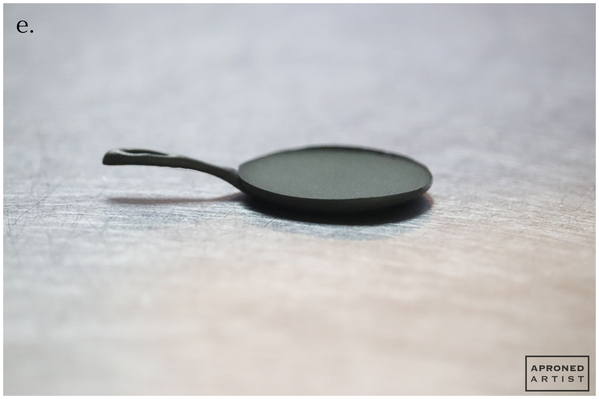
e. Allow the pan transfer to dry completely before gently peeling the parchment paper square away from the transfer.
Step 2: Pipe hot pad royal icing transfer
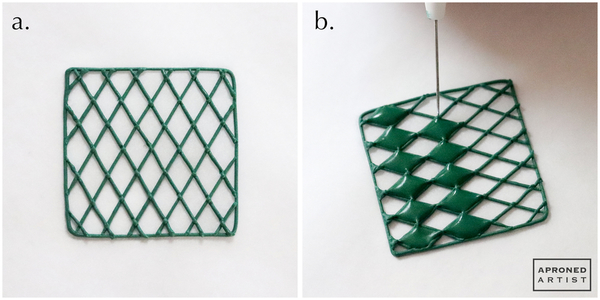
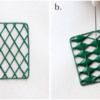
a. Using medium-consistency forest green royal icing and a PME #1 tip (or equivalent), pipe a square with rounded corners onto a piece of parchment paper. The square should be slightly larger than the round base of the cast iron pan transfer piped in Step 1. With the same icing and tip, pipe a diamond grid within the square.
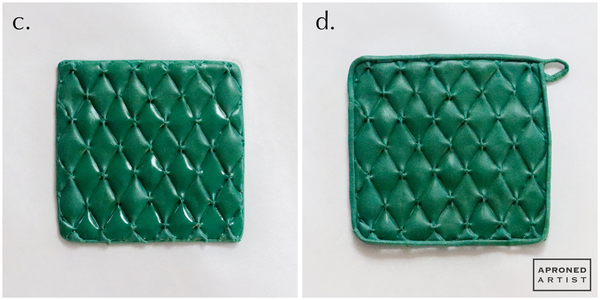
b. Using a PME #1 tip (or equivalent), fill every other diamond of the grid with flooding-consistency forest green royal icing. For a more quilted look, use a scribe tool to drag out the icing at the pointed ends of the diamonds to meet on top of the intersecting lines.
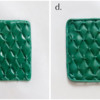
c. Fill the remaining diamonds with the same icing, dragging the points to meet at the intersections.
d. Using medium-consistency forest green royal icing and a PME #25 tip (or equivalent), pipe a loop at one corner of the hot pad and a border around the perimeter.
Step 3: Create egg royal icing transfer
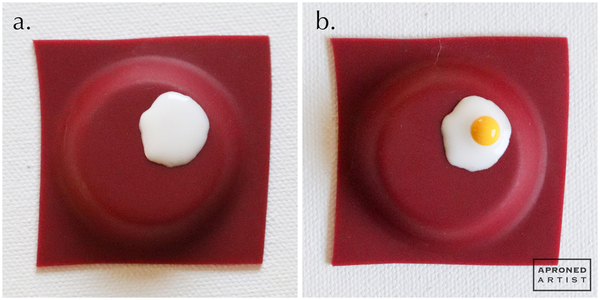
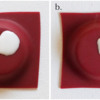
a. Place the same circular silicone mold used to make the pan in Step 1 upside down on your work surface. Using flooding-consistency white royal icing and a PME #2 tip (or equivalent), pipe an irregular oval (for the egg white) on one edge of the circular mold such that its edge follows the edge of the circle. (You can pipe the egg directly in the icing pan, but I prefer to make everything as transfers so I can arrange the components later.) Allow the icing to set for two minutes.
b. Pipe a small mounding circle (for the yolk) within the egg white. Use thick flooding-consistency yellow royal icing and a PME #2 tip (or equivalent). The white icing should be dry enough that the yellow icing mounds on top of it, but wet enough that it doesn’t create a defined seam between the egg white and yolk. Allow the icing to dry completely before gently peeling the mold away from the transfer.
Step 4: Create bacon royal icing transfers
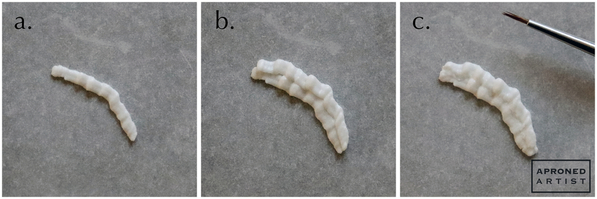
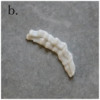
a. Tape a piece of parchment paper to your work surface so that it doesn’t curl. Using stiff-consistency white royal icing and a PME #25 tip (or equivalent), pipe a curved or straight line about 3/4 inch (2 centimeters) in length with pleats like an irregular ruffle.
b. Pipe a second line in the same fashion directly adjacent to the first line.
c. Using a small, damp paint brush, gently smooth the seam between the two lines.
d. Repeat to create as many pieces of bacon as you desire. Allow the transfers to dry completely.
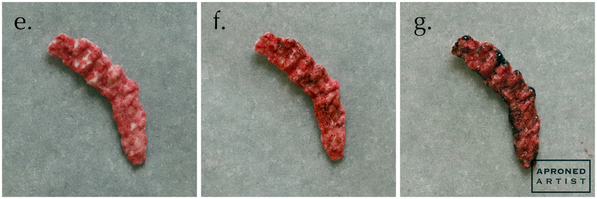
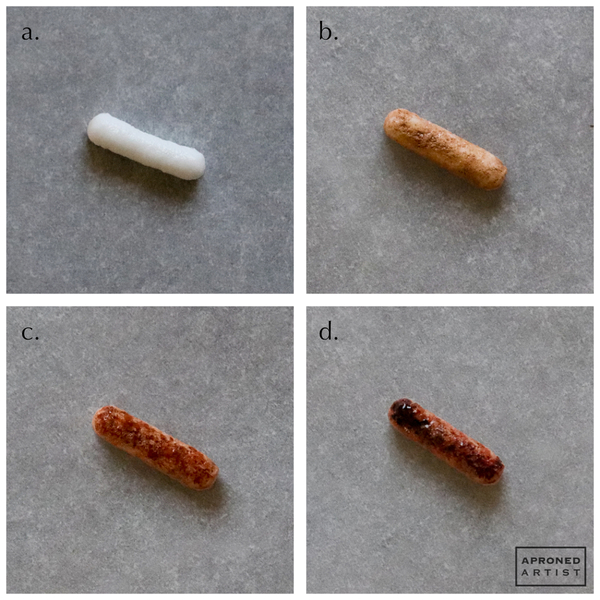
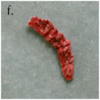
e. To paint the bacon transfer, mix equal amounts of No-taste Red, Brown, and Burgundy gel pastes with a drop of alcohol or water. Gently dab the paint onto the transfer with a small paint brush.
f. Mix equal amounts of Burgundy and Brown gel pastes with a drop of alcohol or water. Dab this darker color onto just a few areas of the bacon where it might have made more contact with the pan.
g. Finally, use undiluted Brown gel paste to darken some of the edges of the bacon. Allow the paint to dry completely.
Step 5: Create sausage royal icing transfers
a. Tape a piece of parchment paper to your work surface so that it doesn’t curl. Using stiff-consistency white royal icing and a Wilton #3 tip (or equivalent), pipe a straight or slightly curved line measuring about 3/8 inch (1 centimeter) in length. Smooth and round the ends with a damp paint brush. Pipe as many sausage links as you desire, and allow them to dry completely.
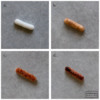
b. To paint the sausage links, mix Brown gel paste with a drop of Bright White. (The white coloring is very watery, so I didn't use additional alcohol or water to dilute this paint.) Use a small paint brush to cover the entire sausage (including the underside) with this color.
c. Mix equal amounts of Copper, Ivory, and Brown gel pastes with a drop of Bright White. (Again, I didn't dilute this paint with any additional alcohol or water.) Dab this paint only on the top side of the sausage links.
d. Mix equal amounts of No-taste Red, Violet, and Copper gel pastes. Dab this coloring, undiluted, on the top of the ends of the sausage and also down the center to give the impression of a sear. (Note: Wilton gel pastes tend to be pretty jammy in consistency, which is perfect for the shiny highlights desired here.) Allow the paint to dry completely.
Step 6: Create plate and toast royal icing transfers
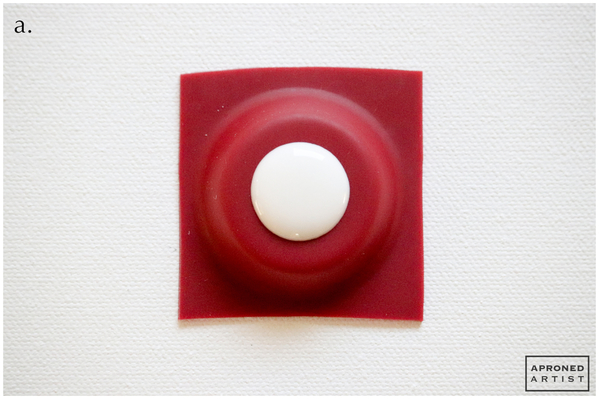
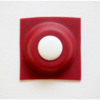
a. Place the same circular silicone mold used to make the pan in Step 1 upside down on your work surface. Using flooding-consistency white royal icing and a PME #2 tip (or equivalent), pipe a circle about 3/4 inch (two centimeters) in diameter on the back of the mold. Allow the icing to dry completely before gently peeling the mold away from the plate transfer.
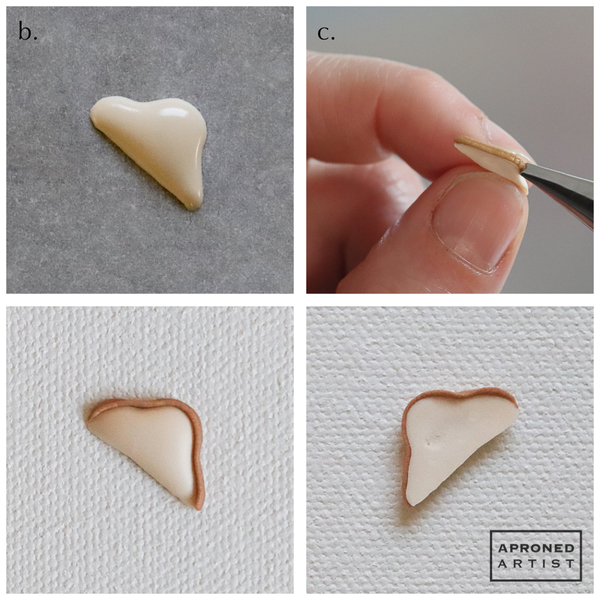
b. Again, tape a piece of parchment paper to your work surface so that it doesn’t curl. Using thick flooding-consistency cream royal icing and a PME #2 tip (or equivalent), pipe a triangular shape like a piece of bread that’s been cut in half. Repeat to create as many pieces of toast as you desire. Allow the transfers to dry completely before gently peeling the parchment away from the transfers.
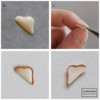
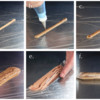
c. Hold a toast transfer between your thumb and forefinger with the flat side down so that the short edges are exposed. Align the left edge of a PME #25 tip (or equivalent) with the flat edge of the toast transfer. This tip positioning will result in most of the crust hanging over the rounded side of the toast, which will become the side that goes face down on the plate. Pipe the crust of the bread along the short edges with stiff-consistency light brown royal icing. Repeat for all of the toast transfers made in Step 6b.
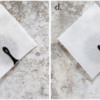
In the lower left photo below, the transfer is upside down (rounded side up). The lower right photo below shows the transfer right side (flat side) up, as we'll want to place it on the final cookie.
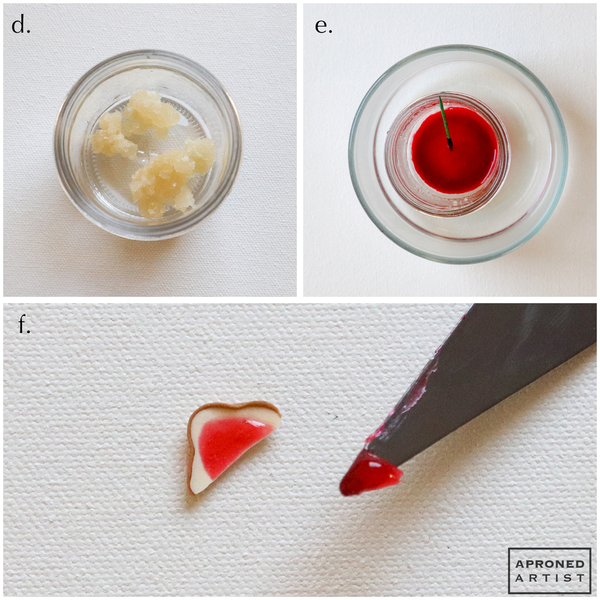
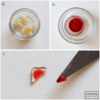
d. In a small microwave-safe dish, mix one teaspoon of powdered gelatin with one teaspoon of water. Microwave in five-second intervals until the gelatin has dissolved.
e. Stir in 1/4 teaspoon of glycerin and a touch of No-taste Red gel paste coloring. Microwave again to rewarm the mixture. Place the dish within a larger dish of hot water to maintain the temperature.
f. With a small trowel or a fine-tipped knife, spread a drop of the warm gelatin mixture on the flat side of the toast to mimic jelly. (You may have to experiment to get the temperature just right. If too hot, the gelatin will melt the icing. If too cool, the gelatin won’t adhere.) Allow the gelatin to set completely. Again, repeat for all of the toast transfers made in Step 6b.
Step 7: Create orange juice cup isomalt/royal icing transfer
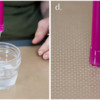
a. Lightly grease one end of the silicone straw with coconut oil (or equivalent), wiping off any excess with a paper towel.
b. Prepare isomalt according to the instructions on the package. Pour the hot, liquid isomalt into a small dish to a depth of 1/2 inch (1.3 centimeters).
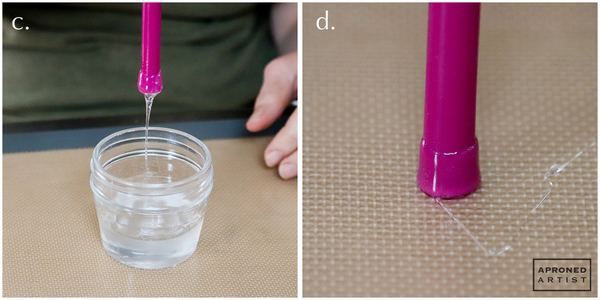
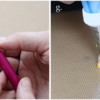
c. Cover the top hole of the straw with your finger to create a vacuum before dipping the greased end of the silicone straw straight down into the isomalt. Raise up the straw, allowing the excess isomalt to drip off the end. (If your straw has too much oil on it, the isomalt may just slide right off. If this happens, remove any bits of hardened isomalt, and try dipping it again without re-greasing the straw.)
d. Immediately press the bottom of the straw onto the silicone baking mat, and hold it in place for about 20 seconds to flatten the bottom of what will become the juice cup. Break off any stray strands of hardened isomalt.
e. Repeat Steps 7c and 7d , dipping the straw a second time to create a thicker coat of isomalt. Allow the isomalt to cool for a minute.
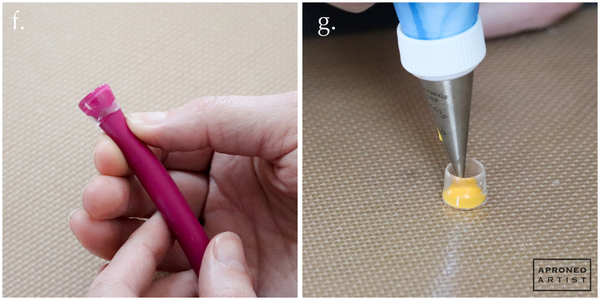
f. Gently squeeze the bottom of the straw directly above the isomalt to detach the cup, and carefully slide it off the end of the straw.
g. Mix about 1/8 cup (2 tablespoons) of stiff-consistency orange royal icing with one tablespoon of corn syrup. Place the mixture in an icing bag with a PME #0 tip (or equivalent), and carefully fill the isomalt cup about three-quarters full. (You will have leftover icing mixture, but it's helpful to have enough to properly fill and handle the pastry bag.)
Step 8: Prepare icing bundle to create woodgrain
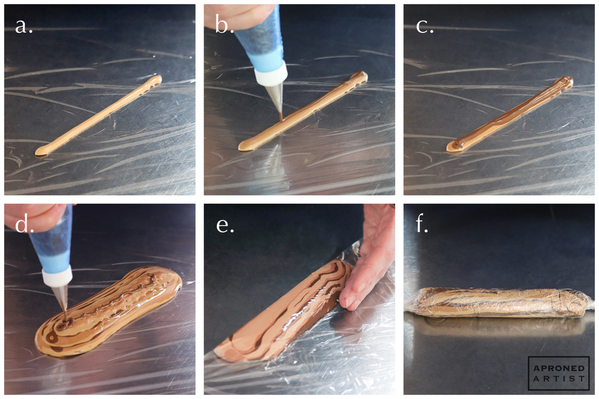
a. Place a large rectangle of plastic wrap on your work surface. Add some flooding-consistency light brown royal icing to the center of the plastic wrap in a diagonal line. (Note: I place the icing on the diagonal, as this placement will leave less bunched plastic wrap on the ends of our icing bundle. Excess wrap can be obtrusive and a bit more difficult to insert into the pastry bag in Step 8f.)
b. Add some flooding-consistency medium brown royal icing on top of the line of light brown icing.
c. Add some flooding-consistency dark brown royal icing on top of the medium brown icing.
d. Continue layering the icing in this manner. You can vary the quantities of each color if you want a lighter or darker wood grain. I added more of the light brown icing to some of the layers.
e. Fold over the plastic wrap on a diagonal, bringing the lower right corner to meet the upper left corner. Apply gentle pressure around the icing to seal it within the plastic wrap.
f. Holding the ends of the plastic wrap, repeatedly fold the icing over until the plastic wrap is completely wrapped around the icing. It should look like a wrapped Tootsie Roll. Insert the wrapped icing into an icing bag with one of the gathered ends sticking out of the opening. Trim the plastic wrap, and fit the opening with a Wilton #2 tip (or equivalent).
Step 9: Flood cookie with woodgrain icing
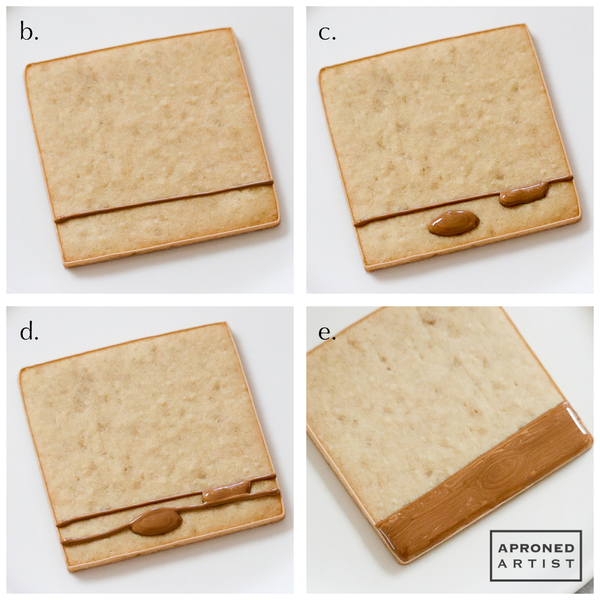
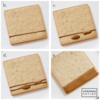
a. Using a PME #1 tip (or equivalent), outline a medium (3 1/2-in/8.9-cm) square cookie with medium-consistency light brown icing.
b. Using the woodgrain icing prepared in Step 8 and a Wilton #2 tip (or equivalent), draw a line about one-fifth of the way across the cookie to create the first plank.
c. With the same icing and tip, pipe a few ovular shapes (for the wood knots) within the first plank.
d. Draw horizontal lines from the left of the first plank to the right of that plank, bowing them around the knots.
e. Continue drawing horizontal lines to fill the remainder of the empty space within the first plank.
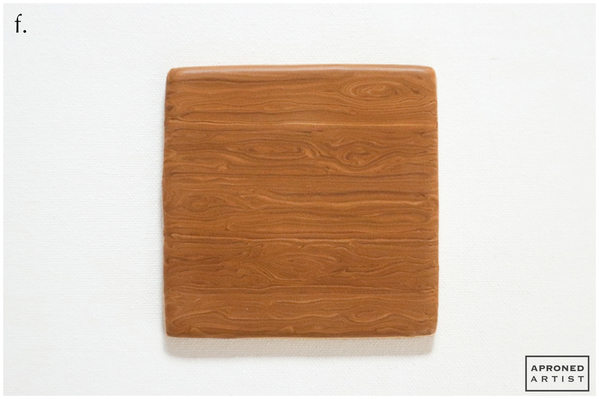
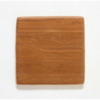
f. Immediately pipe the next plank. Continue creating planks in this way, varying the quantity and placement of the knots. Try to work quickly so that the entire surface dries smoothly without seams.
Step 10: Assemble dad's breakfast!
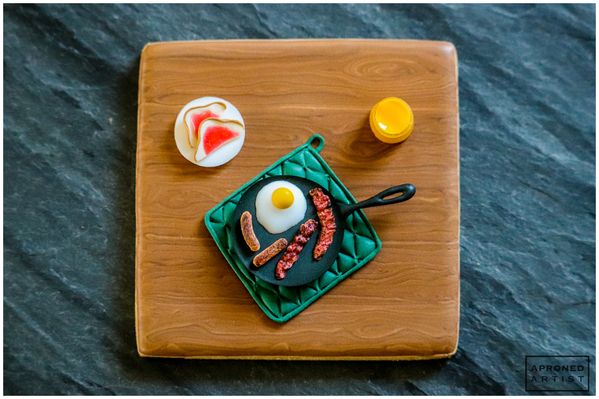
a. Arrange all of the components to create your ideal composition, and then attach everything with small dabs of icing.
A breakfast fit for a king (or at least the very best dad I know)!


Samantha Yacovetta began cookie decorating in 2013. While working at a local bakery, Samantha became captivated by cookie art when a customer requested princess-themed cookies. Attracted initially to the precision of cookie decorating, Samantha soon found that the limitless design opportunities turned it into her artistic passion. Samantha began regularly stocking the bakery case with decorated cookies and for several years sold cookies through her own company, Aproned Artist, a cottage food operation. Having retired from the business life, Samantha now enjoys making cookies just for fun from her home in San Jose, California, USA. To learn more about Samantha, please check out her Cookie Connection portfolio, her Facebook page, and her past Every Little Detail tutorials here.
Photo and cookie credits: Samantha Yacovetta
Note: Every Little Detail with Aproned Artist is a monthly Cookie Connection blog feature written by Samantha Yacovetta focused on the special little details that make big statements in cookie design. This article expresses the views of the author, and not necessarily those of this site, its owners, its administrators, or its employees. To read all of Samantha's past Every Little Detail tutorials, click here. And to see all of Cookie Connection's tutorials, click here.



Comments (30)