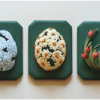
 These delicate floral Easter cookies were inspired by a lovely (free!) vintage graphic from an old greeting card. The image depicts a cluster of daisies forming an egg shape, framed by a spray of dark greenery. I was immediately captivated by the dimension of the clustered daisies and the image’s old-fashioned charm. I’ve tried to recreate a little bit of that magic with this royal icing daisy egg.
Supplies:
- Royal icing (I used AmeriColor gel paste coloring to tint the icing.):
- Stiff-consistency white
- Flooding-consistency dark green (3 parts Silver Spruce/1 part Cypress/1 part Midnight)
- Tips: PME #3, 00 (or equivalents)
- 2 3/8-in (6-cm) silicone egg mold
- Toothpick
- Tiny liner paint brush
- Flat paint brush
- AmeriColor (or equivalent) gel paste colorings for painting: Slate, Bright White, Dijon, Egg Yellow
- 2 3/4 x 3 3/4-in (7 x 9.5-cm) rectangle cookie with trimmed corners
- Food-safe marker
- Heavy cardstock (or two pieces of lightweight cardstock glued together to create a rigid sheet)
Step 1: Pipe daisies
a. Using stiff-consistency white royal icing and a PME #3 tip (or equivalent), pipe a line of icing about 1/4 inch (0.6 centimeters) in length along the side of the silicone egg mold. Gently press the side of a toothpick into the icing to flatten it slightly and create a subtle impression along its length. If necessary, use a damp tiny liner paint brush to further refine the shape to create a long, creased daisy petal.
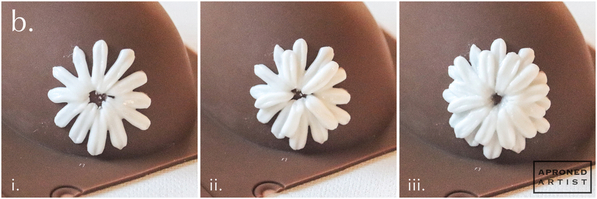
b. Continue to pipe and shape the first layer of petals. Think of the flower as a clock face, and pipe a petal at each hour (i). For the second layer, add a petal in between every other petal so that these petals slightly overlap the first layer (ii). Finally, add more petals to fill the remaining gaps (iii).
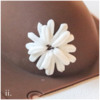
c. Pipe a bead in the center of the flower, and flatten it slightly with a flat paint brush. Switch to a PME #00 tip (or equivalent), and pipe tiny dots around the circumference of the bead.
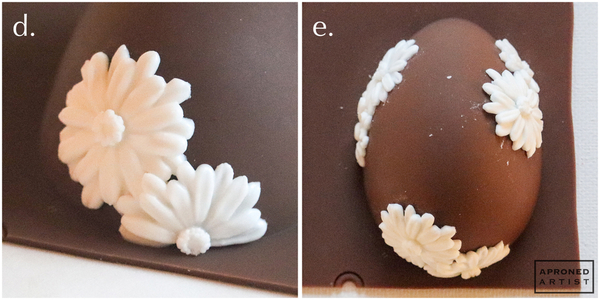
d. Repeat Steps 1a through 1c to create another daisy (or partial daisy if it reaches the bottom edge of the mold) that slightly overlaps the first daisy.
e. Repeat Steps 1a through 1d on another section of the egg mold (completely separate from the first two flowers) to create another cluster of flowers. Repeat the steps again, provided that you can keep the flower groupings separate. Allow the icing to dry completely.
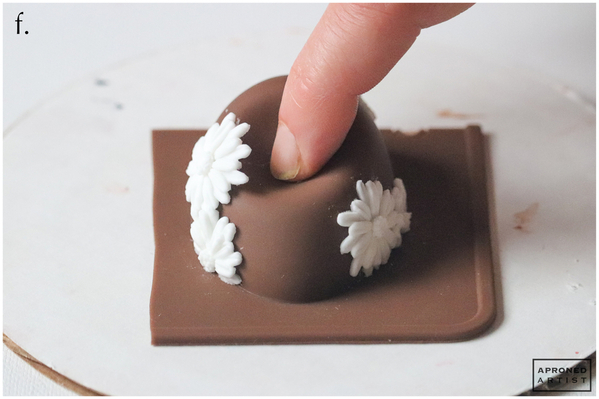
f. Once the icing is dry, gently depress the mold to release the icing flowers from the silicone. Place the dried daisies back on the mold in their original position. Removing the icing at this point serves an important purpose: it will make the removal of the final daisy egg easier because it creates an air gap between the icing and the silicone. Depressing the mold in one spot causes it to expand in another; a slight air gap gives the silicone some room to expand without cracking the icing.
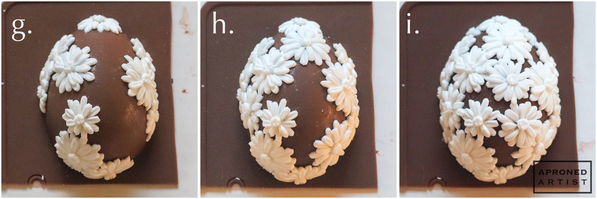
g. Pipe another daisy or two slightly overlapping the dried daisies of each cluster. Again, keep the clusters of daisies separate. Allow the icing to dry completely.
h. Depress the mold to remove each cluster, and place them back in their original positions. (As you continue to add flowers, the gaps where you can depress the mold will get smaller, and the likelihood of the icing cracking as the mold expands will increase. Use the handle end of a paint brush or scribe tool to access the small empty areas between the icing, and don't depress the mold as much.) Add another daisy to each cluster. At this point, you may need to begin to connect some of the clusters. Allow the icing to dry completely.
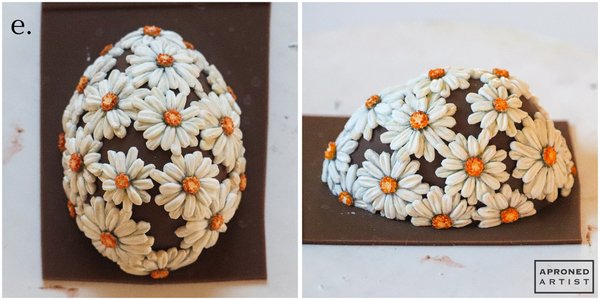
i. Depress the mold around the newest daisies to release the icing, however, don't try to completely remove the transfer from the mold once the clusters are connected. Repeat the process (add more daisies, let dry, depress the mold to release the icing) until the entire mold is covered and all of the daisies are connected. Leave some negative space between the daisies so you can still see inside the egg. Once again, let the most recently added icing dry completely. Depress the mold to ensure the final icing egg is completely detached, however, leave the transfer on the mold so that it is supported while you paint in the next step.
If the icing cracks at any point in the process, you should be able to repair it quite easily by gluing the pieces together with fresh icing and shaping the repair with a damp paint brush so that it blends in with the dried icing. Try to keep any repairs solely on the icing (not touching the silicone) to avoid having to re-release daisies from the mold.
Step 2: Paint daisies
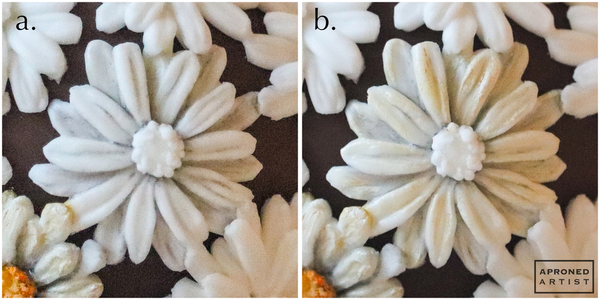
a. Dilute a drop of Slate gel paste coloring (or equivalent) to create a watery gray paint. Using a tiny liner paint brush, add gray shadows to the crevices around the center of the flower, in between the petals, in the indentations along the length of each petal, and directly beneath petals that overlap. If the shadows are too dark or harsh, blend the paint slightly with additional water.
b. Mix a drop of Bright White gel paste coloring with a touch of Dijon gel paste coloring (or equivalents) to create a thick, pale yellow paint. Using long strokes, paint along the length of each petal on either side of the shadowed indentations.
c. Mix a drop of Bright White gel paste coloring with a drop of Egg Yellow gel paste coloring (or equivalents). Dab the paint onto the center of the flower.
d. Mix a drop of Egg Yellow coloring with a drop of Dijon plus a touch of Bright White gel paste coloring (or equivalents). Dab the paint onto the dots around the center of the flower.
e. Repeat Steps 2a through 2d for each daisy.
Step 3: Remove egg transfer and assemble final cookie
a. Flood the baked cookie with dark green royal icing. Allow the icing to dry completely.
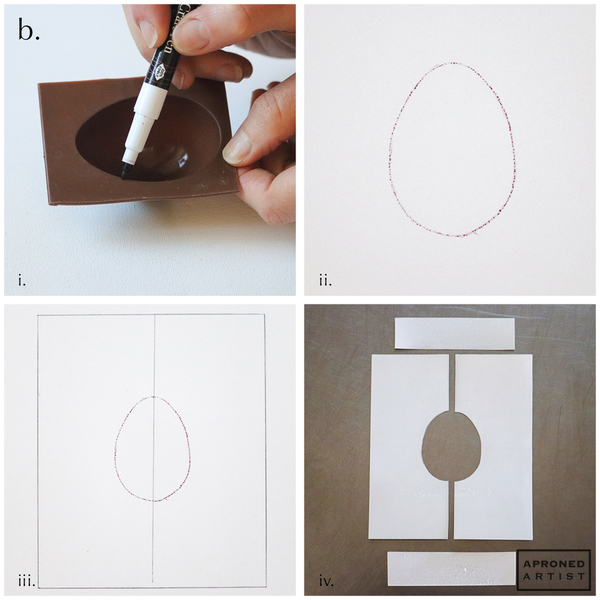
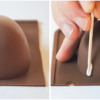
b. We will need to create a simple tool to lift the egg transfer off the mold without applying pressure that could cause it to crack. Flip a clean egg mold over so that the concave side is facing up, and use a food-safe marker to trace the perimeter of the cavity (i). Immediately press the marked side of the mold against a piece of heavy cardstock. The marker should transfer to the cardstock, giving you a template for the tool (ii). Draw a rectangle around the egg shape that is roughly 5 1/2 by 6 1/2 inches (14 by 16.5 centimeters). Draw a vertical line bisecting the rectangle and egg (iii). Cut along the vertical line, and then cut out the two halves of the egg shape. Additionally, cut two strips measuring roughly 4 by 1 inches (10.2 by 2.5 centimeters) (iv).
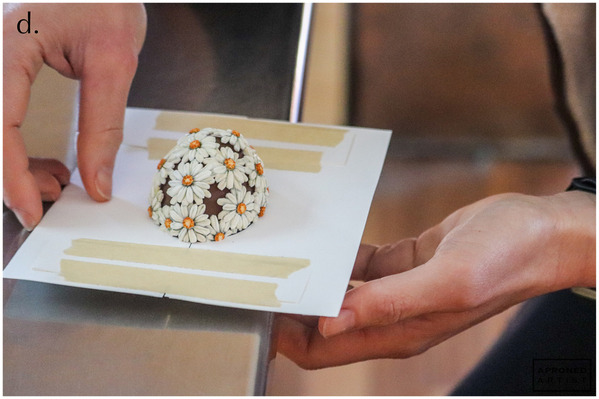
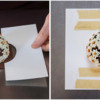
c. Make sure the daisy transfer is completely detached from the silicone mold. Insert one side of the tool beneath the transfer so that the half-egg shape cut out of the cardstock is flush with the mold. Insert the other side of the tool in the same way. Tape the strips of cardstock horizontally across the seams at the top and bottom of the tool. The taped strips will keep the two halves together and add some structural integrity.
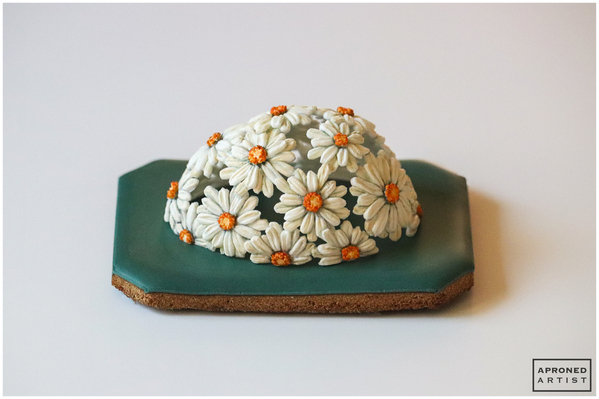
d. Slowly and gently slide the mold and tool over the edge of your countertop. Grip the cardstock with one hand, and position your other hand underneath the tool to guide the silicone mold straight down as the mold slides off the countertop. The mold should drop into your hand, leaving the egg sitting on top of the tool.
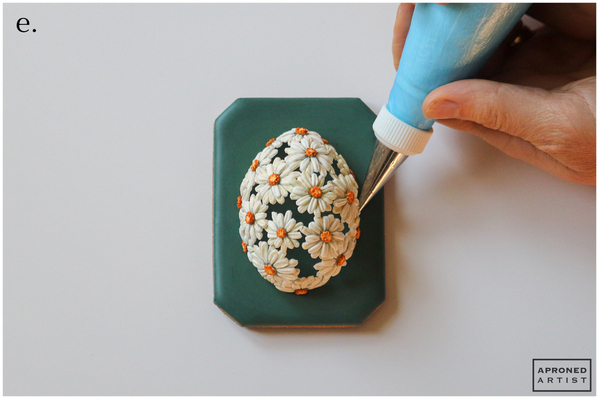
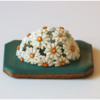
e. Carefully slide the egg transfer from the cardstock tool onto your flooded cookie. To attach the transfer to the cookie, insert your piping tip behind a daisy at the base of the transfer. Pipe a small amount of stiff-consistency white icing adjacent to the back of the daisy. Repeat at various daisies around the base of the transfer.
Finished!
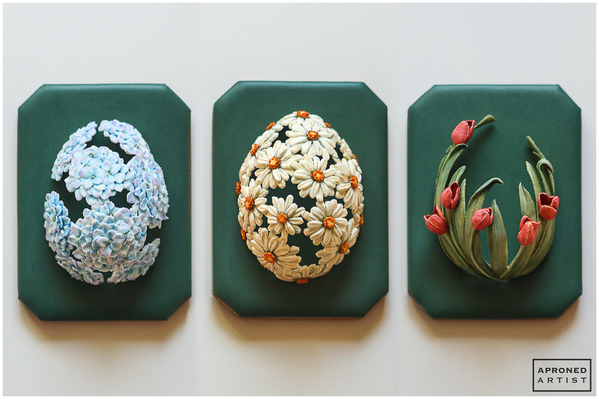
You can use the same technique to create all sorts of floral icing eggs.
Source: Karen Watson, The Graphics Fairy, LLC, 25 Easter Egg Clip Art


Samantha Yacovetta began cookie decorating in 2013. While working at a local bakery, Samantha became captivated by cookie art when a customer requested princess-themed cookies. Attracted initially to the precision of cookie decorating, Samantha soon found that the limitless design opportunities turned it into her artistic passion. Samantha began regularly stocking the bakery case with decorated cookies and for several years sold cookies through her own company, Aproned Artist, a cottage food operation. Having retired from the business life, Samantha now enjoys making cookies just for fun from her home in San Jose, California, USA. To learn more about Samantha, please check out her Cookie Connection portfolio, her Facebook page, and her past Every Little Detail tutorials here.
Photo and cookie credits: Samantha Yacovetta
Note: Every Little Detail with Aproned Artist is a monthly Cookie Connection blog feature written by Samantha Yacovetta focused on the special little details that make big statements in cookie design. This article expresses the views of the author, and not necessarily those of this site, its owners, its administrators, or its employees. To read all of Samantha's past Every Little Detail tutorials, click here. And to see all of Cookie Connection's tutorials, click here.









Comments (30)