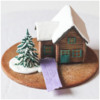
 We’re in the thick of the holiday frenzy now. Logically, I should be choosing more streamlined cookie projects this time of year to free up time for holiday meal planning, decorating, and gift buying. Yet, I seem to gravitate toward the most labor-intensive projects instead (remember these mosaic cookies?). Perhaps it’s my subconscious way of procrastinating. Or maybe I’m just looking for a meditative retreat from all of the noise of a busy season. Whatever the reason, this miniature winter cabin cookie had me covered.
Supplies:
- Royal icing (I used AmeriColor gel paste coloring to tint the icing.):
- Stiff-consistency white
- Stiff-consistency dark green (4 parts Forest Green/1 part Taupe)
- Stiff-consistency green (add uncolored icing to a portion of the dark green icing)
- Stiff-consistency brown (5 parts Warm Brown/1 part Electric Green/touch of Super Black)
- Stiff-consistency gray (1 part Super Black/1 part Taupe)
- Tips:
- Parchment paper
- Rice paper
- Kitchen shears
- 2 silicone mats
- AmeriColor (or equivalent) gel paste coloring for painting: Gold, Bright White, Ivory, Warm Brown, Forest Green
- Paint brushes: small flat, tiny liner
- Winter Cabin Templates (See “Files” in “Attachments” at the end of this post.)
- Cardstock (optional, but recommended)
- Small piece of wafer paper
- Edible glue
- Scribe tool (or equivalent)
- Small trowel (or equivalent)
- Cookie dough that bakes with minimal spread, rolled to thickness of 1/8 in (0.3 cm)
- Sharp paring knife
- Food-safe file
- Reusable paper towel (or equivalent, such as small piece of heavyweight fabric)
- 3 1/2-in (8.9-cm) baked round cookie
Step 1: Pipe tree transfer
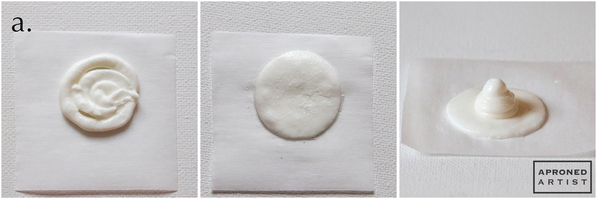
a. Using stiff-consistency white royal icing and a Wilton #8 tip (or equivalent), pipe a flat circle of icing about 1/2 inch (1.3 centimeters) in diameter onto a small square of parchment paper. Allow the icing to set for a minute before flattening it with another square of parchment paper until it measures roughly 3/4 inch (1.9 centimeters) in diameter. Remove the top parchment paper, and pipe a mound of icing about 1/2 inch (1.3 centimeters) high in the center of the flattened circle of icing.
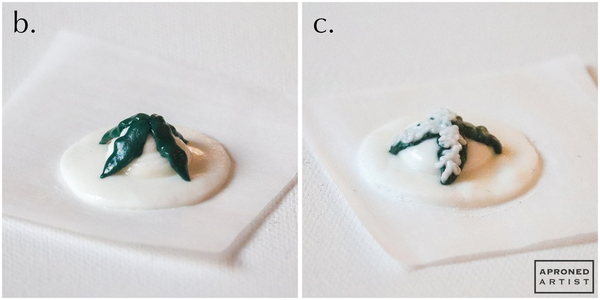
b. Use stiff-consistency dark green royal icing and a Wilton #349 tip (or equivalent) to pipe the branches. Begin piping a long narrow branch starting at the top of the mound of white icing (piped in Step 1a) and ending at the base of the mound. Pipe three or four additional branches around the mound of white icing.
c. Add a squiggle of snow along each branch with stiff-consistency white royal icing and a PME #0 tip (or equivalent). The mound of white icing may compress slightly during this process.
d. Add another tier of four or more branches on top of the first, offsetting them so that they sit in between the branches of the previous tier. (If the branches slump excessively or merge together, thicken your icing with some additional powdered sugar. You could also allow each tier to set for a minute before piping the next, although I did not find this necessary.) Add snow to each branch as you did in Step 1c. Continue piping tiers of branches with snow, making the branches slightly shorter and more horizontal as you progress up the tree.
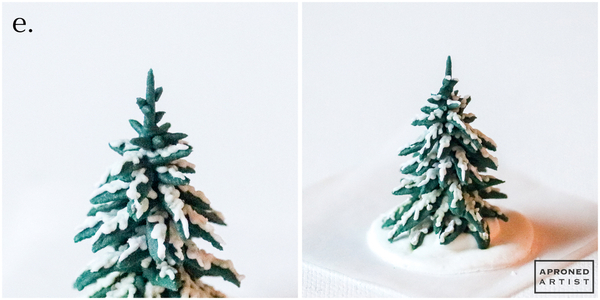
e. When you’re nearly at the top of your tree, use a PME #1.5 tip (or equivalent) and the green icing to pipe a vertical line for the tree’s top. For reference, my finished tree was about 1 1/2 inches (3.8 centimeters) tall. Pipe a few small branches on the lower portion of the treetop with the same tip. Allow the treetop to set for a minute before adding a tiny bit of snow along the upper branches. Set the tree transfer aside to dry completely.
Step 2: Create cabin window and door transfers
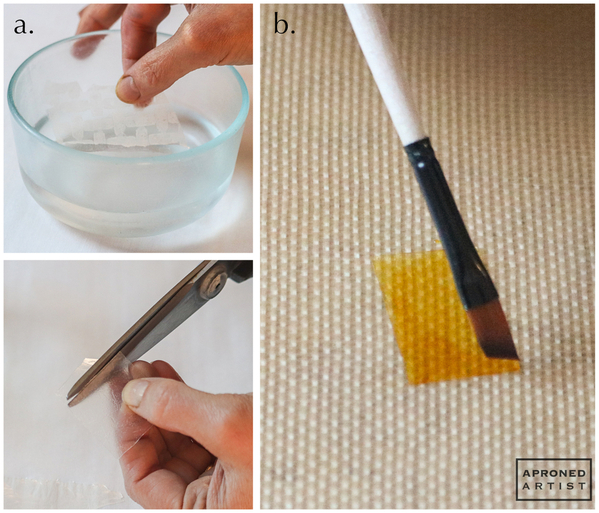
a. Dip a piece of rice paper into a small bowl of cold water, and soak the rice paper for ten seconds. The soaked rice paper should be just pliable enough that you can cut it without it cracking. Using kitchen shears, cut the rice paper into twelve 1/2-inch (1.3-centimeter) squares, and place the squares flat on a silicone mat. (You should end up with a few extra squares unless you add additional windows to your house. I used eight windows on my house, as you'll see in Step 2c.)
b. Paint the rice paper with diluted Gold gel paste coloring and a flat paint brush. Place another silicone mat over the top so that the painted rice paper pieces are sandwiched between the two mats. To ensure that the rice paper dries flat, place a heavy object on top to weigh down the mats. Allow the rice paper to dry completely. (It took three days for my rice paper to dry.)
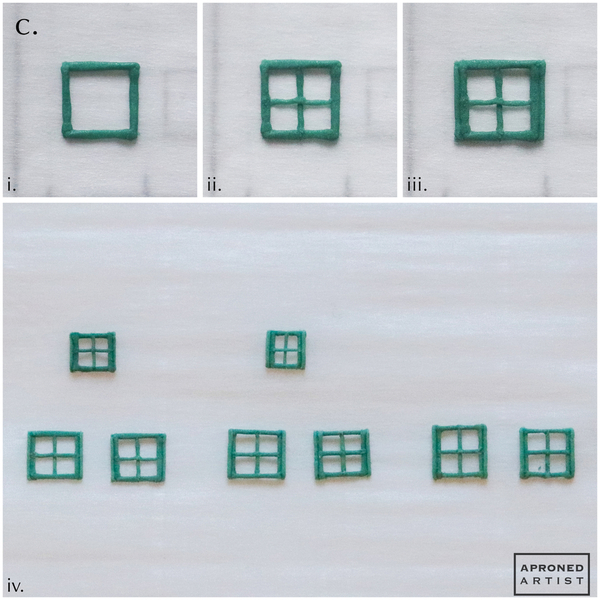
c. Print out the Winter Cabin Templates (located in “Files” in “Attachments” at the end of this post) onto a sheet of cardstock. (I find stiff paper ideal when using templates, however, any paper will work.) Tape a small square of parchment paper over a window template. Using stiff-consistency green royal icing and a PME #0 tip (or equivalent), pipe the outer window frame (i). Flatten the icing slightly with a damp flat paint brush. Use the same icing and a PME #00 tip (or equivalent) to pipe a cross for the inner frames (ii). Again, flatten the icing slightly with a damp flat paint brush. Finally, pipe vertical lines adjacent to the outside of the left and right sides of the outer frame (iii). Repeat this process for as many windows as you want to add to your cabin (iv). I used six large windows and two small windows as shown in photo iv below.
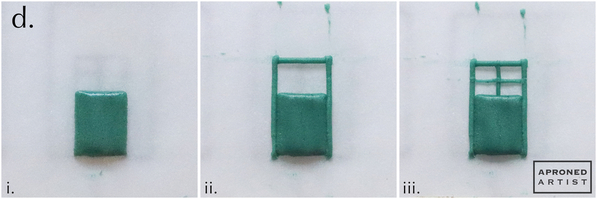
d. Tape a small square of parchment paper over the door template. Using stiff-consistency green royal icing and a Wilton #44 tip (or equivalent), pipe a vertical band of icing over the bottom portion of the door (i). (The easiest way I’ve found to get an even rectangle is to pipe a longer band than you need and trim the ends to size with a scribe tool or paint brush, dragging away the excess icing.) Using the same icing and a PME #0 tip (or equivalent), pipe a border around the left, right, and top of the door (ii). Finally, switch to a PME #00 tip (or equivalent) to pipe the inner cross of the window frame (iii).
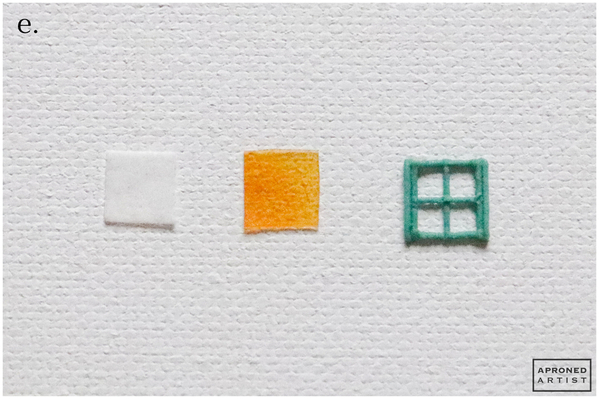
e. Cut out the window and door templates from the cardstock. Hold a cutout over a small piece of wafer paper and cut around the template. Repeat with all of the cutouts to create wafer paper shapes for the windows and the door. Use the same cutouts to cut the shapes out of the dried rice paper squares created in Steps 2a and 2b. (If you’re concerned about the rice paper cracking when you’re cutting it, brush it with some water to soften it slightly.) For each window and the door, you should have a piece of wafer paper with a corresponding piece of rice paper and a royal icing frame.
f. Make sure your wafer paper shapes are oriented with the smooth side up. Use a tiny liner paint brush to apply a small dab of edible glue to each corner of the wafer paper (i). (You may need to use a scribe tool to hold the wafer paper in place while you apply the glue.) Place the rice paper on top of the wafer paper, lining up the edges (ii). Apply a small dab of edible glue to each corner of the rice paper (iii). Use a small trowel or offset spatula to place the royal icing frame on top of the rice paper so that all of the edges are flush (iv). Repeat this process with the remaining windows and door. (Using the white wafer paper behind the colored rice paper helps to maintain the rice paper’s translucency; otherwise, it will look very dark once assembled.)
Step 3: Cut, bake, and assemble cabin cookies
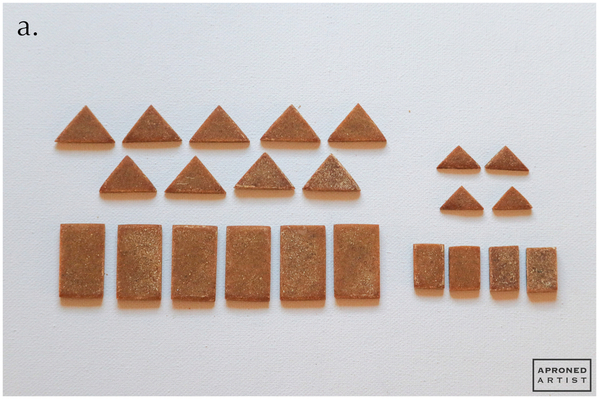
a. Cut out the cookie templates from the printed Winter Cabin Templates. Use the cutouts and a sharp paring knife to hand-cut six large rectangles, nine large triangles, four small rectangles, and four small triangles from the cookie dough. If your dough rises more or less than mine, you may need to bake one fewer or one more of each cookie in order to ensure that your house comes out the same size as mine. (It's important to match the sizes of my various house parts if you want my roof templates to fit; I'll share these dimensions in subsequent steps.)
Bake the cookies until firm. Using a food-safe file and clean templates to guide you, file down any edges of cookies that spread during baking.
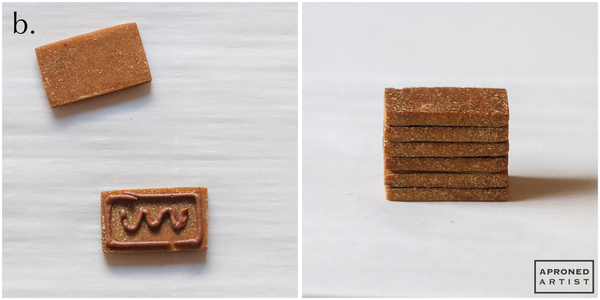
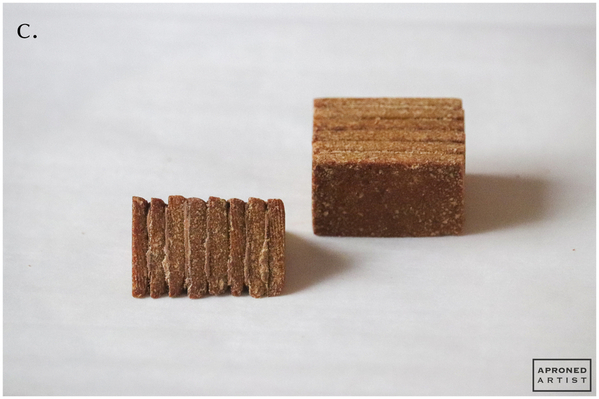
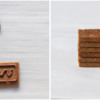
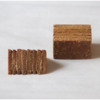
b. Using stiff-consistency brown royal icing and a PME #2 tip (or equivalent), pipe some icing on the face of one of the large rectangle cookies. Place another rectangle on top, lining up the edges. Continue stacking the rectangle cookies with icing in between to create a three-dimensional rectangular box measuring approximately 3/4 inch (1.9 centimeters) tall, 1 1/4 inches (3.2 centimeters) long, and 1 inch (2.5 centimeters) wide.
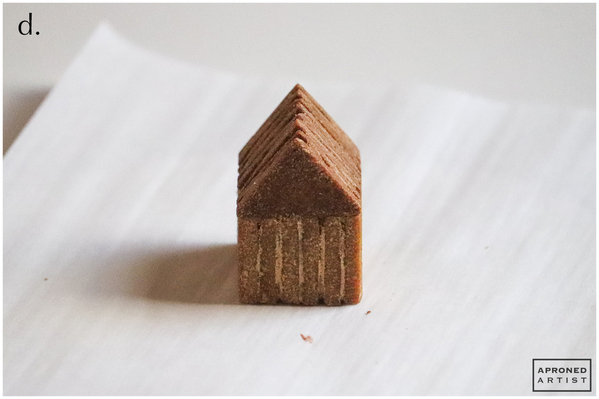
c. Attach the large triangle cookies together in a similar fashion, sandwiching them with a layer of icing in between each cookie. When all of the large triangle cookies are attached together, they will create a triangular prism that should match the length of the rectangular box created in Step 3b. Specifically, this large prism should measure 5/8 inch (1.6 centimeters) tall, 1 1/4 inches (3.2 centimeters) long, and 1 inch (2.5 centimeters) wide.
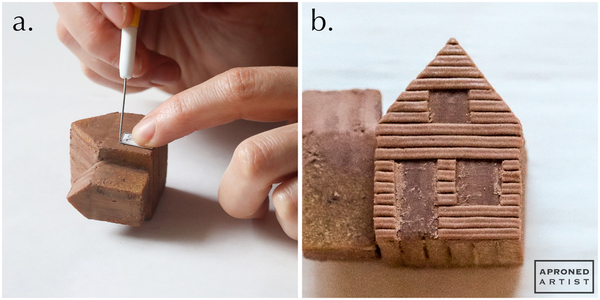
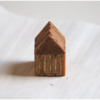
d. Orient the rectangular box created in Step 3b so that the individual cookies are standing vertically on their longest edge (as depicted in the photo above). Pipe some icing on the top of the box and place the triangular prism on top to create the main structure of the cabin. Allow the icing to dry completely. File the edges to create even, flat sides.
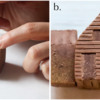
e. Pipe icing along the gaps between the cookies. Brush the icing with a damp flat paint brush to fill and smooth the gaps. It doesn’t need to look perfect; just make sure everything is really cemented together.
f. Repeat Steps 3b through 3e with the smaller rectangle and triangle cookies to create the smaller wing of the cabin. The smaller rectangle should end up 3/4 inch (1.9 centimeters) tall, 1/2 inch (1.3 centimeters) long, and 3/4 inch (1.9 centimeters) wide. And the small triangular prism should measure 3/8 inch (1 centimeter) tall, 1/2 inch (1.3 centimeters) long, and 3/4 inch (1.9 centimeters) wide. Again, it's important to match my house part sizes in order for my roof templates to fit, but you can always scale my roof templates up or down if your parts end up slightly different sizes than mine.
Turn the smaller structure so that the peak of its roof is perpendicular to the roof of the large structure. Center the small structure along the long side of the large structure, and attach the two with more brown icing. Fill the gap between the walls of the two structures with icing, and smooth with the paint brush to create a single cohesive unit. There’s no need to fill the gap between the roofs.
As a frame of reference, the dimensions of my assembled house structure pictured below are 1 1/4 inches (3.2 centimeters) long by 1 1/2 inches (3.8 centimeters) wide. It will get a touch bigger after the roof panels are made and attached.
Step 4: Pipe siding, and attach windows and door
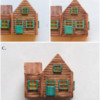
a. Hold the cardstock door cutout (cut in Step 2e) over the area on the house where you want to add a door, and use a scribe tool to scratch around the border of the template. Repeat to mark all of the windows on a single facing.
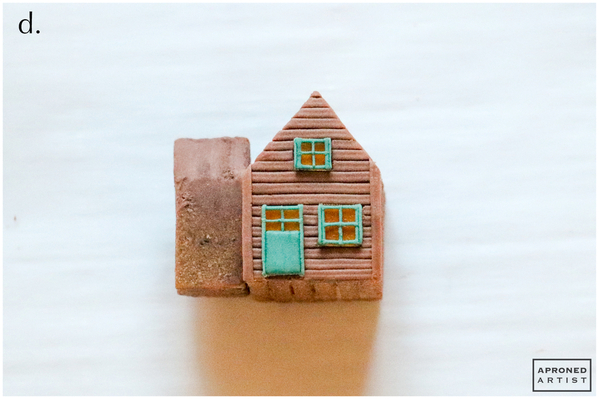
b. Using stiff-consistency brown royal icing and a PME #25 tip (or equivalent), pipe a horizontal plank along the bottom edge of the house facing. Use a scribe tool (or equivalent) to cut away the icing that sits within the marked window/door area. Repeat, piping an adjacent horizontal plank above the first and cutting away the icing within the marked area. When finished, you should have empty spaces where the windows and door will attach with rows of horizontal planks surrounding them. (Check to make sure that your window and door transfers fit. If necessary, cut away more icing with the scribe tool.)
c. Move to the next face of the cabin, and repeat steps 4a and 4b. Continue until you’ve piped horizontal siding on all of the faces. (You may notice in the photos that I did not pipe the horizontal planks on all of the sides before proceeding; I decorated one face in its entirety - piping horizontal planks, then attaching the window transfers, then piping the vertical planks - before moving on. As a result, it became increasingly difficult to pipe on the other sides without breaking the transfers I had already attached. I recommend that you follow the steps in the revised order I’ve outlined here.)
d. Pipe a vertical plank along the left and right edges of the front face. Repeat on all of the faces. Finally, attach the window and door transfers to all of the faces with a small dab of icing.
Step 5: Paint cabin
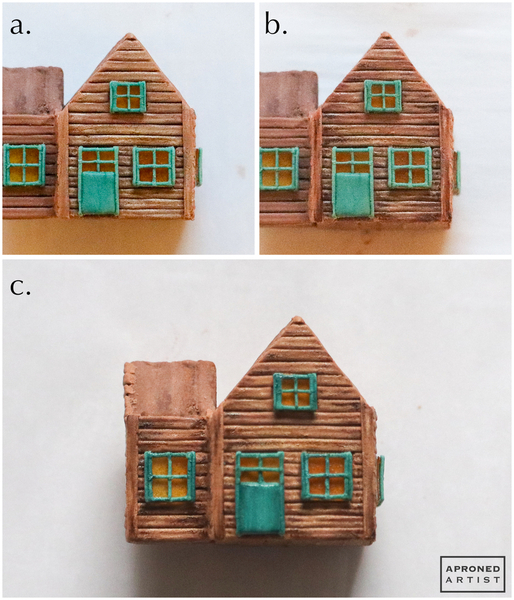
a. Lightly mix equal amounts of Bright White and Ivory gel paste coloring. Dip a small paint brush into the mixture, and brush off almost all of the paint so that it is quite dry. Paint each horizontal plank with light, horizontal brush strokes so that some of the brown icing color still peeks through the paint. Repeat with the vertical planks, using vertical brush strokes.
b. Dip a clean paint brush into Warm Brown gel paste coloring, and brush off almost all of the paint. Using short, horizontal brush strokes, add the dark brown paint to the ends of each horizontal plank. Similarly, add dark brown to the ends of the vertical planks (where they meet the floor and the roof) using vertical brush strokes. We’re aiming for an old and weathered look.
c. Finally, brush a tiny bit of Forest Green gel paste coloring onto the window and door frames, blending the paint slightly with a damp paint brush.
Step 6: Pipe and attach roof transfers
For the roof panels I used a texturing technique that I learned from Maya of Painted Ladies Pastry. Maya often uses fabrics and other materials to texture stiff-consistency royal icing. If you want to learn more, she has many short videos on Instagram demonstrating the technique.
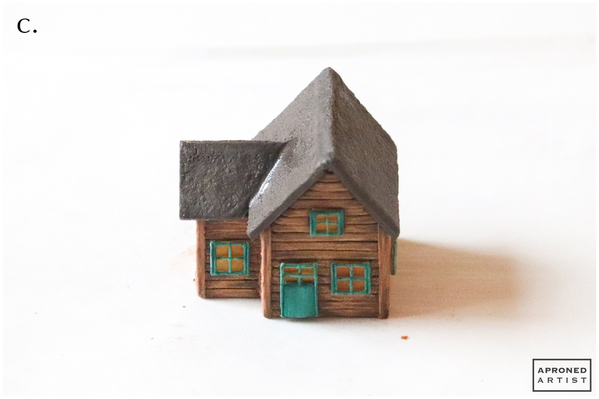
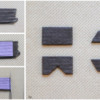
a. Cut out the roof templates from the Winter Cabin Templates. Use the cutouts to cut the same shapes out of a reusable paper towel (or equivalent). On a silicone mat, use stiff-consistency gray royal icing and a Wilton #44 tip (or equivalent) to pipe adjacent bands of icing so that the icing covers an area slightly larger than one of the templates. Pipe another layer of bands directly over the first (i). Allow the icing to set for a minute until it is soft but no longer sticky. Place the fuzzy side of the cut paper towel (or equivalent) over the icing (ii). Glide a small trowel (or equivalent) over the paper towel to evenly press it into the icing. Use the side of the trowel to trim off the excess icing around the paper towel template (iii). Use a scribe tool (or equivalent) to lift up a corner of the paper towel so that you can peel it away from the icing. The end result should have a consistent thickness, sharp edges, and a subtle nubby texture. (The texture isn’t critical at this stage as the roof will be covered with snow. This technique is employed here to get an even, square-edged shape, but we’ll be using the same technique to texture the snow in later steps.) Repeat the same process with the remaining roof cutouts (iv). Allow the transfers to dry completely. (In my experience, icing takes longer to dry on a silicone mat. I let my roof transfers dry overnight, peeled them away from the silicone, and then let them dry for a few more hours.)
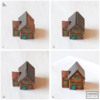
b. Using stiff-consistency gray royal icing and a PME #2 tip (or equivalent), pipe some icing on the left side of the large roof of the cabin. Press the roof panel with the triangle cutout into the icing (i). Add icing to the right side of the roof and press the rectangular panel into the icing, lining it up with the edges of the roof panel on the left side (ii). Pipe a line of gray icing along the top where the two roof panels meet (iii), and blend it into the panels with a damp paint brush (iv).
c. Repeat Step 6b to attach the small roof panels to the roof of the small wing of the cabin. Pipe some icing to fill the seams where the small and large roofs meet, and blend the icing with a damp paint brush.
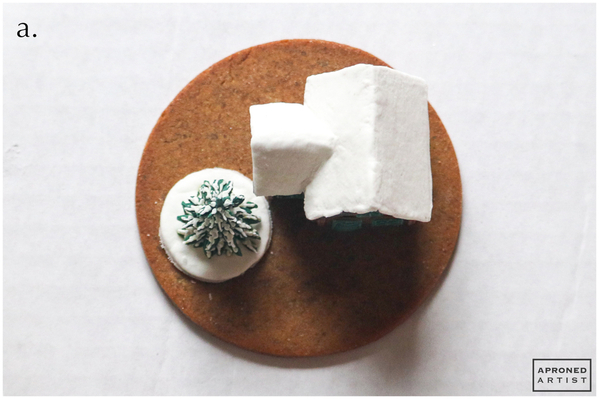
d. Using stiff-consistency white royal icing and a Wilton #44 tip (or equivalent), pipe a single layer of adjacent bands across one roof panel (i). Trim the ends of the icing with a small trowel (or equivalent) so that they don’t extend beyond the edges of the roof. Let the icing set for a minute, and then press a clean square of reusable paper towel (or equivalent) into the icing using a small trowel (or equivalent) just as you did with the roof panel in Step 6a (ii). Remove the paper towel, and use a damp paint brush to clean up any rough edges (iii). Repeat to add a layer of snow to the remaining roof panels. Use a damp paint brush to gently blend the seams where the roof panels meet, but try to retain as much of the nubby texture as possible. Allow the icing to dry completely.
Step 7: Attach cabin and tree to base cookie, and add snow
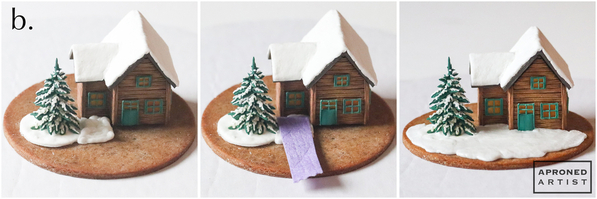
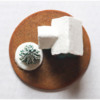
a. Before applying icing, place the tree and cabin onto the baked round cookie so that you can space things appropriately. Remove them, and in their place, pipe dabs of stiff-consistency white royal icing with a PME #2 tip (or equivalent). Gently press the tree and cabin into the icing.
b. For the snow, fill a small section of the base cookie with white icing. Allow it to set for a minute before pressing a small piece of reusable paper towel (or equivalent) against the icing to texture it. Continue piping small adjacent sections and texturing them until the entire base cookie is covered. Use a damp paint brush to smooth the new snow over the white base of the tree to camouflage the seam.
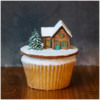
Finished! And if you’re really feeling ambitious, this teeny, tiny wintry cabin makes a perfect (jumbo) cupcake topper.


Samantha Yacovetta began cookie decorating in 2013. While working at a local bakery, Samantha became captivated by cookie art when a customer requested princess-themed cookies. Attracted initially to the precision of cookie decorating, Samantha soon found that the limitless design opportunities turned it into her artistic passion. Samantha began regularly stocking the bakery case with decorated cookies and for several years sold cookies through her own company, Aproned Artist, a cottage food operation. Having retired from the business life, Samantha now enjoys making cookies just for fun from her home in San Jose, California, USA. To learn more about Samantha, please check out her Cookie Connection portfolio, her Facebook page, and her past Every Little Detail tutorials here.
Photo and cookie credits: Samantha Yacovetta
Note: Every Little Detail with Aproned Artist is a monthly Cookie Connection blog feature written by Samantha Yacovetta focused on the special little details that make big statements in cookie design. This article expresses the views of the author, and not necessarily those of this site, its owners, its administrators, or its employees. To read all of Samantha's past Every Little Detail tutorials, click here. And to see all of Cookie Connection's tutorials, click here.



















Comments (24)