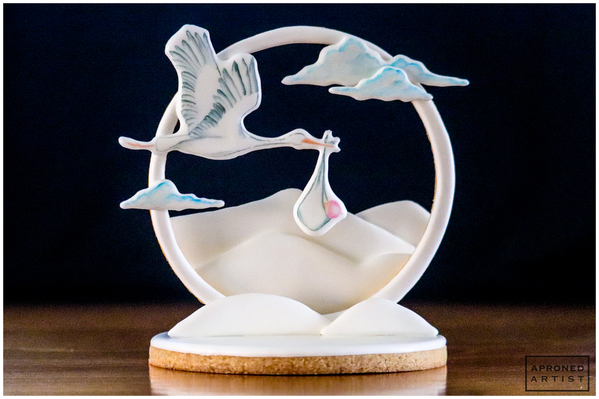
 My neighbors are expecting their first baby any day now. A little girl! With comically unfortunate timing, our street is being closed for two weeks for repaving. We’ve all had to park our cars a few blocks away on another street or risk being trapped in our driveways for the duration. I have visions of my poor, pregnant neighbor in labor, waddling down the street and Lamaze-breathing all the way to her car. She could really use a special delivery, so I made her this cookie with a stork flying her newborn over the snowy hills. If only it worked that way in real life.
Supplies:
- Cookie dough rolled to 3/8-in (1-cm) thickness
- Large (5-in/12.7-cm) circle cookie cutter
- Medium-large (4 1/2-in/11.4-cm) circle cookie cutter
- Small, sharp knife
- Royal icing:
- Flooding-consistency white
- Stiff-consistency white
- Special Delivery Transfer Templates (See “Files” in “Attachments” at the end of this post.)
- Parchment paper
- Tape
- Tips: PME #2 and Wilton #12 (or equivalents)
- Paint palette
- Alcohol or water to dilute gel paste colorings
- Wilton gel paste colorings for painting: Royal Blue, Copper, Ivory, Pink, and Black
- Paint brushes: medium flat angled, small flat angled, tiny liner
- Stork Design Template (See “Files” in “Attachments” at the end of this post.)
- Paper towel
- Several small leftover cookies (or other small objects) to use as supports during drying (I used 14 thin mini cookies.)
Step 1: Prepare cookie frame and base
a. Place the cookie dough on top of your prepared baking sheet. Cutting the dough directly on the baking sheet will prevent any misshaping that might occur if you were to move it after cutting. Use the 5-inch (12.7-centimeter) cookie cutter to cut a large circle into the dough. Remove the dough outside the circle (it won’t be needed for this project).
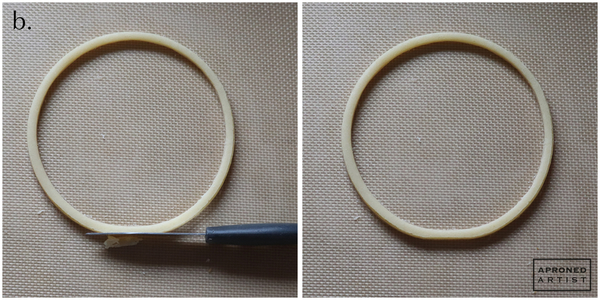
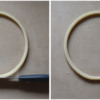
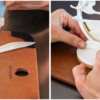
b. Cut a smaller circle out of the center of the large circle of dough using the 4.5-inch (11.4-centimeter) cookie cutter. Carefully remove the inner circle of dough, and place it on the prepared baking sheet (it will become the base cookie). You should be left with a thin circular frame. With a small sharp knife, trim the bottom of the frame so that it has a flat edge. The flat edge will make it easier to attach the frame cookie to the base cookie later on.
c. Bake the frame and base cookies according to your recipe. Allow them to cool before flooding them both with flooding-consistency white royal icing. Set the cookies aside until the icing has dried completely.
Step 2: Pipe royal icing transfers
a. Print the transfer templates (located in “Files” at the end of this post). Lay a piece of parchment paper over the templates, and attach it with tape so that it doesn’t shift while you’re piping.
b. Using flooding-consistency white royal icing and a PME #2 tip (or equivalent), pipe over the transfer templates. Set them aside to dry completely. Once dry, gently peel the parchment paper away from the icing transfers.
Step 3: Paint cloud transfers (Transfers D, E, and F)
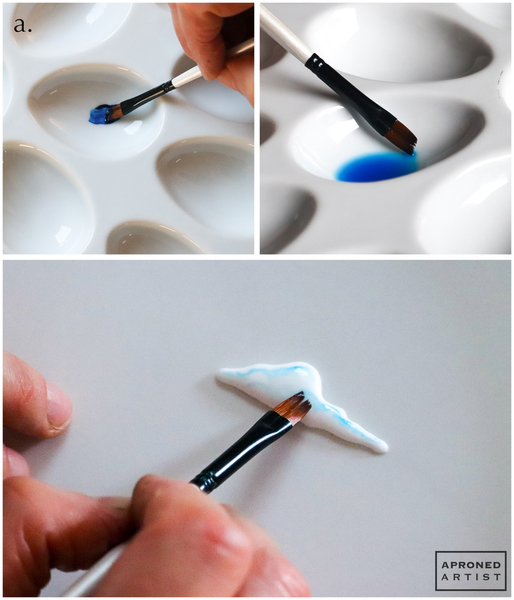
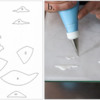
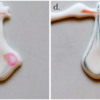
a. In your paint palette, add several drops of alcohol or water (I used six drops of alcohol) to a smudge of Royal Blue gel paste coloring. The consistency of the paint should be quite watery. Dampen a medium flat angled paint brush with alcohol or water. Then, dip just the pointed tip into the blue paint. (By "pointed tip", I mean just a few bristles at the longest end of the brush, as depicted in the top right photo below.) Positioning the pointed tip near the edge of one of the cloud transfers, paint cloud shapes along the perimeter and a few in the center of the transfer. Blend the paint on the transfer, if necessary, using a clean brush dipped in alcohol or water and half-circle brush strokes. Repeat this process with the other cloud transfers.
Step 4: Paint stork transfer
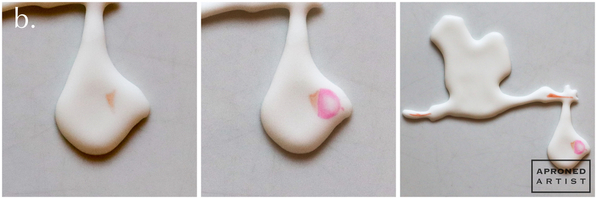
a. Prepare three separate paint colors in your palette by adding several drops of alcohol or water to each gel paste coloring, just as you prepared the blue paint in Step 3a: a pale skin color (using equal amounts of Copper and Ivory gel paste colorings), pink (with Pink gel paste), and orange (with Copper gel paste).
b. Using a small flat angled paint brush, paint the face of the baby with the pale skin color paint. Clean the brush well, and paint the baby’s hat with the pink paint. Then, paint the stork’s beak and feet with the orange paint. (If helpful, reference the Stork Design Template found in “Files” at the end of this post, or project it onto the transfer.)
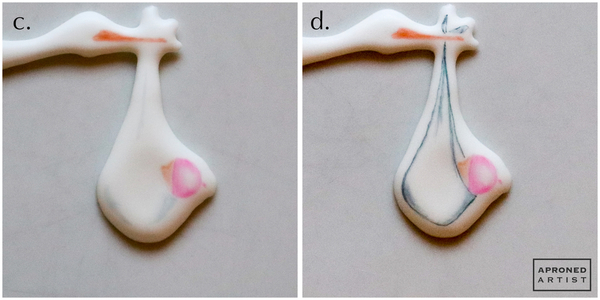
c. Add Black gel paste coloring and several drops of alcohol or water to a clean area of your palette, but do not mix them. The liquid should dissolve a small amount of the gel paste coloring, leaving you with a pool of very diluted black paint and a smear of more concentrated paint. (Note that the black gel paste coloring may turn green or blue when diluted; mine went slightly blue.) Using a (clean) small flat angled paint brush and the very diluted black paint, add a few areas of shading around the pouch that holds the baby.
d. Grab a little bit of the more concentrated black paint with a tiny liner brush, and paint the outline of the pouch.
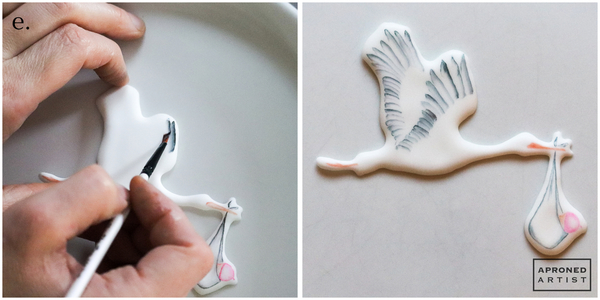
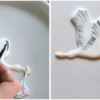
e. Switch back to the small flat angled paint brush to paint the stork’s feathers. Dampen the brush with alcohol or water and dip just the pointed tip in the more concentrated black paint. With the pointed tip of the brush directed away from you, drag the brush down toward the stork’s neck to make one feather. Continue painting the feathers on both wings in this manner.
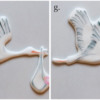
f. Clean the brush, and dip it back into the very diluted black. (You may need to add more alcohol or water if the paint becomes too concentrated as the liquid evaporates.) Add some shaded areas to the stork’s body.
g. Finally, use the tiny liner brush and the more concentrated black paint to outline the stork’s body.
Step 5: Attach background hill transfers (Transfers A, B, and C) to cookie frame
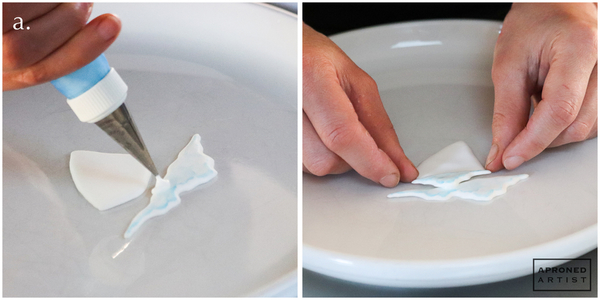
a. Carefully flip the cookie frame over on a paper towel so that the underside of the cookie is facing up. Pipe a line of stiff-consistency white royal icing along the bottom edge of the cookie with a PME #2 tip (or equivalent). Flip over Transfer A (the medium background hill, as labeled on the template), and line up the transfer’s rounded edge with the bottom edge of the cookie. Gently press down to adhere the transfer to the frame.
b. Flip over Transfer B (the large background hill), and attach it to the back of Transfer A with some more stiff-consistency white royal icing.
c. Pipe some more icing on the back left corner of Transfer B, and attach Transfer C (the small background hill). Allow the icing to dry completely before proceeding.
Step 6: Attach stork and cloud transfers to cookie frame
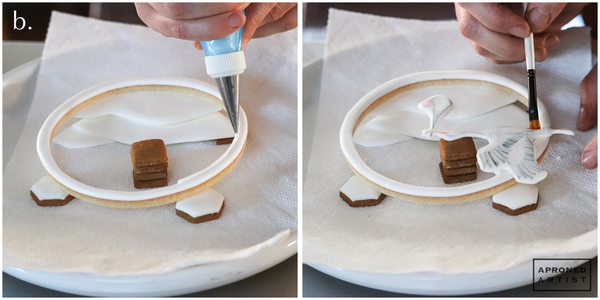
a. Using a dab of stiff-consistency white royal icing, attach Transfer D (the small cloud) to Transfer E (the large cloud), such that Transfer D overhangs the bottom edge of Transfer E. You may want to prop up the edge of Transfer D (I used an extra small hill transfer) to ensure that it is level. Set aside for 15 minutes to dry.
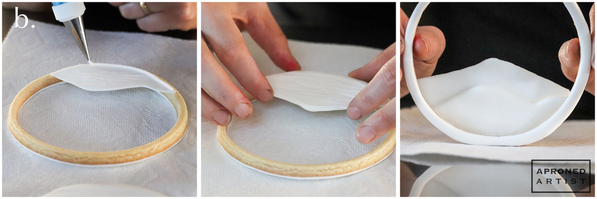
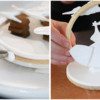
b. Prop the top of your frame cookie, right side up, on some small leftover cookies (or other small objects) so that it is level. Stack more small leftover cookies in the center of the frame until they reach the height of the frame. Apply stiff-consistency white royal icing to the upper left quadrant of the frame. Using the Stork Design Template as a guide, gently place the stork transfer on top of the icing, making sure that its head is supported by the stack of leftover cookies in the center. Remove any excess icing with a dry paint brush.
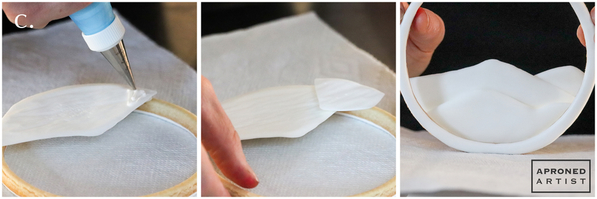
c. Stack up some more small leftover cookies within the top right side of the frame. Apply some stiff-consistency white royal icing to the top right of the cookie frame. Then, carefully attach the stacked cloud transfers from Step 6a, propping the left edge of the transfer on top of the leftover cookies so that it sits level.
d. Finally, repeat this process with the final cloud transfer (Transfer F). Stack leftover cookies to support the cloud transfer along the inside of the left frame edge. Attach the transfer to the frame with stiff-consistency royal icing, propping the right edge of the transfer with the stack of leftover cookies. Allow the icing to dry completely before proceeding.
Step 7: Mount cookie frame on base, and add front mound transfers (Transfers G and H)
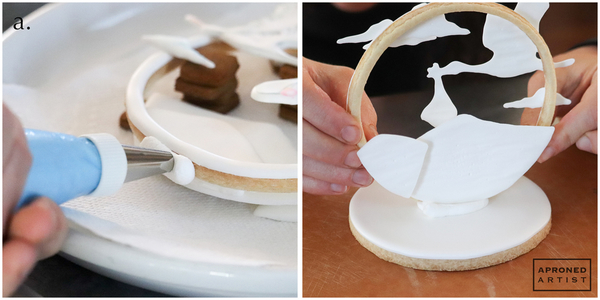
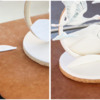
a. Using stiff-consistency white royal icing and a Wilton #12 tip (or equivalent), pipe a thick line of icing along the bottom flat edge of the frame cookie (where you trimmed the dough in Step 1). Carefully pick up the frame, turn it upright, and press the icing on the bottom into the middle of the base cookie. Remove any icing that squeezes out from underneath the cookie frame with a dry paint brush. (I did not find it necessary to prop the cookie during drying, but you can use the leftover cookies for a little extra insurance. Just be sure they don’t make contact with the wet icing.) Let the icing set for a few minutes.
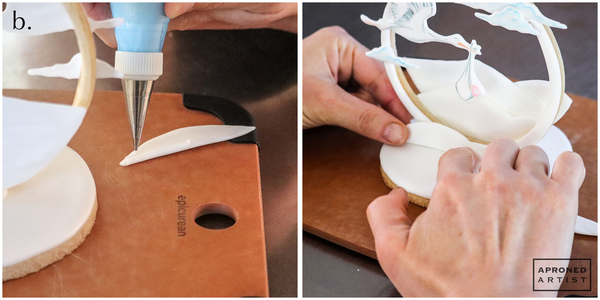
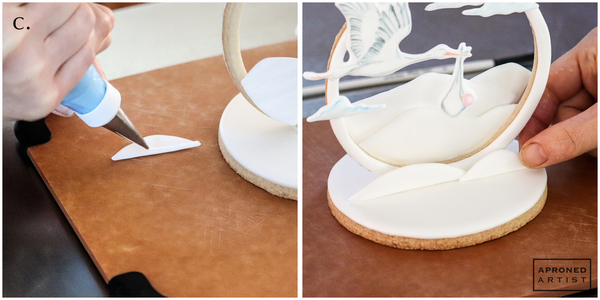
b. Apply stiff-consistency white royal icing to the lower back edge of Transfer G (the large front mound) with a PME #2 tip (or equivalent), and gently press it into place on the left front side of the cookie frame.
c. In a similar fashion, apply icing to the lower back edge of Transfer H (the small front mound), and press it into place in front of Transfer G on the right side of the base cookie.
Finished!
My youngest is in the process of applying for college (I’m months away from being an empty-nester!), so it’s particularly exciting to know a new baby is on its way to the neighborhood. Here’s wishing my neighbor a speedy, if not special, delivery.


Samantha Yacovetta began cookie decorating in 2013. While working at a local bakery, Samantha became captivated by cookie art when a customer requested princess-themed cookies. Attracted initially to the precision of cookie decorating, Samantha soon found that the limitless design opportunities turned it into her artistic passion. Samantha began regularly stocking the bakery case with decorated cookies and for several years sold cookies through her own company, Aproned Artist, a cottage food operation. Having retired from the business life, Samantha now enjoys making cookies just for fun from her home in San Jose, California, USA. To learn more about Samantha, please check out her Cookie Connection portfolio, her Facebook page, and her past Every Little Detail tutorials here.
Photo and cookie credits: Samantha Yacovetta
Note: Every Little Detail with Aproned Artist is a monthly Cookie Connection blog feature written by Samantha Yacovetta focused on the special little details that make big statements in cookie design. This article expresses the views of the author, and not necessarily those of this site, its owners, its administrators, or its employees. To read all of Samantha's past Every Little Detail tutorials, click here. And to see all of Cookie Connection's tutorials, click here.









Comments (39)