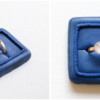
Every Little Detail with Aproned Artist: Wedding Ring


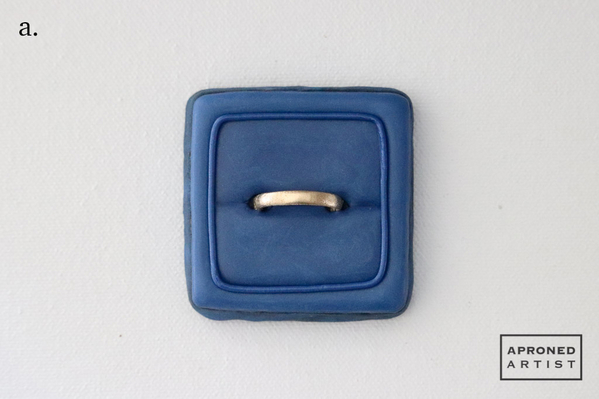
In real life, my tastes verge on plain. I’m a no makeup, jeans-and-t-shirt sort of girl. Naturally, my wedding ring is a simple gold band, and that’s exactly how I like it. Despite these tendencies, when it comes time to design wedding cookies, I love the traditional fantasy. I want elegance, flowers, luxury, and sparkle. These wedding ring cookies have all the drama and romance this plain girl can muster.

Supplies:
  • Tips:
    • Ateco #44 (or equivalent)
    • PME #1, 2, 1.5 (or equivalents)
  • Parchment paper
  • Metal or wooden spoon with round 5/8-inch (1.5-cm) diameter handle
  • Royal icing (AmeriColor gel paste was used to color the icing):
    • Thick (about 25-second) flooding-consistency taupe (2 parts Chocolate Brown/1 part Leaf Green)
    • Thick (about 25-second) flooding-consistency royal blue (6 parts Royal Blue/2 parts Regal Purple/1 part Super Black)
    • Stiff-consistency taupe
    • Stiff-consistency royal blue
  • 1 1/2-inch (3.8-cm) square cookie cutter
  • 2-inch (5-cm) square chocolate cookie rolled 1/2-inch (1.3-cm) thick
  • Paint brushes: large flat, medium round, small flat, and tiny liner
  • Gold luster dust mixed with alcohol
  • Royal blue petal dust
  • Black petal dust
  • Gem-shaped candy mold
  • Nonstick cooking spray
  • Isomalt nibs
  • Small silicone bowl
  • Scribe tool
  • Food-safe gloves
  • Food-safe tweezers
  • Silver pearl dust mixed with alcohol

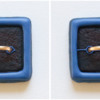
Step 1: Create band royal icing transfer

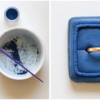
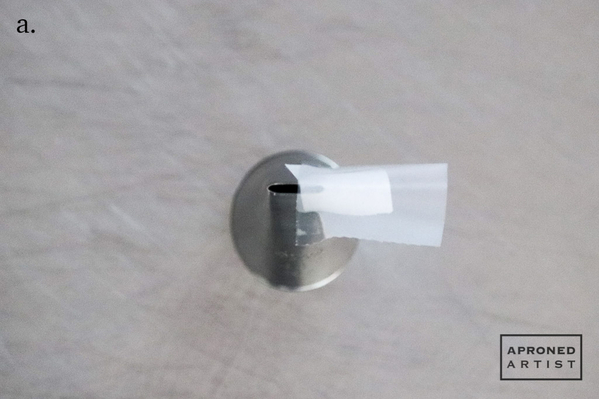
a. Modify an Ateco #44 tip by covering about half of the tip opening with a small strip of parchment paper secured with tape.

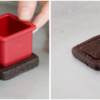
1a band

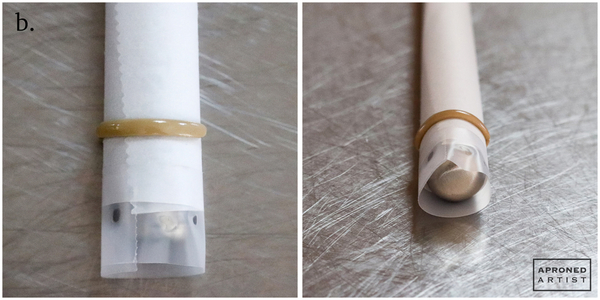
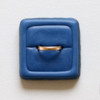
b. Wrap the handle of a metal or wooden spoon with parchment paper, and secure it with tape. A spoon with a tapered handle is ideal so that you can slide the dried band to the thinner section of the handle where it will be easier to remove. Using thick flooding-consistency taupe icing and the modified Ateco #44 tip (or equivalent), pipe a line across the handle, forming a curved semicircle of icing. I piped at the area of the handle that was about 5/8 inch (1.5 cm) in diameter. Pipe extra bands just in case some break. Allow the icing to dry for at least 2 hours before carefully removing the dried bands from the parchment paper.

1b band

Step 2: Prepare cookie

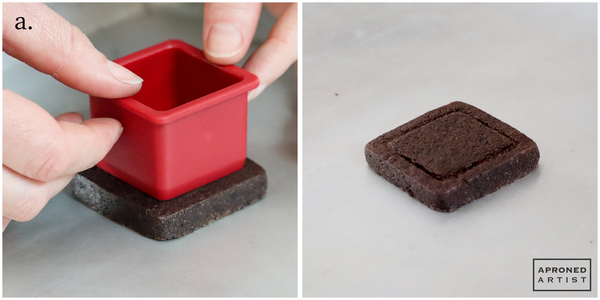
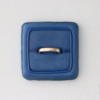
a. Use a 1 1/2-inch (3.8-cm) cookie cutter to make a shallow impression in the middle of a 2-inch (5-cm) square chocolate cookie. This impression will serve as a guide for the border that will be piped later. Alternatively, if you are using a pale cookie, trace around the cookie cutter with a food-safe marker.

2a cookie

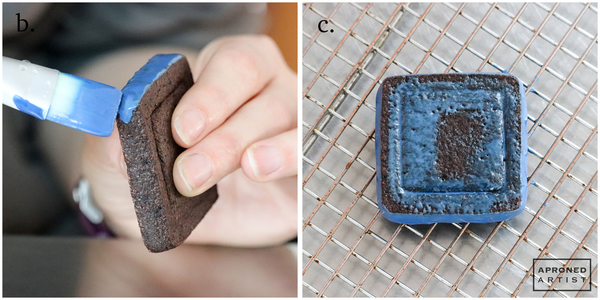
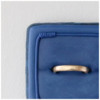
b. Place a small amount of thick flooding-consistency royal blue icing in a small bowl. Dilute the icing with water until it reaches a very thin (about 6-second) consistency. Using a large flat paint brush, paint the sides of the cookie with the thin icing. The sides don’t have to look perfect; we just want to give the impression of a box by covering the entire cookie.

c. Use the same thin icing and brush to cover the square impression on the top of the cookie. This thin coating serves to lock in any crumbs and leaves a smooth surface for the next layer of icing. Allow the cookie to dry for 30 minutes before proceeding.

2b-2c cookie

Step 3: Create ring box

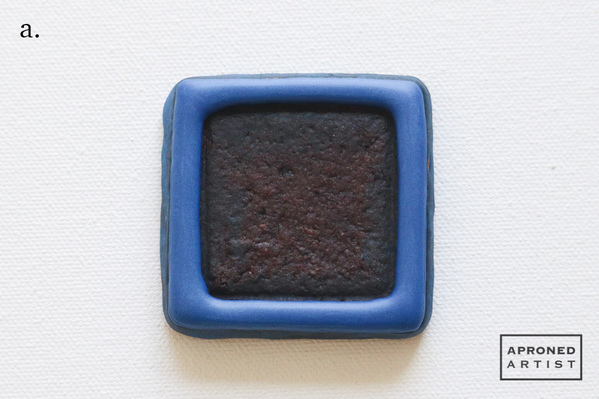
a. Using thick flooding-consistency royal blue icing and a PME #1 tip (or equivalent), outline and flood the section bordering the square impression made in Step 2a. Try to get the icing right to the edge of the cookie. Fill this section fully to make the border puffy like a cushioned ring box. Set aside to dry for 30 minutes.

3a ring box

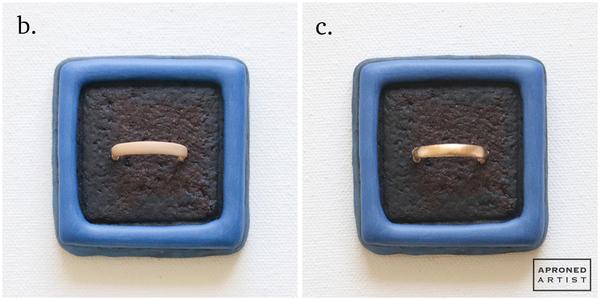
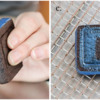
b. Attach the band transfer from Step 1 to the center of the cookie using a small dab of stiff-consistency taupe icing on each end. Allow the icing to dry for 10 minutes before proceeding.

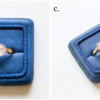
c. Gently paint the band with gold luster dust mixed with alcohol.

3b-3c ring box

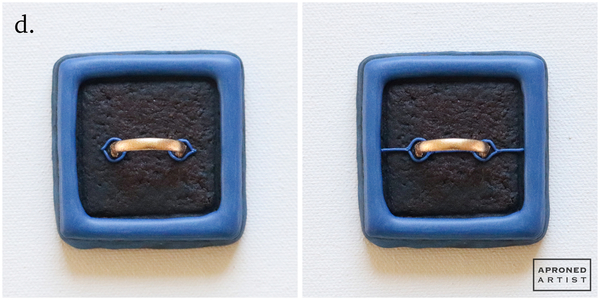
d. Using stiff-consistency royal blue icing and a PME #1 tip (or equivalent), pipe eye shapes around the ends of the band where they attach to the cookie. Then, connect the shapes and the border with a line that divides the center square in half.

3d ring box

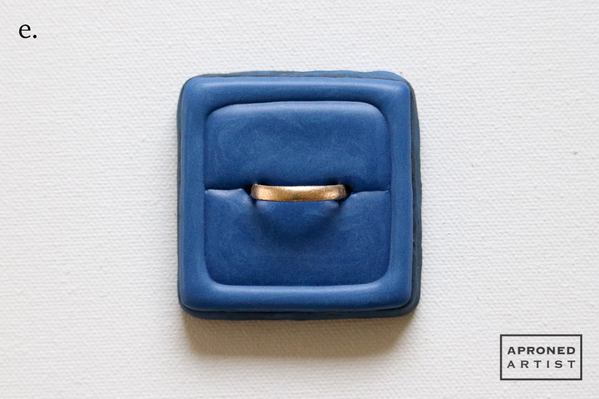
e. With the same icing and tip, fill one half until it is puffy with icing. Allow it to dry for about 1 hour before filling the other half in the same fashion. Set the cookie aside to dry completely.

3e ring box

Step 4: Add embroidered border

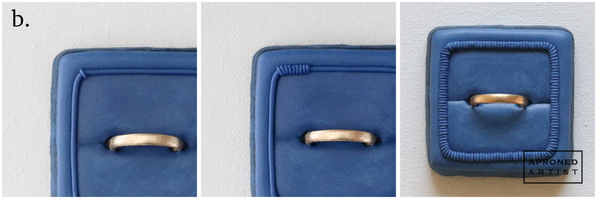
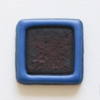
a. Using stiff-consistency royal blue icing and a PME #2 tip (or equivalent), pipe a thick line around the edge of the inner square.

4a border

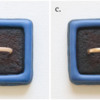
b. Starting at a corner, use the same icing and a PME #1.5 tip (or equivalent) to pipe a thin line over the width of the thick line piped in Step 4a. If necessary, use a damp paint brush to tuck the ends of your thin line beneath the thicker line. Continue piping short, thin lines adjacent to one another until you’ve completely covered the thick line.

4b border

Step 5: Apply petal dust

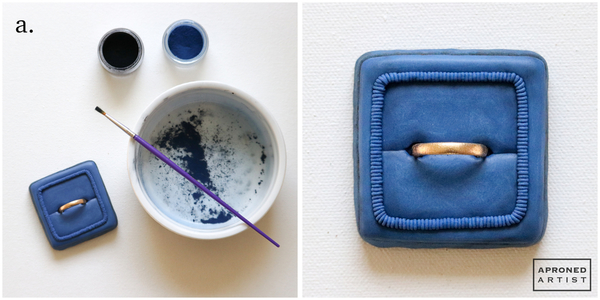
a. Adding a little bit of petal dust softens the shine of the icing and helps to give the impression of fabric. Mix equal parts royal blue petal dust and black petal dust in a small dish. Using a dry round brush, dab a small amount of petal dust around the corners and creases of the cookie. Then, dab just the blue dust over the entire surface to give the cookie a matte appearance. Gently brush off any excess petal dust. Check out the suede tutorial by @Yankee Girl Yummies for a more detailed description of this technique.

5a petal dust

Step 6: Create isomalt gems

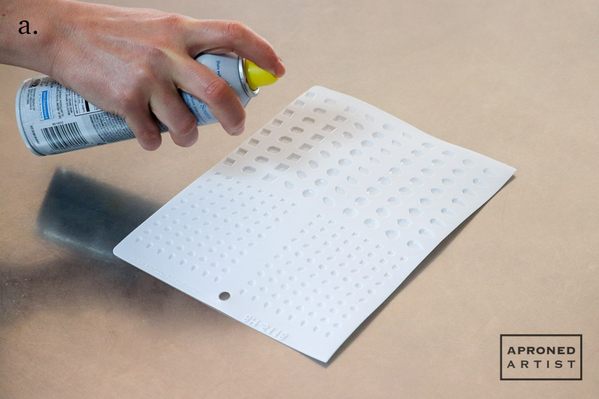
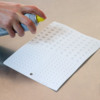
a. Lightly spray your gem mold with nonstick cooking spray. Use a paper towel to remove any excess spray.

6a gems

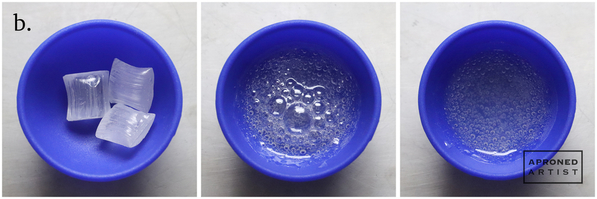
b. Add a few isomalt nibs to a small silicone bowl. Microwave in 20-second bursts until the isomalt has melted. (Be very careful handling the isomalt; it is extremely hot!) Allow the isomalt to sit for a minute or until most of the large air bubbles have popped.

6b gems

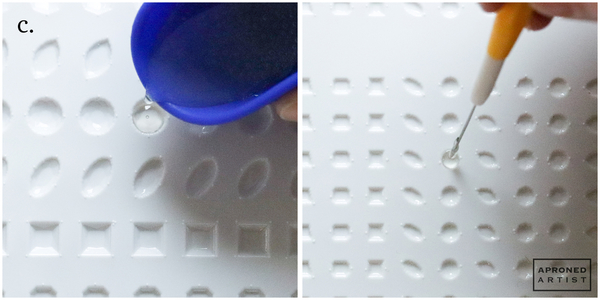
c. Gently pinch the silicone bowl, and carefully pour the isomalt into the large cavities of the gem mold. If you would like to make small gems as well, dip a scribe tool into the hot isomalt to pick up a small drop of syrup on the end, and transfer the drop to a small cavity of the mold. Repeat to make as many gems as desired. When your isomalt becomes too thick, reheat it in the microwave, and repeat the process.

6c gems

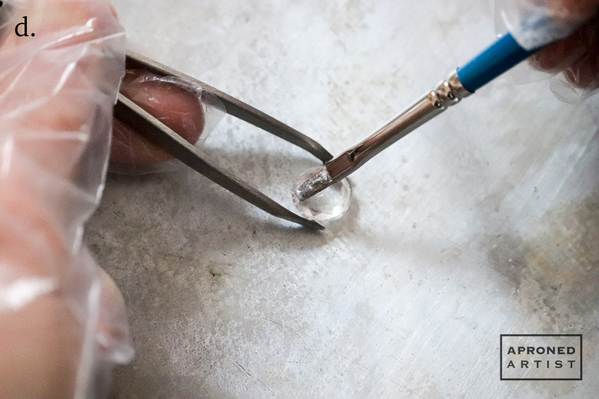
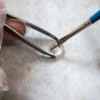
d. Allow the gems to set for about 5 minutes, or until completely firm. Put on a pair of food-safe gloves to prevent fingerprints before popping the isomalt gems out of the mold. Hold each gem in place with a pair of food-safe tweezers while you paint the back with a mixture of silver pearl dust and alcohol. A small flat brush is best for this task. (Experiment with painting either the flat side or the faceted side of the gem to see which you prefer; I painted the flat side.) Allow gems to dry for 10 minutes before proceeding. The isomalt is susceptible to humidity, so it’s best to use your gems right away while they are at their shiniest. Otherwise, store the gems until needed in an airtight container, ideally with a few desiccant packets.

6d gems

Step 7: Attach gem

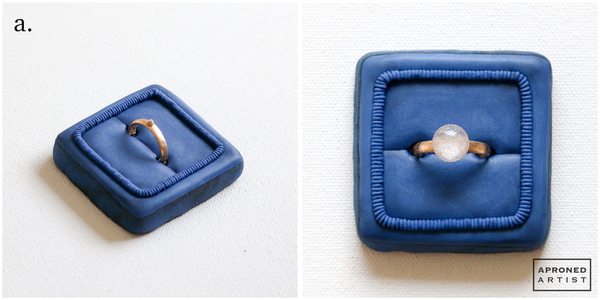
a. Attach the painted side of the gem to the top of the band with a small dab of stiff-consistency taupe icing.

7a attach gem

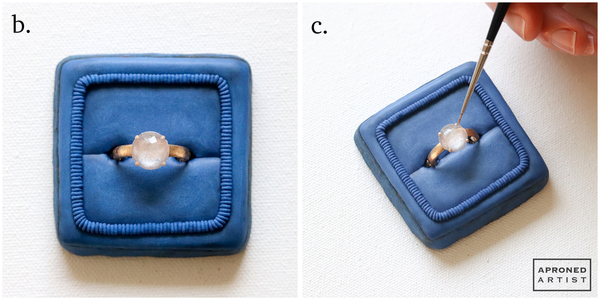
b. Using the same stiff-consistency taupe icing and a PME #1.5 tip, pipe four dots around the edge of the gem.

c. Using a tiny liner brush, paint the taupe dots with gold luster dust mixed with alcohol.

7b-7c attach gem

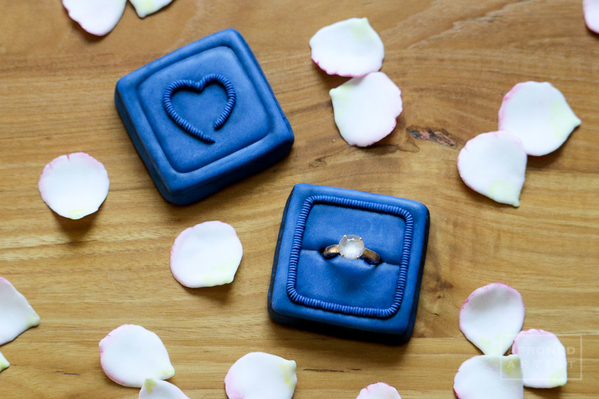
Throw in a few royal icing rose petals, and you’re sure to melt the heart of any bride-to-be.

wedding ring final set

 Source:

Samantha Yacovetta began cookie decorating in 2013. While working at a local bakery, Samantha became captivated by cookie art when a customer requested princess-themed cookies. Attracted initially to the precision of cookie decorating, Samantha soon found that the limitless design opportunities turned it into her artistic passion. Samantha began regularly stocking the bakery case with decorated cookies and for several years sold cookies through her own company, Aproned Artist, a cottage food operation. Having retired from the business life, Samantha now enjoys making cookies just for fun from her home in San Jose, California, USA. To learn more about Samantha, please check out her Cookie Connection portfolio, her Facebook page, and her past Every Little Detail tutorials here.

Photo and cookie credits: Samantha Yacovetta

Note: Every Little Detail with Aproned Artist is a bimonthly Cookie Connection blog feature written by Samantha Yacovetta focused on the special little details that make big statements in cookie design. This article expresses the views of the author, and not necessarily those of this site, its owners, its administrators, or its employees. To read all of Samantha's past Every Little Detail tutorials, click here. And to see all of Cookie Connection's tutorials, click here.

Attachments

Images (19)
  • Wedding Ring Cookie - Where We're Headed!: Cookie and Photo by Aproned Artist
  • Step 1a - Modify Pastry Tip: Photo by Aproned Artist
  • Step 1b - Pipe Band Royal Icing Transfer: Photos by Aproned Artist
  • Step 2a - Make Square Impression in Cookie: Cookie and Photos by Aproned Artist
  • Steps 2b, 2c - Paint Cookie with Icing: Cookie and Photos by Aproned Artist
  • Step 3a - Pipe Square Border: Cookie and Photo by Aproned Artist
  • Steps 3b, 3c - Attach and Paint Band: Cookie and Photos by Aproned Artist
  • Step 3d - Pipe Dividing Line: Cookie and Photos by Aproned Artist
  • Step 3e - Fill in Two Sections: Cookie and Photo by Aproned Artist
  • Step 4a - Pipe Line Border: Cookie and Photo by Aproned Artist
  • Step 4b - Add Piped Embroidery: Cookie and Photos by Aproned Artist
  • Step 5a - Add Petal Dust: Cookie and Photos by Aproned Artist
  • Step 6a - Spray Mold: Photo by Aproned Artist
  • Step 6b - Melt Isomalt Nibs: Photos by Aproned Artist
  • Step 6c - Fill Mold: Photos by Aproned Artist
  • Step 6d - Paint Gem: Photo by Aproned Artist
  • Step 7a - Attach Gem: Cookie and Photos by Aproned Artist
  • Steps 7b, 7c - Pipe and Paint Ring Setting: Cookie and Photos by Aproned Artist
  • Final Wedding Ring Set: Cookies and Photo by Aproned Artist

Add Comment

Comments (23)

Newest · Oldest · Popular

Another wonderful tutorial, @Aproned Artist! Congrats again on your Milestone Award (which everyone can read about here)! We are so lucky to have you contributing to the site!

Hi again, @Aproned Artist! I had a question for you. I meant to ask it while editing, but forgot. So I will ask it here, as it might help others too, particularly those with large orders who need to match certain colors over and over. When you cite your color formulas (i.e., "one part" this and "one part" that), are you just eyeballing the "parts" or do you more systematically measure or weigh in some way? I ask, because I've never had great success crafting repeatable color formulas with gels, as they're so messy and unpredictable to dole out of their containers. I primarily work with liqua-gels with a dropper top and count out drops. This process seems to create more repeatability/predictability in color formulas, but it's far from 100-percent perfect either. Depending on how hard I squeeze, I may get a bigger or smaller drop! Any color mixing tips to ensure repeatability would be helpful - to me, anyway! Thanks! 

Julia M. Usher posted:

Hi again, @Aproned Artist! I had a question for you. I meant to ask it while editing, but forgot. So I will ask it here, as it might help others too, particularly those with large orders who need to match certain colors over and over. When you cite your color formulas (i.e., "one part" this and "one part" that), are you just eyeballing the "parts" or do you more systematically measure or weigh in some way? I ask, because I've never had great success crafting repeatable color formulas with gels, as they're so messy and unpredictable to dole out of their containers. I primarily work with liqua-gels with a dropper top and count out drops. This process seems to create more repeatability/predictability in color formulas, but it's far from 100-percent perfect either. Depending on how hard I squeeze, I may get a bigger or smaller drop! Any color mixing tips to ensure repeatability would be helpful - to me, anyway! Thanks! 

“Parts” are just drops from the bottle, nothing more systematic or exact, unfortunately. The size of the drops definitely varies from color to color, as some gels seem to be far thicker than others. But it’s a starting point. It takes me forever to dye icing and sometimes I’ll make a color that wasn’t at all what I wanted and have to start over, so I always appreciate when a tutorial gives me some indication of the formula. I recently discovered LilaLoa’s color chart and it helps a lot. Like you said, I’m rarely able to replicate her colors exactly, but it gets me going in the right direction and then I can adapt it more easily knowing the key components that make up the color.

Julia M. Usher posted:

Another wonderful tutorial, @Aproned Artist! Congrats again on your Milestone Award (which everyone can read about here)! We are so lucky to have you contributing to the site!

Thank you, Julia! I really love being a part of this site.

Manu posted:

Genius!!!! Amazing idea, project and tutorial 👏🏻👏🏻👏🏻 Thank you Samantha!

Thanks, Manu. This idea’s been in my head for about a year now. Feels good to finally bring it to life.

D95D7486-4F00-4056-B1B2-A9E8D797EF5BAproned Artist posted:
Julia M. Usher posted:

Hi again, @Aproned Artist! I had a question for you. I meant to ask it while editing, but forgot. So I will ask it here, as it might help others too, particularly those with large orders who need to match certain colors over and over. When you cite your color formulas (i.e., "one part" this and "one part" that), are you just eyeballing the "parts" or do you more systematically measure or weigh in some way? I ask, because I've never had great success crafting repeatable color formulas with gels, as they're so messy and unpredictable to dole out of their containers. I primarily work with liqua-gels with a dropper top and count out drops. This process seems to create more repeatability/predictability in color formulas, but it's far from 100-percent perfect either. Depending on how hard I squeeze, I may get a bigger or smaller drop! Any color mixing tips to ensure repeatability would be helpful - to me, anyway! Thanks! 

“Parts” are just drops from the bottle, nothing more systematic or exact, unfortunately. The size of the drops definitely varies from color to color, as some gels seem to be far thicker than others. But it’s a starting point. It takes me forever to dye icing and sometimes I’ll make a color that wasn’t at all what I wanted and have to start over, so I always appreciate when a tutorial gives me some indication of the formula. I recently discovered LilaLoa’s color chart and it helps a lot. Like you said, I’m rarely able to replicate her colors exactly, but it gets me going in the right direction and then I can adapt it more easily knowing the key components that make up the color.

One other thing I do when making large batches or working across multiple days is to make a reference cheat sheet. Basically I just put a smudge of each color on a piece of paper so that I have something to compare against when I remake or adjust the icing later.

Attachments

Images (1)
  • D95D7486-4F00-4056-B1B2-A9E8D797EF5B
Aproned Artist posted:
D95D7486-4F00-4056-B1B2-A9E8D797EF5BAproned Artist posted:
Julia M. Usher posted:

Hi again, @Aproned Artist! I had a question for you. I meant to ask it while editing, but forgot. So I will ask it here, as it might help others too, particularly those with large orders who need to match certain colors over and over. When you cite your color formulas (i.e., "one part" this and "one part" that), are you just eyeballing the "parts" or do you more systematically measure or weigh in some way? I ask, because I've never had great success crafting repeatable color formulas with gels, as they're so messy and unpredictable to dole out of their containers. I primarily work with liqua-gels with a dropper top and count out drops. This process seems to create more repeatability/predictability in color formulas, but it's far from 100-percent perfect either. Depending on how hard I squeeze, I may get a bigger or smaller drop! Any color mixing tips to ensure repeatability would be helpful - to me, anyway! Thanks! 

“Parts” are just drops from the bottle, nothing more systematic or exact, unfortunately. The size of the drops definitely varies from color to color, as some gels seem to be far thicker than others. But it’s a starting point. It takes me forever to dye icing and sometimes I’ll make a color that wasn’t at all what I wanted and have to start over, so I always appreciate when a tutorial gives me some indication of the formula. I recently discovered LilaLoa’s color chart and it helps a lot. Like you said, I’m rarely able to replicate her colors exactly, but it gets me going in the right direction and then I can adapt it more easily knowing the key components that make up the color.

One other thing I do when making large batches or working across multiple days is to make a reference cheat sheet. Basically I just put a smudge of each color on a piece of paper so that I have something to compare against when I remake or adjust the icing later.

Me too, though I put it on a white coated cake cardboard! 

Dani Matos posted:

Hi! Thanks for sharing! The tutorial is very good.

My city is extremally umid. How to work with Isomalt at this situation? It doesn't stay a long time as we expected... :-(

Tks, Dani

Hi Dani,

Unfortunately, I don’t often work with isomalt so I don’t have a ton of tips. My first batch succumbed to the humidity and became cloudy after a day or two. I kept the second batch in an air-tight container with desiccant packets, and they stayed clear. You could try sealing the gems with an edible glaze, but I don’t have any personal experience using it. I’ve also heard that you can fix any cloudiness by running a torch over the gem or shining it with a little oil, but, again, I haven’t tried either. Let me know if you find something that works.

Aproned Artist posted:
Dani Matos posted:

Hi! Thanks for sharing! The tutorial is very good.

My city is extremally umid. How to work with Isomalt at this situation? It doesn't stay a long time as we expected... :-(

Tks, Dani

Hi Dani,

Unfortunately, I don’t often work with isomalt so I don’t have a ton of tips. My first batch succumbed to the humidity and became cloudy after a day or two. I kept the second batch in an air-tight container with desiccant packets, and they stayed clear. You could try sealing the gems with an edible glaze, but I don’t have any personal experience using it. I’ve also heard that you can fix any cloudiness by running a torch over the gem or shining it with a little oil, but, again, I haven’t tried either. Let me know if you find something that works.

The oil trick is very temporary, BTW; the isomalt will cloud over again very fast. @Dani Matos, my suggestions to reduce/avoid clouding are: (1) first, be sure to bring your isomalt to the correct temperature when you melt it (about 300-320 F, but see your package instructions). If you do much less, the isomalt won't set as firmly and will be more prone to clouding. I use granules and a candy thermometer (not the pre-cooked nibs) for this reason; (2) try not to get other mediums on it; painting and putting icing on it can cause clouding too; and (3) immediately store all pieces in an airtight container with desiccant packs, as Samantha suggested. While isomalt clouds MUCH less quickly than real sugar, it can still be problematic.

Do you have any tips for how to package these for clients in a cello bag?  Does the isomalt stick to the bag?

I'm not sure if the isomalt would stick, but I do worry a bag would break the ring transfer. I know it's considerably more expensive, but a small box (like this one) would work much better.

Post
×
×
×
×
Link copied to your clipboard.
×