 Here in Spain, vacations are over. And though unbearably hot weather still persists (imagine 42°C in the shade!), kids must go back to school.
Do you remember your first days of school? I do. I remember them like they were yesterday, even though they were more than three decades ago! It’s funny how some moments stick in our minds forever.
I remember I always loved to bring a new bag with me, filled with plenty of pencils and books, which smelled so good and new. But the thing I liked most was meeting all of my friends again, and drawing on the classroom chalkboard together before the teacher arrived!
And what about you? ![]()
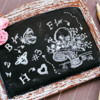
Today, I recall those happy, simpler days with a special cookie that's easy and full of fun doodles.
Would you please join me in this class? ![]()
- 1 medium rectangular cookie, undecorated
- Medium piping tip and pastry bag, for flooding cookie (I used a PME #2.5 tip.)
- Black royal icing, flooding consistency
- Nontoxic white marker (I used a Gelly Roll pen from Sakura.)
- Font and flower rubber stamps
- Vodka (or alcohol rejuvenator spirit or alcohol-based extract), to extend white gel coloring (below) into paint
- Small flat paint brush, for handpainting chalkboard frame
- Scribe tool or toothpick
- Large soft paint brush, for dusting off cookie debris
- 2 to 3 royal icing roses
- White and Black AmeriColor gels
This class is about to start! Are you ready?
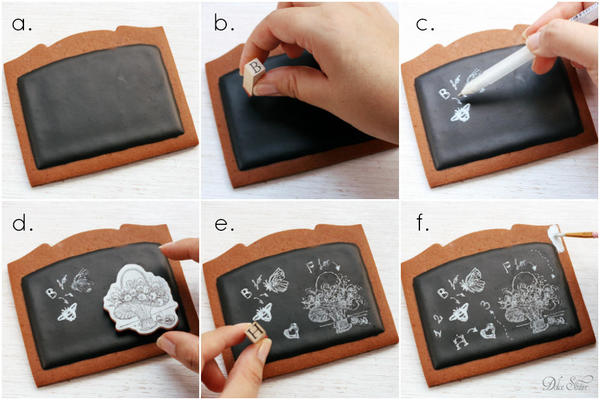
Step 1: Begin by flooding a portion of the cookie with black royal icing, as you can see below (Image a). Make sure to leave some “frame” around the iced part. I left a 1 cm-wide frame, but you can leave more or less room. Your choice! Let the icing dry completely (ideally overnight or longer at room temperature), as the icing must be dry all the way through to stamp in the next step.
Step 2: Ink a little letter "B" rubber stamp with white food coloring, and press gently on the black royal icing (Image b). To ink the stamp, you can use white edible markers to draw on the stamp, as I explained in this tutorial, or a round brush dipped in the food coloring to paint on the stamp. Again, remember: if the black icing is not completely dry before you stamp, it will crack when you press on it.
Step 3: Now, using a white nontoxic marker, draw some freehand images (bees, butterflies, and other things that start with "b") and relate those images to the stamped letter "B" by drawing some arrows. Let these drawings dry a few minutes.
Step 4: Repeat the inking process described above (Step 2) with other stamps. (This time, I use a flower basket stamp and the letters "H" and "F".) Again, gently press the inked stamps onto the dry black cookie icing (Images d and e). Remember to apply the coloring sparingly to the stamp and to blot off any excess coloring before you apply the stamp to the cookie. These steps will keep too much coloring from accumulating in the stamp recesses, which can lead to blurry imprints.
Step 5: Finally, mix a few drops drops of vodka (or alcohol rejuvenator spirit or alcohol-based extract) with the white gel color, and paint the frame around the cookie with a small flat paint brush. Let the coat of "paint" dry completely (about 15 minutes at room temperature).
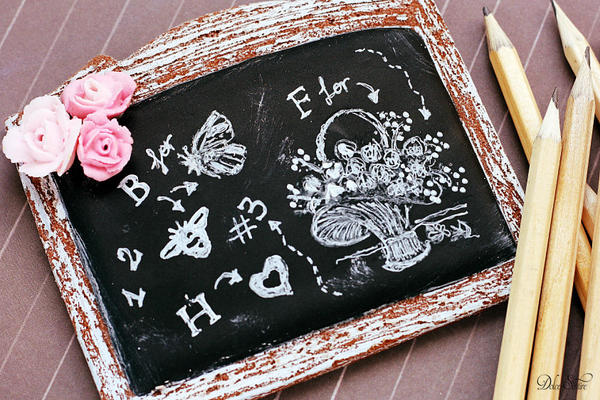
Step 6: Scrape the dry white "paint" with a scribe tool or toothpick, as shown below, to create a distressed wood effect.
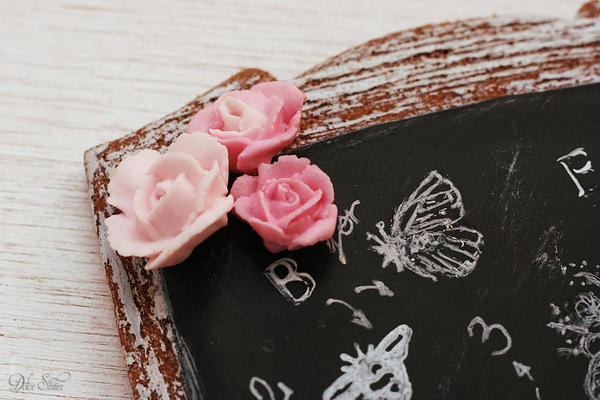
Step 7: Finally, brush off the cookie “chips” (I used a large soft paint brush), and "glue" some royal icing roses on the corner of the cookie with leftover icing - just because every cookie looks better with a few roses, right?! ![]() For a good tutorial about how to make royal icing roses, please see Cookie Connection host Julia M Usher's video.
For a good tutorial about how to make royal icing roses, please see Cookie Connection host Julia M Usher's video.
Great! Your chalkboard cookie is done! And for that, you've earned an A-plus!
Cookie and photo credits: Aixa Zunino

 Aixa Zunino is the soul of Dolce Sentire, a virtual corner of sweetness and creativity dedicated to cookie decorating. On her site, this garden engineer, self-taught decorator, and lover of flowers and animals lets her imagination fly, sharing everything she has learned since discovering the world of cookies in early 2012. She combines this activity with courses around Spain (her current home) where she teaches all the secrets to getting dreamy cookies. Meet her on Facebook or her website, and email her your cookie decorating questions or concerns at dolcesentiredolci@gmail.com.
Photo credit: Aixa Zunino
Note: Get Inspired with Dolce Sentire is a monthly Cookie Connection blog feature written by Aixa Zunino, where, through in-depth tutorials, she proves that if you can dream it, you can cookie it! This article expresses the views of the author, and not necessarily those of this site, its owners, its administrators, or its employees. To read all of Aixa's past Get Inspired tutorials, click here. And to see all of Cookie Connection's tutorials, click here.





Comments (25)