[EDITOR'S NOTE: To those of you who watch eagerly for our every tutorial, you may be wondering why you're seeing two Aproned Artist tutorials in a row without one from Manu in between?! If so, it's entirely because of me! I needed to make some adjustments to the Cookie Connection editorial calendar to "smooth" my workload, and so Manu and I decided to shift her December tutorial to January (a week or so from now). She'll continue on her usual monthly basis going forward. I thank Manu for her flexibility, and all of you for going without one precious tutorial last month! ![]() I can say with certainty that you're going to love both of our January tutorials. So, without further ado, on to the first! ~JMU]
I can say with certainty that you're going to love both of our January tutorials. So, without further ado, on to the first! ~JMU]
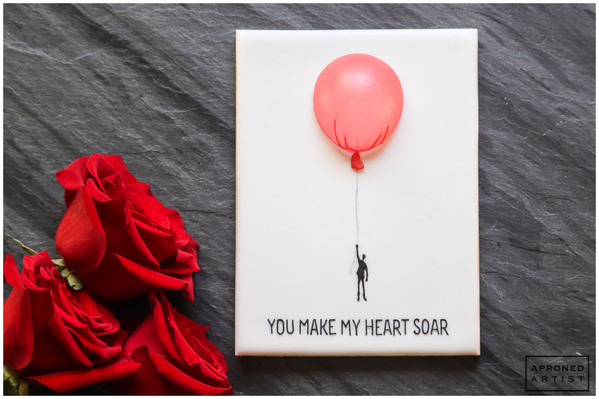
 When I was in kindergarten, one of my “assignments” was to draw a Valentine’s Day card for my mom. We worked on it in class for days, adding tissue paper embellishments and wonky lettering. When Valentine’s Day finally arrived, I proudly presented my card. She was thrilled (as only mothers can be when given a crudely constructed but sentimental keepsake). To my surprise, my father then revealed his own homemade card for my mother, an illustration of him with a giant balloon. At the time, I giggled at the notion that my dad had the same assignment; the idea of him laboring over his card as I had seemed silly. Looking back now, I realize how sweet a gesture it was.
I was inspired to use rice paper for my balloon after seeing the gorgeous entries of PUDING FARM and Szalony Cukiernik in Practice Bakes Perfect Challenge #42. This medium was new to me, but I found it easy to use and it lent the perfect matte, semi-translucency of a balloon.
Supplies:
- Red gel paste coloring (I used AmeriColor Super Red.)
- Large dinner plate
- Cold water
- Rice paper
- Kitchen shears
- Medium (2-in/5.1-cm diameter) silicone hemisphere mold
- Chopstick (or equivalent)
- 2-in/5.1-cm round cookie cutter
- Medium paint brush
- 4 1/2 x 6-in (11.4 x 15.2-cm) rectangle cookie, flooded with white royal icing
- White and black gel paste colorings, for painting
- Tiny liner paint brush
- Piping-consistency black royal icing or black food-safe marker
- PME #00 tip (or equivalent)
- Scribe tool (or equivalent)
- Piping-consistency red royal icing
Step 1: Mold rice paper balloon
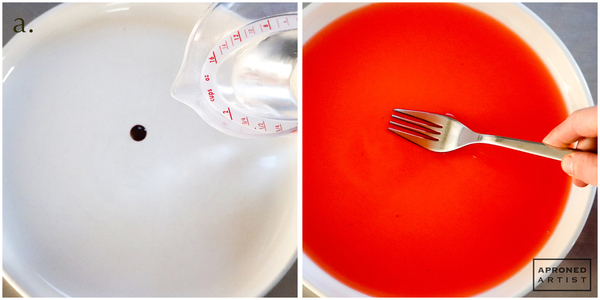
a. Place a drop of red gel paste coloring on a large dinner plate. Pour in about 1/2 cup of cold water, and agitate the gel paste with a fork (or equivalent) until it is completely dissolved.
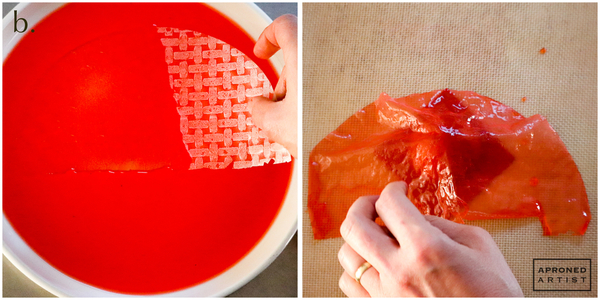
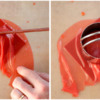
b. Cut a piece of rice paper in half with kitchen shears. Dip one semicircle of rice paper into the colored water. Make sure the rice paper is completely submerged, and allow it to sit in the colored water for about 30 seconds. The rice paper will soften considerably but will still have a slight rigidity (like the fabric of a windbreaker). Remove the rice paper from the water, and place it over the top of the silicone hemisphere mold.
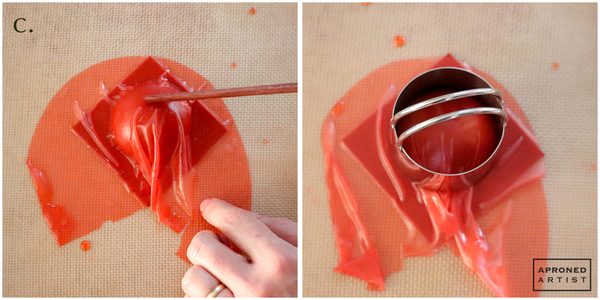
c. Pull the two ends of the semicircle closer together so that the rice paper gathers slightly at the base of the mold. Using a chopstick (or equivalent) dipped in the colored water, gently shape the rice paper around the mold. Use the side of the chopstick to carefully roll any air bubbles to the outside edge to create a smooth surface. The paper will soften further as you shape it. It will also become sticky and gummy as it dries; add more water with the chopstick to keep the rice paper slippery and workable. Continue shaping until the surface is smooth and contoured with only a few small gathers at the base. (Try to minimize the gathering as much as possible for the best balloon shape.) Dip a 2-inch/5.1-centimeter round cookie cutter in the colored water before placing it over the mold. The cookie cutter should fit snugly, flattening the gathers of the rice paper. Allow the rice paper to dry for 24 hours.
Step 2: Unmold and cut balloon
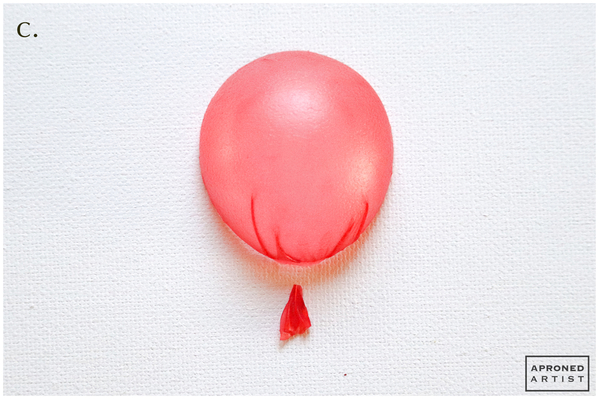
a. Once the rice paper is mostly dry (some rubberiness where the paper gathers is fine), remove the cookie cutter. (It’s possible that the rice paper will have split around the cookie cutter and shrunk slightly.) Carefully peel the mold away from the balloon.
b. Use a wet paint brush to soften the edges of the rice paper before cutting a smooth edge around the balloon with kitchen shears. (If your rice paper split and shrunk at the base of the cookie cutter, cut away the jagged edge so you have a seamless perimeter; your balloon will be slightly smaller but otherwise the same.)
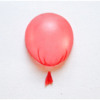
c. Cut out a small balloon tail from the excess rice paper. Use a section where the rice paper gathered so that the tail has more dimension. If the rice paper seems too brittle, soften it with a wet paint brush prior to cutting.
Step 3: Paint balloon string, pipe man, and pipe lettering
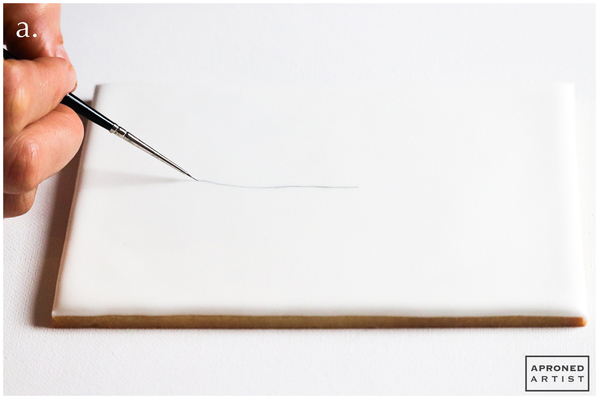
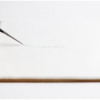
a. Place the balloon at the top of the flooded cookie so you can gauge where you want the balloon string to begin. Mix a drop of white gel paste coloring with a touch of black gel paste coloring to achieve a medium gray color. Using a tiny liner paint brush, paint the string extending about 2 inches (5.1 centimeters) down from your balloon. The bottom 1/2 inch (1.3 centimeters) of the string should swing out slightly to the left just below where the little man will be grabbing on to it.
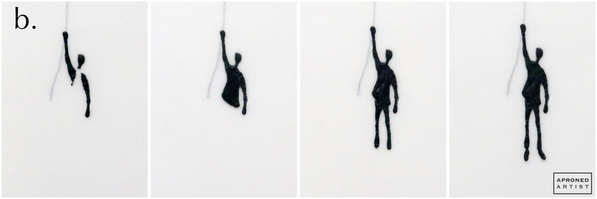
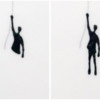
b. You can either pipe or draw the small man holding the balloon. If you choose to pipe the man, use piping-consistency black royal icing and a PME #00 tip (or equivalent). Pipe in small sections and shape them with a scribe tool (or equivalent). I started with the arms and head, then piped the torso, then the pants, and finished with his dangling feet. Alternatively, use a black food-safe marker to draw the man. I’ve included a template (located in “Files” in “Attachments” at the end of this post) if you'd like to project the image to use as a piping or drawing guide.
c. Next, pipe (using the same icing and tip) or draw the message “YOU MAKE MY HEART SOAR” across the bottom of the cookie.
Step 4: Attach balloon
a. Using piping-consistency red royal icing and a PME #00 tip (or equivalent), pipe a very small dab of icing on the underside of the balloon tail. Attach the tail to the cookie at the top of the balloon string. Pipe a very small dab of red icing at the top of the attached balloon tail, and then press the base of the balloon into the icing, being careful to camouflage the dab of icing in the gathers of the balloon. (Use only a small amount of icing to attach the balloon so that it can easily be removed before the cookie's consumption.)
Finished! Wishing you all a very happy Valentine’s Day.


Samantha Yacovetta began cookie decorating in 2013. While working at a local bakery, Samantha became captivated by cookie art when a customer requested princess-themed cookies. Attracted initially to the precision of cookie decorating, Samantha soon found that the limitless design opportunities turned it into her artistic passion. Samantha began regularly stocking the bakery case with decorated cookies and for several years sold cookies through her own company, Aproned Artist, a cottage food operation. Having retired from the business life, Samantha now enjoys making cookies just for fun from her home in San Jose, California, USA. To learn more about Samantha, please check out her Cookie Connection portfolio, her Facebook page, and her past Every Little Detail tutorials here.
Photo and cookie credits: Samantha Yacovetta
Note: Every Little Detail with Aproned Artist is a monthly Cookie Connection blog feature written by Samantha Yacovetta focused on the special little details that make big statements in cookie design. This article expresses the views of the author, and not necessarily those of this site, its owners, its administrators, or its employees. To read all of Samantha's past Every Little Detail tutorials, click here. And to see all of Cookie Connection's tutorials, click here.









Comments (27)