
A few years back I shared a Cookie Connection tutorial featuring hot water bottle cookies with cable-knit covers. Actually, given their size, I named them hand warmers. Later on, I decorated cookies of the same shape with ugly sweater covers. On each of the sweaters, I applied a design from one of my past Christmas project tutorials.
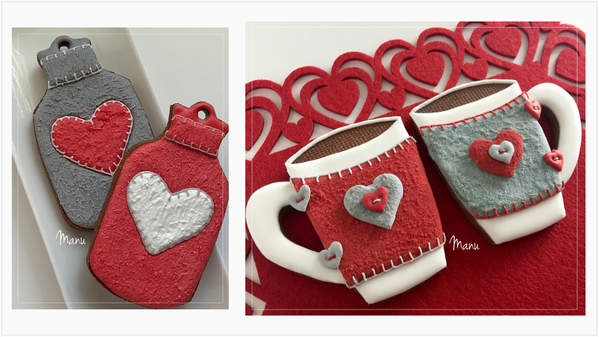
In this project, I've changed the cover of the hand warmer cookies yet again, this time into Valentine-themed felt covers. To create the felt texture here, I've used the stippling technique - that is, random dabs of flood-consistency royal icing applied with a paint brush to a dry iced cookie. Usually, I prefer to sprinkle tinted icing sugar over the stippled texture for a softer, more realistic look, as I did in my past Cookie Connection tutorials here and here. The sugar coating really looks so real and warm in person (see mug cookies, below right). The bare stippling looks a bit more like textured plastic once the icing is dry (see hand warmer cookies, below left), but there are some serious upsides! It is quicker and less messy. We must remember that these creations are cookies, and they are going to be eaten, so I leave you to choose between the two techniques.
My cookies don’t work as hand warmers, of course, but sharing them with friends over coffee or hot cocoa will surely warm everyone's hearts!
- Cookie dough of your choice
- 1 (5.8 x 10.7-cm/2 1/4 x 4 1/4-in) hot water bottle template. (You’ll find my cookie template in "Attachments" under "Files" at the end of this post.)
- 1 small (2.5 x2.5-cm/1 x 1-in) heart cutter
- Parchment paper or other baking mat
- Sharp knife or sugarcraft knife
- 1 paper straw
- Perforated baking mat (optional)
- Royal icing:
- Light grey piping-consistency, in pastry bag with PME #0 or #1 tip (or equivalents)
- Red flood-consistency, in tipless pastry bag with opening equivalent to Wilton #2 tip
- White flood-consistency, in tipless pastry bag with opening equivalent to Wilton #2 tip
- Small craft paint brush
Step 1: Cut and bake cookie
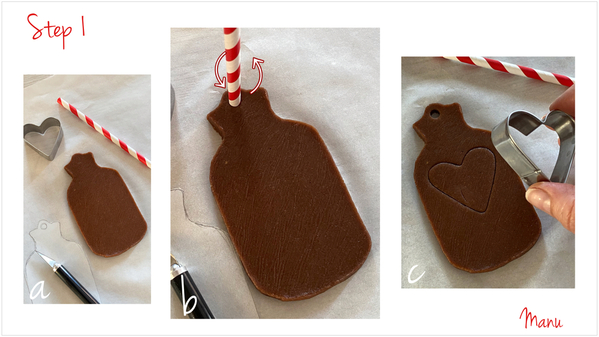
a. Use my template and a sugar craft knife to cut out a hot water bottle from your cookie dough, rolled to the thickness of your choice. (Again, you’ll find that template in "Attachments" under "Files" at the end of this post.)
b. Use a paper straw to cut out the typical hot water bottle hole at the top of the cookie. Plunge it perpendicularly into the dough, and rotate it.
c. Use the small heart cookie cutter to lightly imprint a heart shape in the top middle part of the cookie. This impression will serve as a piping guide in Step 2a when outlining the heart.
Bake the cookie following the directions in your recipe, and let it cool completely. (Note: You will see a texture on the surface of my cookie. That's because I baked it face down on a perforated baking mat. I often like to decorate the backside of my cookies as it is flatter. Also, I like how the textured surface turns out in pictures and videos.)
Step 2: Flood and stipple cookie
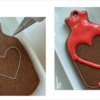
a. Using grey piping-consistency royal icing and a PME #1 tip (or equivalent), outline the little hole, the heart shape, and the hot water bottle cookie. (I actually used a PME #0, but a PME #1 will pipe a fine line too.)
b. Use red flood-consistency royal icing and a Wilton #2 tip (or equivalent) to flood all the cookie surface except for the heart interior. Let the icing dry completely before moving to Step 2c.
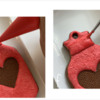
c. Pipe a small amount of the same red icing on a saucer. Use a small craft paint brush to apply the icing over the red flooded surface with up-and-down motions of the brush. This technique is call stippling. While you stipple, the icing will start to dry, and you will be left with a felt-like texture on the cookie. Stipple all over the cookie until you reach the “neck” of the hot water bottle. Don’t stipple the area around the hole. (On a real hot water bottle, that part is made of rubber, and so we want to leave it smooth in contrast to the stippled felt cover.)
d. Now use grey piping-consistency royal icing (and the same #0 or #1 tip) to outline the neck of the hot water bottle.
e. Once again, use red flood-consistency royal icing to flood the neck. Let the icing dry completely.
f. As in Step 2c, pipe a small amount of red icing on a saucer, and use a small paint brush to stipple the icing over the neck. Again, leave the top area around the hole without any stippling.
g. Now, using white flood-consistency royal icing and a Wilton #2 tip (or equivalent), fill the heart in the center of the cookie. Let the icing dry completely.
h. Pipe a small amount of white icing on a saucer, and use a small paint brush to stipple the icing over the heart.
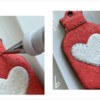
a. Now using grey piping-consistency royal icing and a PME #1 tip ( or equivalent), pipe little blanket stitches (typically seen on felt crafts) all along the top and bottom edges of the neck. The easiest way to pipe these stitches is to pipe a series of "L"s, or upside down “L”s, or vertical and horizontal dashes. Do what works best for you. For best access to and viewing of your piping area at all times, rotate the cookie as you pipe.
b. And last, repeat Step 3a to add the same details all around the white heart.

Our Valentine's hand warmer cookie is ready!

And while you're at it, decorate another cookie, and get ready to share the two over coffee with your Valentine.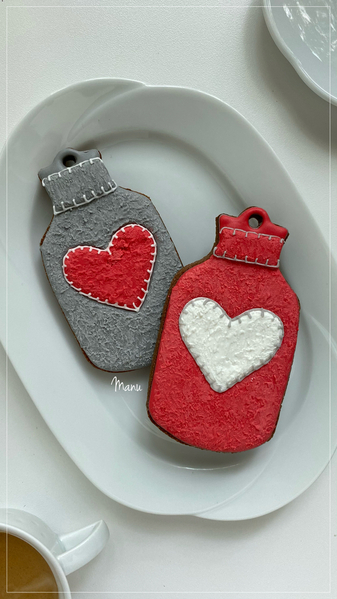
Oops, I almost forgot to attach the usual video! This time-lapse video moves fast, as it is meant to be a quick supplement to the tutorial.
Love, Manu ❤️

Manuela Pezzopane, affectionately called Manu by her friends and family, is a fan of everything handmade, and professes to have tried every possible hobby. However, it wasn’t until the end of 2014, when an American friend invited her to a Christmas cookie exchange, that she first discovered decorated cookies. In 2015, after watching Julia M. Usher's videos and signing up on Cookie Connection, Manu finally attempted her own. Since then, cookie decorating has become Manu’s passion. You can follow Manu on Facebook and Instagram, or email her at manubiscottidecorati@gmail.com.
Photo and cookie credits: Manuela Pezzopane
Note: Made by Manu is a Cookie Connection blog feature written by Manuela Pezzopane, where each month she shares the method behind a magical cookie of her own making. This article expresses the views of the author, and not necessarily those of this site, its owners, its administrators, or its employees. To read all of Manuela's past Made by Manu tutorials, click here. And to see all of Cookie Connection's tutorials, click here.










Comments (13)