
For some reason, no one ever wants to eat beautifully decorated cookies! Usually I hear, "they're too pretty to eat", and so I find myself giving advice about how to store and display them for optimal longevity. But, occasionally, a customer will suggest (usually accusingly and with a side order of mild disgust) it's because something that intricate and beautiful couldn't possibly be good to eat, could it?
Well, I've found that I can't help responding to both of those prospects in my cookie development and design. We all put a lot of effort into creating and sharing recipes that taste delicious. We know our cookies taste good! But now, in the way I design my sets, I try to encourage my customers to actually start eating the cookies, so they can discover their deliciousness themselves! I might add a "frame" to a "cookiesaw" (aka cookie jigsaw puzzle), for example, so that people start munching from the outside in.
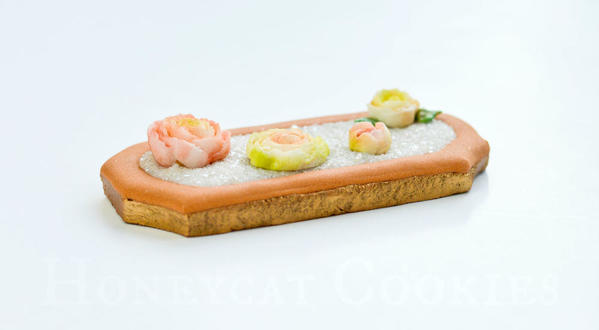
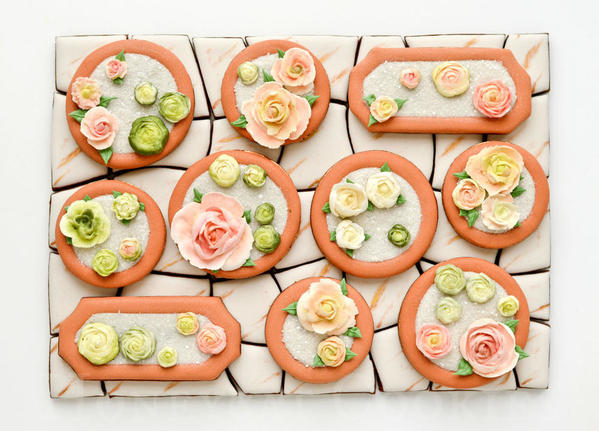
So in this set, where I mainly set out to create little pots of flowers, I decided to place them on a paved courtyard, so that the pavement could be eaten without spoiling the display of flowers! (And I have received a report that it has worked! These cookies were given to my mother's friends, who, without prompting, started eating the pavement!)
You will need:
- Cookie dough of your choice
- Sharp knife or scalpel
- Pale stone-coloured royal icing (RI), flooding consistency
- Gold lustre dust
- Clear, flavourless alcohol, i.e., vodka
- Pastry bag fitted with PME #2 tip or equivalent
- Scribe tool
- Fine-pointed food-use-only paint brush
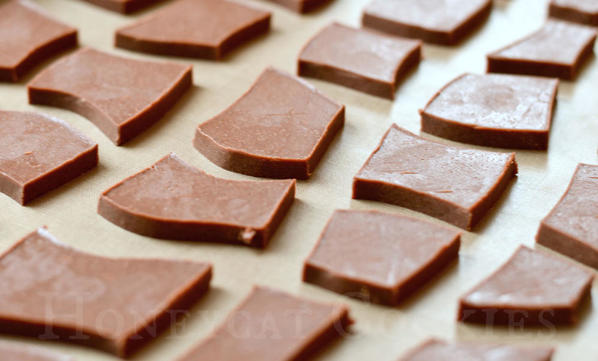
Step 1: Using the scalpel, score the shapes you'd like to cut on the rolled dough, so you can ensure you've got it right before you cut. I start in the middle and draw a wavy line from top to bottom; I then draw more vertical wavy lines at roughly even intervals across the slab; and, lastly, I draw similar wavy lines horizontally. To get nice undulating lines, score very gently with a relaxed movement; and only score a light line, so that if you're not happy with the result, you can smooth it over and start again. Once you're happy with your lines, go carefully over them with the scalpel, cutting right through the dough.

Step 2: Freeze the separated pieces of dough before baking to minimise spreading; then bake and cool as directed in your recipe. Important: keep them in order on your baking trays and at all subsequent stages, so you don't spend hours trying to work out what fits where afterwards! (I may or may not have made this mistake . . .)
Step 3: Prepare your flood icing and your lustre paint (mix a little powder with alcohol), so both are ready to go at the same time. Using a pastry bag fitted with a PME #2 tip (or equivalent), outline and flood one piece with the same flood icing, so that no outline is left visible. Use a scribe tool to ensure that the icing is as tight to the edges and corners as possible. Immediately paint thin wavy lines of gold across the icing surface to give the appearance of marble. Hold the paint brush at a very shallow angle so that you can paint the gold across the surface without picking up the icing - this is actually easier than it sounds. Repeat for each piece, and set aside to dry. This process is best viewed in the video below (at the very bottom of this tutorial) than in still photographs.
To Create the Pots
- White sparkling "gravel" mix (see below)
- Readymade royal icing (RI) flowers and roses, plus assorted lustre dusts (see below)
- Small baked and cooled cookies to cover the surface of the pavement, with enough room to see the marble effect beneath. (I used 10 cookies - a combination of tiny circles, plaques, and some hand-cut shapes.)
- Gold metallic edible paint (I used Rainbow Dust paint, as once dry, it doesn't smudge, and the cookies can be handled easily. But you can use the same lustre dust and alcohol mix used for the pavement, if you prefer.)
- Broad food-use-only paint brush
- Terracotta-coloured RI, thick (15- to 20-second) flooding consistency
- Pastry bags fitted with PME #1.5 and #3 tips or equivalents
- White RI, thin flooding consistency
- Stiff green RI in pastry bag fitted with small (#249 or #250) leaf tip
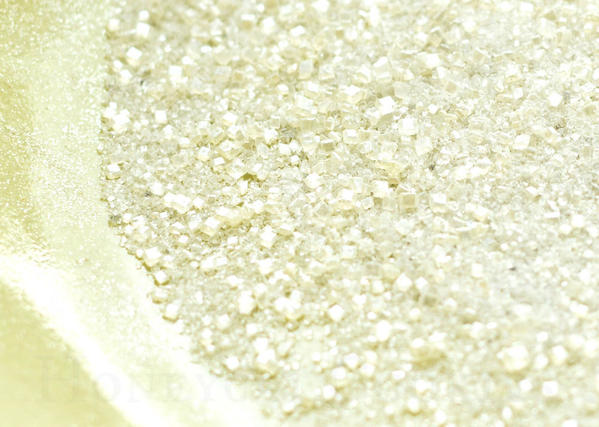
To make the "gravel" (above), I mixed granulated sugar, white sparkling sanding sugar, and a blend of white pearl and light silver lustre dusts.
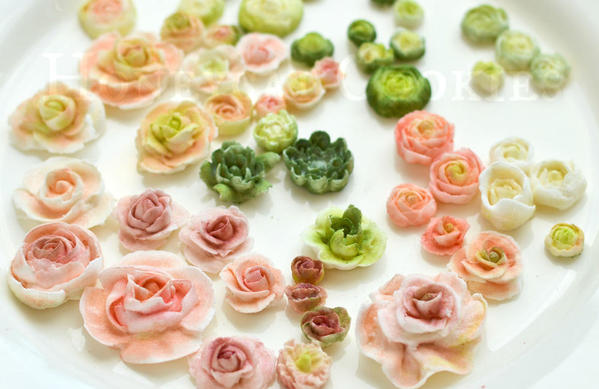
To make the roses (above), I used various YouTube tutorials as recommended in Practice Bakes Perfect Challenge #16 for piping guidance; I then coloured the dry roses with lustre dusts as I described at the end of this previous What's New, Honeycat? tutorial. With these longer lead time items now made, onto the cookies!
Step 1: Paint the edges of the cookies with the gold metallic paint and broad food-use-only paint brush. Let the paint dry until you can handle the cookies without paint rubbing off.
Step 2: Using a PME #1.5 tip (or equivalent), outline a cookie at the outer edge with terracotta RI; then pipe a parallel line inside the outer line, spacing the lines about 5 mm (slightly less than 1/4 inch) apart. Now using the PME #3 tip, fill the gap between the lines with thick flood icing of the same color, so the icing is as raised and puffy as possible. This band of terracotta icing will be the rim of the "pot". Repeat with the remaining cookies, and let the icing dry fully. (For more details, see the video below.)
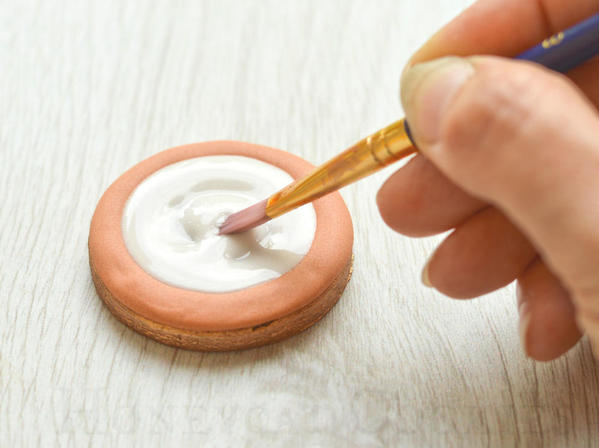
Step 3: Working on one cookie at a time, flood the interior with a thin layer of white RI. Barely cover the surface, and use a brush to spread out the icing. This process will allow the gravel surface to remain at or below the height of the rim of the pot.
Step 4: While the white icing is still wet, immediately spoon the prepared "gravel" all over it; then gently dump off the excess. Repeat Steps 3 and 4 with the remaining cookies.
Ideally allow the white icing to dry. (However, I'm usually too impatient and don't bother with drying - in this case, just be careful not to squish the icing too much when adding the roses in the next step!)
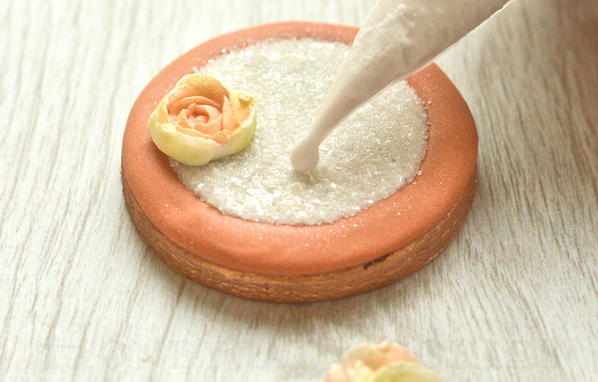
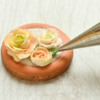
Step 5: Arrange (and re-arrange) the royal icing roses and flowers until you're happy with their positioning; then fix them in place with a small dot of white flood icing under each.
Step 6: Pipe occasional leaves around the flowers with the stiff green icing and a small (#249 or #250) leaf tip.
Finally, position the pots over the marble pavement. For this gift, I actually placed a terracotta-flooded plaque cookie with gilded text right in the centre, arranging the pots all around, and finally placed the whole courtyard inside a gift box. (I lightly "glued" it with dabs of stiff RI to cushion padding inside the box.)
Hopefully the video (below) will help to fill in some of the gaps in the pictures above. And maybe now I have to finally admit that summer's nearly over, and put those roses away!
Cookie, photo, and video credits: Lucy Samuels

 Lucy Samuels is the owner of UK-based Honeycat Cookies. Originally with an art-based career in mind, Lucy attended art college for a year after school but switched to nursing where she spent twenty years specializing in cardiology. After becoming a stay-at-home mom to her daughter Jess, Lucy experimented with a range of crafts, alighting upon decorative cookies almost by accident. In late 2011, she was persuaded to start her business Honeycat Cookies following several requests to place orders. She set about learning the craft from books, the internet, and trial and error. Lucy has a YouTube channel as well as a blog, Honeycat Cookies, that document some of her wider adventures in confectionery.
Photo credit: Lucy Samuels
Note: What's New, Honeycat? is a bimonthly Cookie Connection blog feature written by Lucy Samuels, which pushes the cookie envelope every other month with innovative cookie design ideas and tutorials. Its content expresses the views of the author and not necessarily those of this site, its owners, its administrators, or its employees. To catch up on all of Lucy's past posts, click here.







Comments (16)