 Okay, Halloween has now passed. Thanksgiving turkey preparations are about to get underway in the US. Christmas sweets and decorations are being set out in stores, and the smell of gingerbread is in the air! This can mean only one thing . . . Yes! Christmas is fast approaching, and it's time to start organizing your holiday season calendar!
Admit it: you’re very excited about it! You dream of a warm decorated home, fun Christmas parties, singing with your house guests all night long, and Christmas cookies, of course! But, there's only one problem: you are living in domestic chaos and you don't know where to begin.
Well, what do you think about beginning to plan by doing a pre-Christmas cookie together? ![]()
Supplies you’ll need:
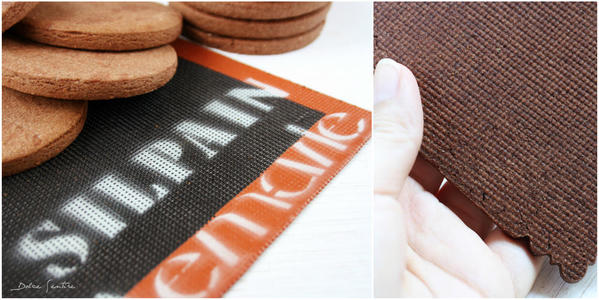
- Silicone baking mat with textured back (I used a Silpain mat.)
- A cookie, baked on above mat (Gingerbread or chocolate cookies are preferred. I used my Daucus plaque cutter, which you can find here.)
- Beige royal icing, flooding consistency
- Three decorating brushes, including the following (which can be found here and here): large flat brush, soft round brush, and large soft angled brush
- Pre-printed wafer paper
- Deer silhouette to trace (I used this freebie.)
- Non-toxic pencil and scissors
- Piping gel (I used this type from Wilton.)
- Red and green royal icing, medium consistency, for holly transfers
- Red sugar beads, for holly transfers (I used these beads from FunCakes.)
- Decorating tips, including: PME #1 for serged seam border and PME Supatube Small Leaf #ST50 for holly leaves
- To color the royal icing: Rainbow Dust Milk Chocolate ProGel, Rainbow Dust Sunset Yellow ProGel, Wilton Moss Green gel, and Sugarflair Super Red paste
- To age the wafer paper: Rainbow Dust Milk Chocolate dusting powder
- To outline the deer silhouette: Rainbow Dust Chocolate edible marker
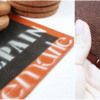
- The goal is to create a burlap texture on a cookie. In order to do this, I baked the cookies on a Silpain silicone baking mat, which is a non-stick baking mat for bread, pizza, and cookies. This particular mat is perforated, which gives the backs of cookies a very realistic burlap texture. Please note that there are other similar mats, even ones from the same manufacturer Demarle, called Silpat mats, which are also great for baking cookies. But Silpat mats are not perforated and not nearly as textured as the Silpain ones, so you won't obtain the same cool embossed effect if you use them.
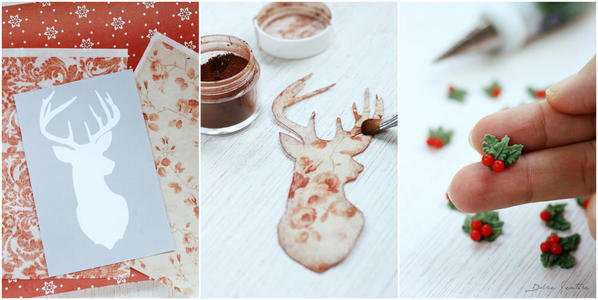
- Regarding the edible paper deer silhouette:
- Types of paper: Any type of edible paper, such as frosting sheets or wafer paper, could be used. However, I’ve used a thin sheet of rice-based wafer paper, which tastes best to me!
- Paper designs: I've chosen a red floral design, but you can get creative by using other Christmas prints or plaid, dotted, or damask patterns.
- Cutting the silhouette: Before cutting out the deer silhouette, trace the pattern on the wafer paper with a non-toxic pencil. Then cut it out with care.
- Aging with dusting powders: Use a soft round brush and be careful not to push too hard. Wafer paper cutouts are very delicate and can easily be broken.
- Adhering the silhouette: I prefer piping gel to water for my edible glue. It sticks well to royal icing and doesn’t damage (i.e., dissolve) the rice paper. [EDITOR'S NOTE: A small amount of corn syrup, or diluted glucose, will also work well if you don't have piping gel.]
- About the royal icing transfers (holly leaves and berries): I piped them on parchment paper and let them dry in a dehydrator. You can learn how to make them with this useful tutorial by Sweet Sugarbelle.
Okay, we're ready to go, aren’t we?![]()
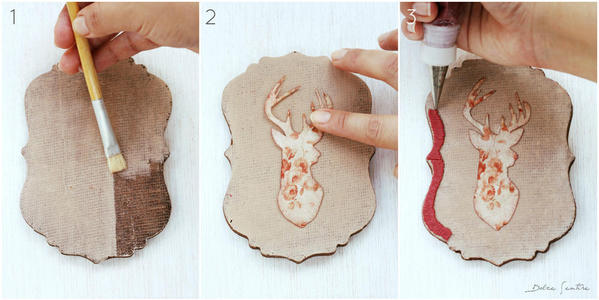
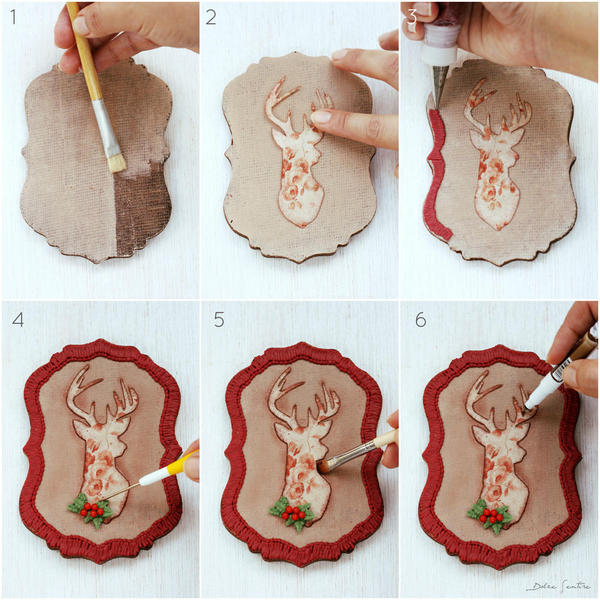
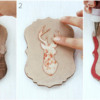
Steps 1, 2, and 3: Start by coating the textured back of the cookie using the large flat brush and beige royal icing (image 1). Let the icing dry for about 30 minutes (if you use a dehydrator) or an hour on your kitchen table.
Using the soft round brush, load a very small amount of chocolate-colored dusting powder onto it (make sure to tap off the excess), and carefully dust the edges of the wafer paper silhouette. Lightly dip the large soft angled brush into the piping gel, and blot any excess gel on a paper towel. Brush the piping gel on the back of the silhouette, thinly coating the entire surface. Then turn the paper over and stick it on the iced cookie (image 2). You won’t need to apply much pressure (it sticks almost instantly).
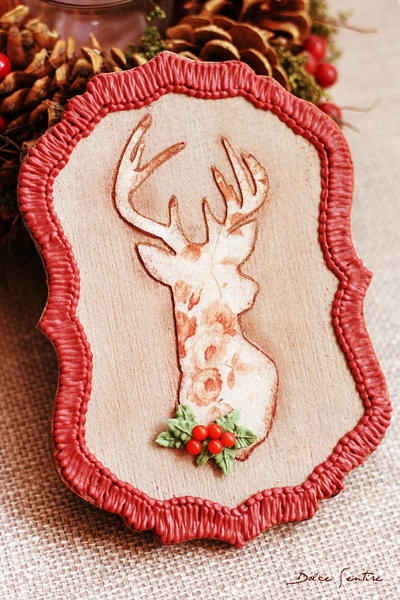
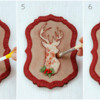
Now, start piping the red royal icing border by making a zigzag movement with your hand (image 3). The goal is to create a border that looks like a tightly serged seam, typical on burlap edges, or decorative embroidery. Let the icing dry.
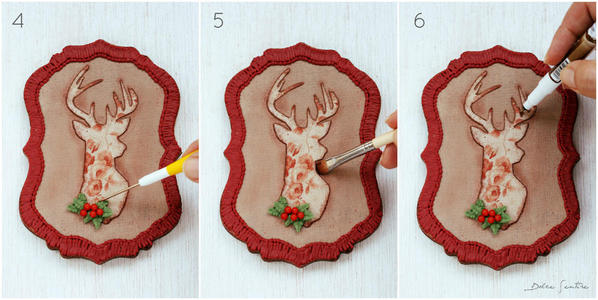
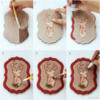
Steps 4, 5, and 6: Stick the royal icing holly leaves and berries (red sugar beads) on the left side of the deer silhouette (image 4), or wherever they look best on your particular silhouette. Then, to accent the silhouette, dust around the edges a little more with the soft round brush (image 6), and highlight the the silhouette edges with the chocolate-colored edible marker.
Quick photo recap:
Of course, you can get awesome effects by using other textured mats (wood, fabric, stone, lace, etc.). In addition, you can cut out your cookies in other shapes and sizes and make Christmas tree ornaments. ![]()
The power is in your imagination! ![]()
Cookie and photo credits: Aixa Zunino

 Aixa Zunino is the soul of Dolce Sentire, a virtual corner of sweetness and creativity dedicated to cookie decorating. On her site, this garden engineer, self-taught decorator, and lover of flowers and animals lets her imagination fly, sharing everything she has learned since discovering the world of cookies in early 2012. She combines this activity with courses around Spain (her current home) where she teaches all the secrets to getting dreamy cookies. Meet her on Facebook or her website, and email her your cookie decorating questions or concerns at dolcesentiredolci@gmail.com.
Photo credit: Aixa Zunino
Note: This article expresses the views of the author, and not necessarily those of this site, its owners, its administrators, or its employees. To read more Cookie Connection tutorials, click here.


Comments (20)