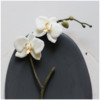
 My husband gifts me a new orchid every year for our wedding anniversary. Needless to say, I’ve amassed quite a collection. This time of year as I walk around the house admiring the blooms, the house feels full of love and memories. Roses are nice, but orchids will always be my favorite flower.
For more dimensional flower inspiration, check out Manu’s innovative water lily tutorial and Julia’s gorgeous YouTube botanical series.
Supplies:
- Orchid Transfer Template (See “Files” in “Attachments” at the end of this post.)
- Parchment paper
- Royal icing (I used AmeriColor gel paste to tint the icing.):
- Flooding-consistency white
- Stiff-consistency white
- Stiff-consistency green (2 parts Cypress/1 part Moss/1 part Olive/1 part Regal Purple)
- Stiff-consistency light green (1 part Moss/1 part Olive)
- Stiff-consistency dark green (1 part Moss/1 part Olive/1 part Regal Purple)
- Dipping-consistency* blue (4 parts Navy/1 part Regal Purple/1 part Super Black)
- Tips:
- Scribe tool (or equivalent)
- Yellow gel paste for painting (I used AmeriColor Egg Yellow.)
- Tiny liner paint brush
- Small cookies (or equivalent) for propping the flower transfers
- Medium flat paint brush
- Shallow bowl
- Small silicone baking mat (or equivalent)
- Cookie dough suitable for contouring (See Julia's video for details about how to adapt cookie dough for contouring.)
- 2 1/2-in (6.4-cm) tall egg-shaped or oval silicone mold
- Small knife
- Food-safe file
- Large round piping tip for elevating the flowerpot cookie (I used an Ateco #808.)
- 7-in (17.8-cm) oval cookie, flooded with gray icing (I added AmeriColor Super Black to white icing plus a small amount of the dipping-consistency blue icing.)
- Long offset spatula
* Note: I used 10-second icing for dipping (meaning it took about 10 seconds for the icing to settle completely after a knife or spatula was drawn through it). To see dipping in action, check out Julia’s "How to Make 3-D Cookie Teacups" video tutorial.
Step 1: Pipe and assemble three orchid transfers
Note: You will need to repeat Steps 1a through 1g three times to make three fully assembled orchid transfers. To save time, you’ll want to do each of these steps in batches (e.g. repeat Step 1a two more times before moving on to Step 1b) to make three orchid transfers in total.
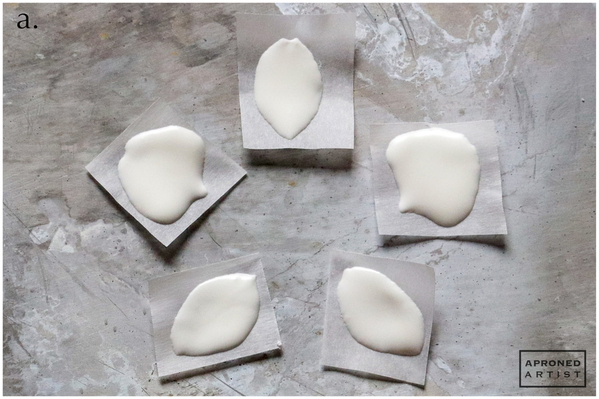
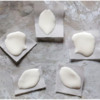
a. Print the Orchid Transfer Template (located in “Files” at the end of this post), and cut small squares of parchment paper slightly larger than the five petals marked on the template as “outer petals”. (Cutting the parchment paper into very small squares will encourage the paper to curl slightly, giving the petals more dimension.) You will pipe three oval petals and two wider "side petals".
Place a parchment paper square over an outer petal template, and hold it in place. Using the template as a piping guide, pipe the petal with flooding-consistency white royal icing and a PME #1.5 tip (or equivalent). To create a thin petal, pipe only enough icing to cover the template, and use a scribe tool (or equivalent) to drag the icing to the edges. Repeat with the other four outer petals. Allow the icing to dry completely before carefully peeling the parchment paper away from the petals. Drying time takes about 30 minutes here in California, but it can vary considerably with starting icing consistency, depth of icing, and ambient conditions.
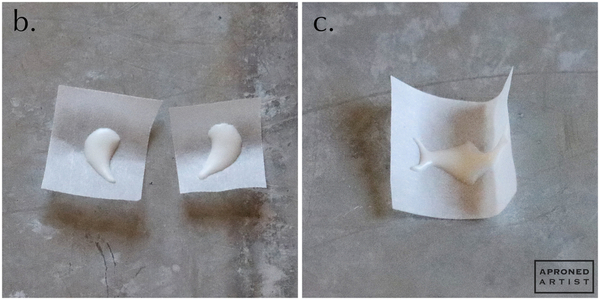
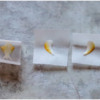
b. Use the same icing and tip to pipe the two petals marked on the template as "center petals” onto small squares of parchment paper.
c. Cut a longer square of parchment paper to cover the petal marked on the template as “center column”. Fold down the top third of the parchment paper to create a crease. Using the same icing and tip, pipe the center column so that the orientation of the column and the placement of the crease match the template. Allow the icing to dry completely. (This piece is the most fragile element of the orchid transfer, so you may want to make a few extra.)
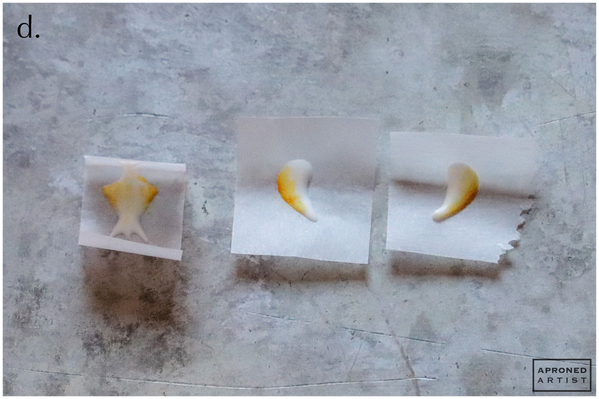
d. Before removing the center petals and column from the parchment paper squares, paint them with yellow gel paste coloring and a tiny liner paint brush. Apply a tiny dab of undiluted coloring to the pointed sides of the center column, and blend the paint toward the center with a damp paint brush. Apply a tiny dab of undiluted coloring to the outer edge of each center petal. Blend the paint toward the center of the petal. Allow the paint to dry before carefully peeling the parchment paper away from the petals.
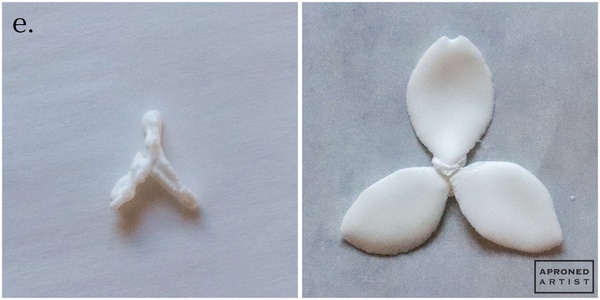
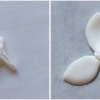
e. To assemble the orchid transfer, begin by piping a small upside-down “Y” onto a square of parchment paper using stiff-consistency white royal icing and a PME #1.5 tip (or equivalent). Press the top and two bottom outer petals (the three oval petals) into the three branches of the “Y” so that their tips meet in the middle.
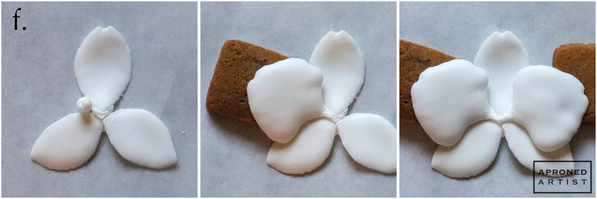
f. Using the same icing and tip, pipe a tall dot of icing adjacent to the intersection between the top petal and one lower petal. Use a small cookie (or equivalent) between the two petals to prop one of the wide side petals so that its tip sits on top of the tall dot of icing. Apply a dab of icing in the center of the flower, and use a damp paint brush to blend the icing onto the side petal tip to further adhere the petal. Repeat this step with the opposite side petal.
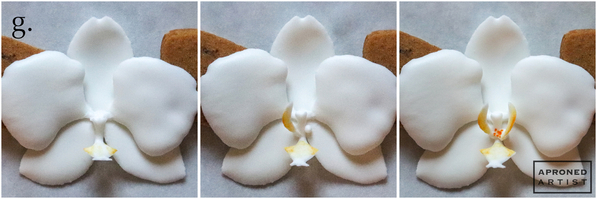
g. To form the orchid center, apply a small dab of icing in the center of the flower, and attach the top of the center column (the narrower, unpainted end) to the icing. Apply a small dot of icing adjacent to the narrow section of the center column, and insert the tip of one of the side center petals into the dot of icing so that it stands vertically. Repeat on the opposite side with the other center petal. Finally, use the tiny liner paint brush to paint a few dots of undiluted yellow gel paste coloring on the center column between the two side center petals.
Step 2: Make leaf, bud, and stem transfers
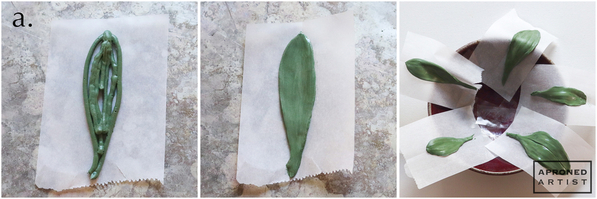
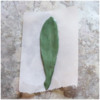
a. Using stiff-consistency green royal icing and a PME #3 tip (or equivalent), pipe the outline of a leaf measuring approximately 2 1/2 inches (6.4 centimeters) in length on a square of parchment paper. Loosely fill in the leaf with lines of icing. Use a damp flat paint brush and vertical brush strokes to blend the lines of icing together and fill in the leaf. Immediately place the leaf transfer against the inside of a shallow bowl so that it hangs over the edge. Repeat, creating several more leaves, varying the size and shape slightly with each one. Let the icing dry completely before carefully peeling the parchment paper away from the leaves.
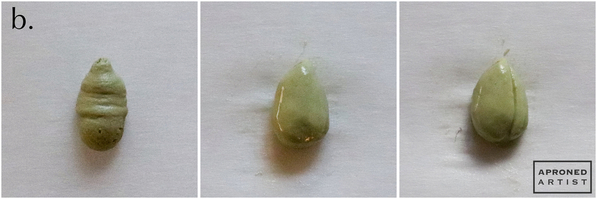
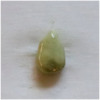
b. Using stiff-consistency light green royal icing and a Wilton #4 tip (or equivalent), pipe a thick teardrop of icing measuring about 1/4 inch (0.6 centimeter) in length onto a square of parchment paper. Use a damp flat paint brush to smooth and refine the shape into a flower bud. To define a petal, drag a tiny liner paint brush along the icing starting from the fat end of the bud and ending at the tip of the bud. Set the flower bud transfer aside to dry completely before carefully peeling the parchment paper away from it.
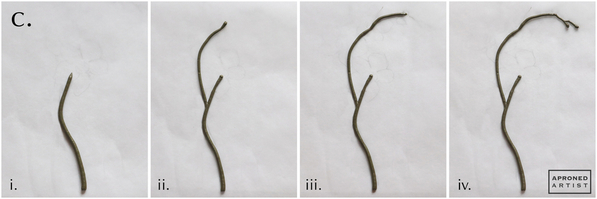
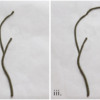
c. Place a piece of parchment paper over the stem template. You will need various piping tips to pipe the stem; refer to the template to see where to transition to the next size tip. Using stiff-consistency dark green royal icing and a Wilton #6 tip (or equivalent), pipe the bottom of the stem according to the template (i). Switch to a Wilton #4 tip (or equivalent) to pipe the next section of the stem (ii). Use a damp paint brush to meld the transition where you changed piping tips. Switch to a PME #3 tip (or equivalent) to pipe the next section (iii). Meld the stem sections together with a damp paint brush. Finally, use a PME #2 tip (or equivalent) to pipe the two ends of the stem. Again, use a damp paint brush to meld the transition where you changed piping tips. Finish each end with a small teardrop to create immature buds (iv).
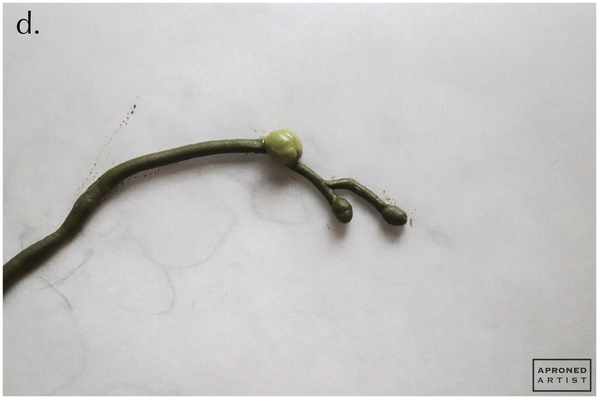
d. Use stiff-consistency light green royal icing and a PME #3 tip (or equivalent) to pipe a small bud about half the size of the flower bud transfer piped in Step 2b on the stem (refer to the template for the placement). Use a tiny liner paint brush to lightly define a petal. Set the stem transfer aside to dry completely.
Step 3: Bake and decorate flowerpot cookie
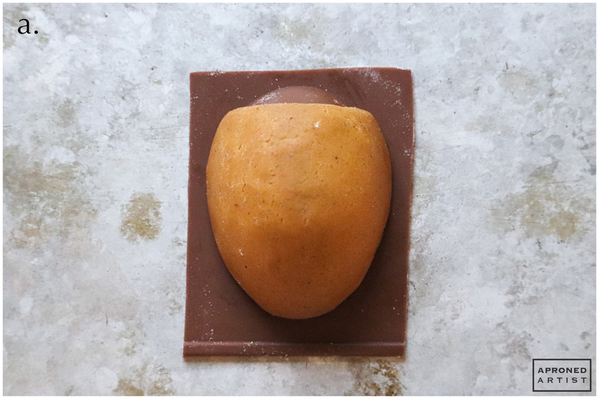
a. To mold the flowerpot cookie, begin by generously flouring a small silicone baking mat (or piece of parchment paper). Roll a small hunk of cookie dough on the prepared surface to a thickness of 1/8 inch (0.3 centimeter). Transfer the dough to the convex side of the egg-shaped (or oval) silicone mold. Use the palms of your hands to gently pat the dough in place until it fully conforms to the sides of the mold (much as you would wrap a cake with fondant). Avoid using your fingertips, as they are more likely to leave dents in the cookie dough, and try not to stretch the dough to maintain an even thickness. Trim away any excess dough at the base of the mold with a small knife. Also cut away 1/2 inch (1.3 centimeters) of dough from one of the tapered ends to create the opening of the flowerpot. Bake the flowerpot cookie, checking every few minutes so you can smooth any bubbles or malformations. Once baked, use a food-safe file to smooth the edges of the cookie, if necessary.
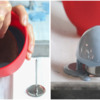
b. Place the dipping-consistency blue royal icing in a small bowl so that the icing is deeper than the depth of the flowerpot cookie. Stand a large round piping tip (with the narrow end pointing up) on top of a piece of parchment paper. Dip the flowerpot cookie into the icing, rotating the cookie to cover the convex side with icing. Allow the excess icing to drip off before suspending the cookie on top of the large round piping tip.
Immediately use a scribe tool (or equivalent) to pop any air bubbles, and to clean away the drips along the bottom edge of the cookie. Swipe the scribe all the way around the bottom edge using small strokes directed toward the interior of the cookie. Do not drag the scribe sideways along the edge, as this motion can lead to messier results. Repeat this process until the icing ceases to drain off and the bottom edge is clean and straight, but stop if you should see the icing starting to set. If you continue to swipe after this point, you can crack the icing along the bottom edge. (This clean-up step will minimize the amount of filing needed after the icing has fully dried.)
Allow the icing to dry completely before removing the cookie from the piping tip. Use a food-safe file to remove any remaining drips of icing from the bottom edge.
c. Optionally, brush the entire surface of the dried icing with a damp flat paint brush. A very light coat of water adds a subtle shine and makes the icing appear slightly porous (and more like pottery).
Step 4: Assemble final cookie
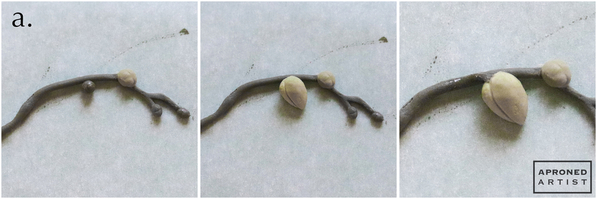
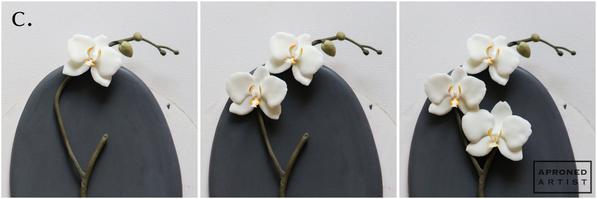
a. Using stiff-consistency dark green royal icing and a PME #2 tip (or equivalent), pipe a dot of icing adjacent to the stem where you intend to attach the large flower bud. Gently press the flower bud transfer into the icing. Use the same icing and tip to pipe a small stem connecting the bottom of the flower bud to the main stem. Shape and blend the stem with a damp paint brush.
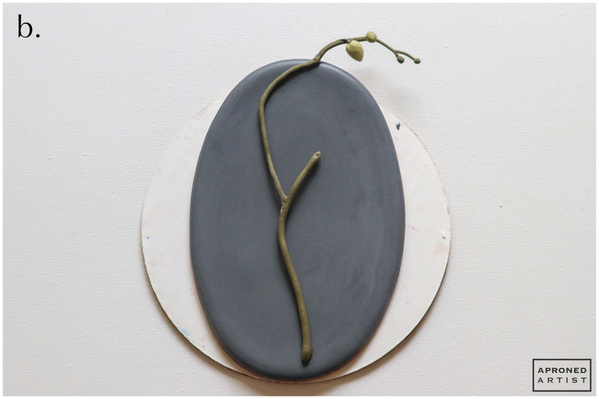
b. To attach the stem transfer to the cookie, use the same icing and tip to pipe a small dab of icing toward the bottom of the flooded oval cookie. Carefully place the stem transfer onto the cookie with a long offset spatula, and gently press the bottom of the stem into the wet icing.
c. To attach the top flower, pipe a dab of icing on the stem according to the template, and gently press the orchid transfer into the icing. Repeat with the remaining orchid transfers, working toward the bottom of the stem.
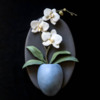
d. Pipe icing along the underside edge of the flowerpot cookie, and press it into place so that the bottom of the flowerpot hangs off of the cookie about 1/2 inch (1.3 centimeters).
e. To attach the leaves, pipe a small dab of icing on the base of each leaf, and insert them into the opening of the pot so that the icing adheres to the oval cookie inside the pot, hiding the connections.
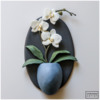
Finished! Another orchid to add to my collection.
Source:
Contouring and dipping cookies: Julia M. Usher’s "How to Make 3-D Cookie Teacups" video


Samantha Yacovetta began cookie decorating in 2013. While working at a local bakery, Samantha became captivated by cookie art when a customer requested princess-themed cookies. Attracted initially to the precision of cookie decorating, Samantha soon found that the limitless design opportunities turned it into her artistic passion. Samantha began regularly stocking the bakery case with decorated cookies and for several years sold cookies through her own company, Aproned Artist, a cottage food operation. Having retired from the business life, Samantha now enjoys making cookies just for fun from her home in San Jose, California, USA. To learn more about Samantha, please check out her Cookie Connection portfolio, her Facebook page, and her past Every Little Detail tutorials here.
Photo and cookie credits: Samantha Yacovetta
Note: Every Little Detail with Aproned Artist is a monthly Cookie Connection blog feature written by Samantha Yacovetta focused on the special little details that make big statements in cookie design. This article expresses the views of the author, and not necessarily those of this site, its owners, its administrators, or its employees. To read all of Samantha's past Every Little Detail tutorials, click here. And to see all of Cookie Connection's tutorials, click here.












Comments (16)