 Halloween is my favorite cookie holiday. There are so many fun themes to use; I feel like I’ll never run out of Halloween ideas. Designs can go in a million different directions too: anything from dark and seductive to whimsical and cute, or even macabre and sinister. Like a witch concocting her potion, I'm aiming this year for a brew of several styles: a dash of elegance, a pinch of whimsy, and enough spookiness to keep it all interesting.
Supplies:
- Plastic wrap
- Royal icing*:
- Flooding-consistency dark gray
- Flooding-consistency white
- Thick flooding-consistency black
- Thick flooding-consistency ivory
- Stiff-consistency black
- Tips:
- PME #1.5, 0, 00, and 1 (or equivalents)
- 6 1/2 x 2 1/4-inch (16.5 x 5.7-cm) rectangular cookie
- Scribe tool (or equivalent)
- AmeriColor Bright White gel paste
Tiny liner paint brush
*Notes on consistency: For flooding-consistency, aim for about 15 seconds, meaning the "tracks" left by the icing when dropped into the icing bowl should disappear in about 15 seconds. Thick flooding-consistency should be about 25 seconds.
Step 1: Prepare smoke icing
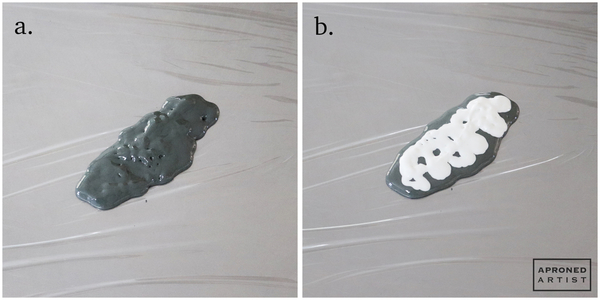
a. Place a large rectangle of plastic wrap on your work surface. Add some flooding-consistency dark gray royal icing to the center of the plastic wrap in a diagonal puddle.
b. Add some flooding-consistency white royal icing on top of the dark gray icing. Apply the white icing in an irregular pattern, but make sure it spans the length of the dark gray diagonal puddle piped in Step 1a.
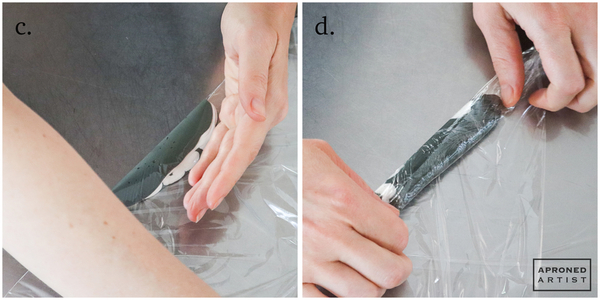
c. Fold over the plastic wrap on the diagonal, bringing the lower right corner to meet the upper left corner. Apply gentle pressure around the icing to seal it within the plastic wrap. At this point, the icing should look like a taco with a dark gray shell around white filling.
d. Holding the ends of the plastic wrap, repeatedly fold the icing over until the plastic wrap is completely wrapped around the icing. It should look like a wrapped Tootsie Roll.
e. Insert the wrapped icing into an icing bag with one of the gathered ends sticking out of the opening.
f. Trim the plastic wrap at the opening, and fit the opening with a PME #1.5 tip (or equivalent).
Step 2: Pipe wet-on-wet spooky smoke
Before starting, check out Julia and Manu’s informative tips for wet-on-wet piping.
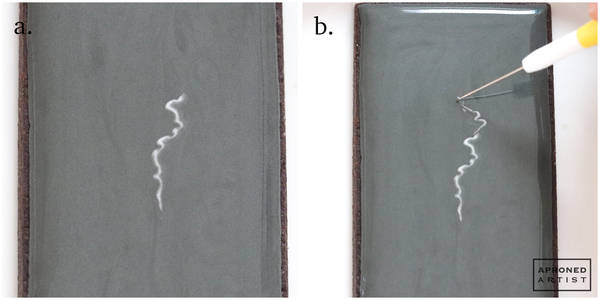
a. Begin by flooding the rectangular cookie with flooding-consistency dark gray icing. (Use the same dark gray icing you used when preparing the smoke icing in Step 1 so that the smoke will seamlessly blend with the background.) Using the pastry bag prepared in Step 1f, immediately pipe the smoke icing in a wavering tendril, beginning about 2 1/2 inches (6.4 cm) from the top of the cookie and ending about 1 inch (2.5 cm) above its start.
b. Quickly add another smaller tendril above the smoke you just piped. Try to pipe the smoke organically, allowing it to drift in different directions. Extend the end of your tendril with your scribe tool (or equivalent), if necessary.
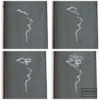
c. Above these tendrils, pipe more wavering lines to give the impression of a face or skull forming in the smoke. I began with a tendril to form the left side of the face (see top left picture); then I added an arcing tendril to enclose the left eye socket (see top right picture) and an ovular tendril to create the right eye socket and complete the nose (see bottom left picture). Finally, I added a large winding tendril to form the the top of the skull and another tendril for the left jawline (see bottom right picture).
I recommend piping the skull in stages (while moving quickly so that the icing doesn’t crust), adding tendrils wherever you feel is necessary to imply the shape of a skull. Because you don’t have complete control over how much white comes out of the tip, each smoke skull you pipe will look different. (There are three different skulls featured throughout this tutorial so you can see the variation.)
Once you’re happy with the shape of your smoke skull, set the cookie aside until the icing is completely dry.
Step 3: Pipe candlestick and candle
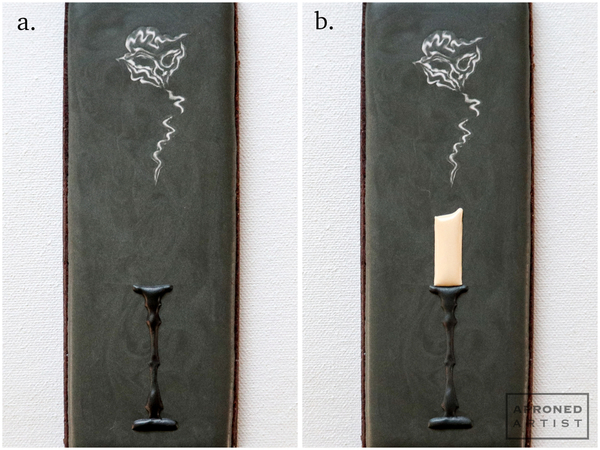
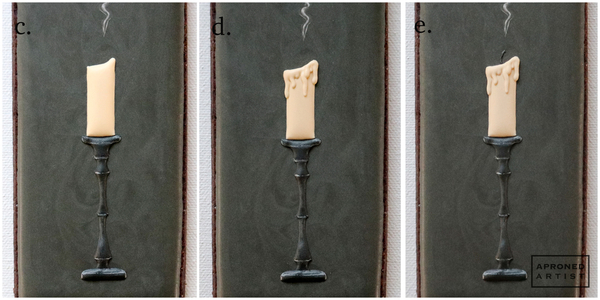
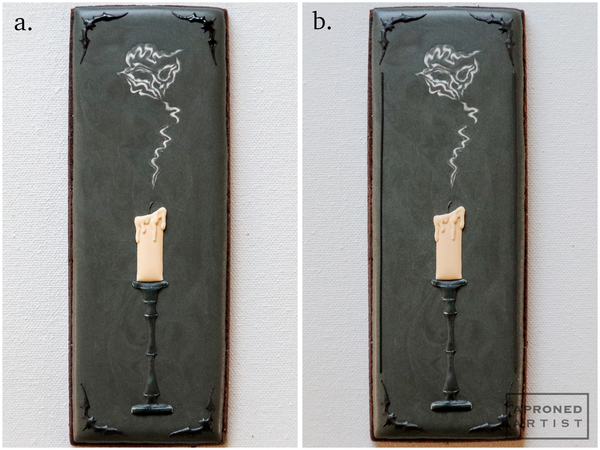
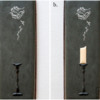
a. In the bottom portion of the cookie, use thick flooding-consistency black royal icing and a PME #0 tip (or equivalent) to pipe the candlestick. Keep the candlestick narrow with several sections that flare out before narrowing again. Allow the candlestick to dry for 15 minutes before proceeding.
b. Pipe a candle sitting on top of the candlestick with thick flooding-consistency ivory royal icing and a PME #0 tip (or equivalent). The top of the candle should be sloped as if it has melted.
c. Using AmeriColor Bright White gel paste and a tiny liner paintbrush, paint thin lines across the flared sections of the candlestick.
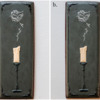
d. Pipe drips of candle wax along the top edge of the candle with thick flooding-consistency ivory royal icing and a PME #0 tip (or equivalent).
e. Finally, pipe a small wick with thick flooding-consistency black royal icing and a PME #00 tip (or equivalent).
Step 4: Pipe border
a. Using thick flooding-consistency black royal icing and a PME #00 tip (or equivalent), pipe a small bat in each corner of the cookie, orienting each bat so that its tail points toward its corner.
b. Pipe a vertical line between the top left bat and the bottom left bat with stiff-consistency black royal icing and a PME #1 tip (or equivalent). Leave a small gap between the ends of the line and the bats’ wings. Pipe a similar line between the bats on the right side.
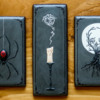
There you have it - sophisticated, spooky, and fanciful all at the same time. Happy Halloween!


Samantha Yacovetta began cookie decorating in 2013. While working at a local bakery, Samantha became captivated by cookie art when a customer requested princess-themed cookies. Attracted initially to the precision of cookie decorating, Samantha soon found that the limitless design opportunities turned it into her artistic passion. Samantha began regularly stocking the bakery case with decorated cookies and for several years sold cookies through her own company, Aproned Artist, a cottage food operation. Having retired from the business life, Samantha now enjoys making cookies just for fun from her home in San Jose, California, USA. To learn more about Samantha, please check out her Cookie Connection portfolio, her Facebook page, and her past Every Little Detail tutorials here.
Photo and cookie credits: Samantha Yacovetta
Note: Every Little Detail with Aproned Artist is a monthly Cookie Connection blog feature written by Samantha Yacovetta focused on the special little details that make big statements in cookie design. This article expresses the views of the author, and not necessarily those of this site, its owners, its administrators, or its employees. To read all of Samantha's past Every Little Detail tutorials, click here. And to see all of Cookie Connection's tutorials, click here.







Comments (39)