 These aren’t the cookies I intended to post. I started weeks earlier with a completely different concept. I was excited about the idea and the progress I was making. However, on the final and most risky step, after investing more hours than I’d care to admit, I decided I hated the cookies. My family assured me they weren’t as terrible as I thought, but I was certain that I hated them. Even the steps I had previously liked, I now hated. I’m well acquainted with cookie fails. I keep a whole file of them (which sounds slightly masochistic, but sometimes I do actually revisit them and reuse the successful bits). This recent cookie fail, like the many before it, rocked my confidence. Maybe I should go with something less complicated. I tried another idea. Another cookie fail. Maybe just stick with the basics. A simple flood, something I’ve done countless times, came out rippled and strange. Twice. Maybe it’s time for a new hobby . . . Predictably, I am my own worst enemy, psyching myself out and paving the way for more failure. It always takes me a little while to push my doubt aside. But eventually, no matter how convinced I am that I’ll never again make a successful cookie, I find an idea that works. These jellyfish cookies aren’t what I originally intended to post, but they are the cookies that broke the streak. [EDITOR'S NOTE: OMG! You just described me and my recent cookie psych-out! Something strange must be in the air, because I'm doing an unusual amount of second-guessing! ~JMU]
Supplies:
- Jellyfish Design Template (See “Files” in “Attachments” at the end of this post.)
- 2 1/4 x 7-inch (5.7 x 17.8-cm) rectangle cookie flooded with aqua royal icing (AmeriColor: 9 parts Teal/2 parts Electric Blue/1 part Regal Purple)
- Projector (or equivalent)
- Gel pastes (I used AmeriColor): Bright White, Super Red
- Tiny liner paint brush
- Royal icing: Stiff-consistency pink (pale AmeriColor Super Red)
- Tip: PME #0 (or equivalent)
- Light corn syrup
- Paint palette (or equivalent)
- Medium-sized paint brush
Step 1: Paint jellyfish tentacles
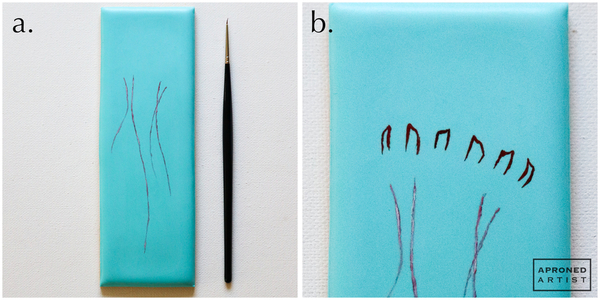
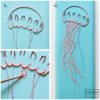
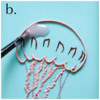
a. Transfer the jellyfish design onto the flooded cookie using a projector or the method of your choice. (Again, my design template can be found in "Files" at the end of this post.) Lightly mix a drop of undiluted Bright White gel paste with a drop of Super Red gel paste; the colorings shouldn't be completely combined. Use a tiny liner paint brush to paint the tentacles of the jellyfish.
b. Using the same paint brush and undiluted Super Red gel paste, paint the “n” shapes within the jellyfish’s hood.
Step 2: Pipe jellyfish hood and arms
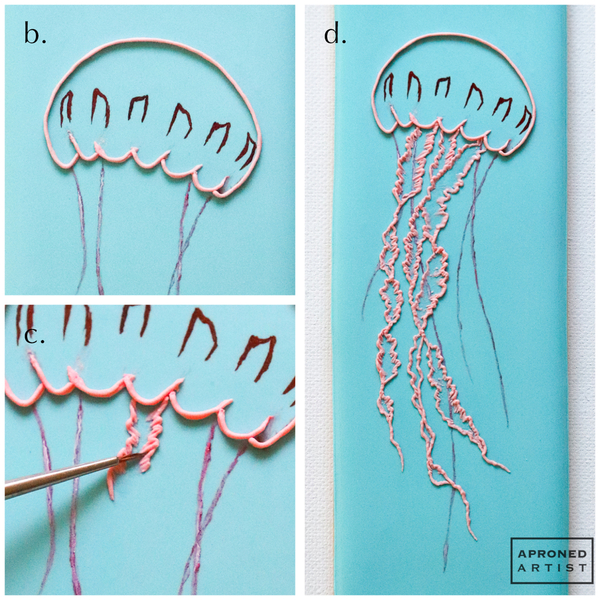
a. Using stiff-consistency pink royal icing and a PME #0 tip (or equivalent), pipe the outline of the jellyfish’s hood.
b. Add a second tier of icing on top of the outline piped in Step 2a. This extra layer gives the outline more height to contain the corn syrup that will be added in a later step.
c. Using the same icing and tip, pipe a short squiggly line to form a portion of the outside edge of an arm. Keep the section small so that the icing doesn’t dry too quickly. Immediately, use a damp liner paint brush to drag some of the icing toward the interior of the arm. This brush embroidery technique gives the arm a ruffled appearance. (It also coordinates perfectly with Practice Bakes Perfect Challenge #40. Be sure to check out the pink link for more details and resources to help master this technique.)
d. Continue piping small sections of the arm edges and applying the brush embroidery technique until all of the arms depicted in the template are complete.
Step 3: Apply corn syrup
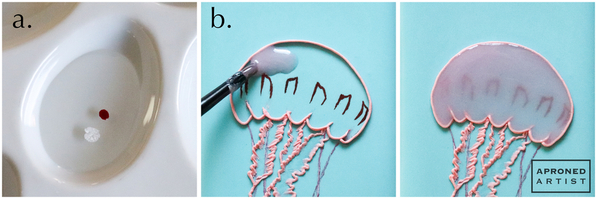
a. Mix about a tablespoon of light corn syrup with a drop of Bright White gel paste and a small drop of Super Red gel paste. (To maintain control over the quantities, I poured a drop of each gel paste onto a paint palette and used a medium-sized paint brush to transfer small amounts of each color to the corn syrup.)
b. Use a medium-sized paint brush to transfer a small glob of the colored corn syrup into the hood of the jellyfish. Add more globs of corn syrup, using the paint brush to guide the corn syrup into the crevices. Continue until the hood is evenly filled with corn syrup.
c. In the same fashion, use the paint brush to transfer a small amount of the colored corn syrup into the arms. Be careful not to transfer too much corn syrup as these areas can easily overflow.
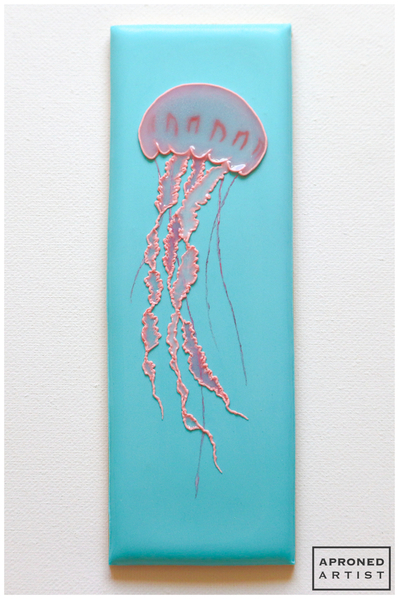
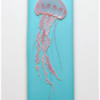
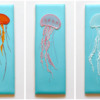
Finished! Wishing you many cookie successes (and the confidence to deal with any failures)!


Samantha Yacovetta began cookie decorating in 2013. While working at a local bakery, Samantha became captivated by cookie art when a customer requested princess-themed cookies. Attracted initially to the precision of cookie decorating, Samantha soon found that the limitless design opportunities turned it into her artistic passion. Samantha began regularly stocking the bakery case with decorated cookies and for several years sold cookies through her own company, Aproned Artist, a cottage food operation. Having retired from the business life, Samantha now enjoys making cookies just for fun from her home in San Jose, California, USA. To learn more about Samantha, please check out her Cookie Connection portfolio, her Facebook page, and her past Every Little Detail tutorials here.
Photo and cookie credits: Samantha Yacovetta
Note: Every Little Detail with Aproned Artist is a monthly Cookie Connection blog feature written by Samantha Yacovetta focused on the special little details that make big statements in cookie design. This article expresses the views of the author, and not necessarily those of this site, its owners, its administrators, or its employees. To read all of Samantha's past Every Little Detail tutorials, click here. And to see all of Cookie Connection's tutorials, click here.



Comments (41)