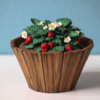
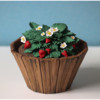
 Every week we get a delivery of produce from a small, local farm. The box is filled with fresh seasonal fruits and vegetables, but the exact contents are always a surprise. When my kids are home from college, Thursday mornings are practically like Christmas. To our delight, tucked away inside our last box were the first strawberries of the season - vibrantly red, juicy little gems of flavor. Hopefully, this strawberry barrel cookie, with its sweet hidden surprise, is just as tempting.
Supplies:
- Royal icing (I used AmeriColor gel paste to tint the icing.):
- Stiff-consistency red (Super Red)
- Stiff-consistency green (2 parts Forest Green/2 parts Moss/1 part Teal)
- Stiff-consistency white
- Stiff-consistency brown (5 parts Warm Brown/1 part Super Black/1 part Electric Green)
- Stiff-consistency dark brown (5 parts Chocolate Brown/1 part Super Black)
- Tips:
- Parchment paper
- Two medium flat paint brushes of similar size
- Tiny liner paint brush(es)
- Strawberry Barrel Cookie Template, including project dimensions (See “Files” in “Attachments” at the end of this post.)
- Small angled flat paint brush
- AmeriColor (or equivalent) gel paste coloring for painting: Forest Green, Egg Yellow, Bright White, Chocolate Brown
- Gingerbread (or another dark-colored cookie dough that bakes with minimal spreading), rolled 1/8 inch (0.3 centimeter) thick
- 3 silicone cupcake liners
- Food-safe file
- Round paint brush
Step 1: Make strawberry, leaf, and flower transfers
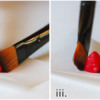
a. Use stiff-consistency red royal icing and a Wilton #8 tip (or equivalent) to pipe the strawberry transfers. Pipe a small mound of icing (about the size of a pomegranate aril) onto a small square of parchment paper (i). Let the icing dry for roughly a minute; the icing should be malleable but neither sticky nor brittle. Hold a dry medium flat paint brush in each hand, and simultaneously press the flat sides of the brushes against both sides of the icing to create a pyramid shape (ii). Rotate the brushes to the opposite sides, and repeat to flatten and shape the entire surface of the strawberry. Scoop the sides of the brushes just beneath the edges of the icing that are in contact with the parchment paper, and lift gently to pinch the icing at the base (iii). Pipe about ten strawberries, varying the size and shape of each slightly. Allow the transfers to dry completely.
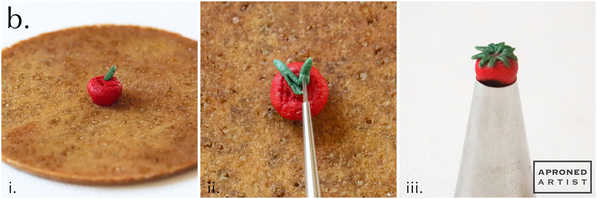
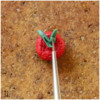
b. Once dry, remove the strawberry transfers from the parchment paper. Flip over a strawberry transfer so that the pointed end faces down, and find an item to brace it. (I used a cookie with a small hole in the center. As pictured in the rightmost photo below, the narrow hole of a round tip, such as a Wilton #10 tip, also works well.) Using stiff-consistency green royal icing and a PME #24 tip (or equivalent), pipe a small leaf extending from the top of the strawberry (i). Press a tiny liner paint brush into the icing that contacts the strawberry to widen and indent that end (ii). Pipe and shape more little leaves to create a circle of leaves (also known as the “calyx”) at the top of the strawberry (iii). Repeat this process with the remaining strawberries.
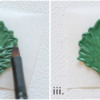
c. Print out the Strawberry Barrel Cookie Template (in "Attachments" at the end of this post), and cut small squares of parchment paper just larger than the leaf template. (Using very small pieces of parchment paper will encourage the paper to curl, adding dimension to your leaves.) While holding a small square of parchment paper over the leaf template, use stiff-consistency green royal icing and a PME #2 tip (or equivalent), to outline the leaf and loosely fill the outline with lines of icing (i). Spread the icing within the outline of the leaf using a damp, small angled flat paint brush (ii). Use the tip of the paint brush to drag indentations within the icing that reach from the serrated edge toward the center vein (iii). Repeat this process, creating about 50 leaf transfers. Vary the side of the parchment paper that you use so that the leaves curl in different directions. Allow the transfers to dry completely. To emphasize the rippling nature of the leaves, paint the indentations of the dry leaves using a tiny liner paint brush and green gel paste coloring diluted with water (iv).
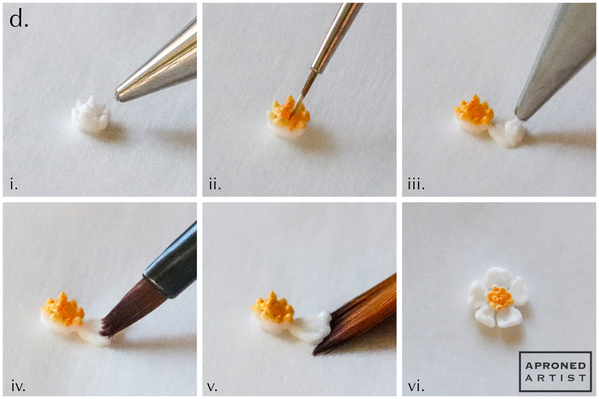
d. Use stiff-consistency white royal icing and a PME #0 tip (or equivalent) to pipe the strawberry flowers. Pipe a small, dense pile of dots for the center of the strawberry flower onto a square of parchment paper (i). Allow the icing to dry before painting the dots with a mixture of yellow and white gel paste colorings (ii). With the same icing and tip, roughly pipe a small petal adjacent to the flower’s center (iii). Use a barely damp paint brush to flatten and smooth the petal (iv). Let the icing harden for about 15 seconds or until malleable but no longer sticky. Slide the edge of a flat paint brush beneath the petal and lift gently to curl the petal up toward the flower’s center (v). Repeat this process, creating five petals in total for each flower (vi). Make about ten flower transfers, varying the sizes slightly.
Step 2: Construct barrel cookie
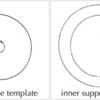
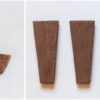
Use the templates from the Strawberry Barrel Cookie Template to hand-cut 12 panel cookies, one barrel base cookie, one inner support cookie, and one lid cookie. Bake and cool all of the cookies. Set aside the barrel base, inner support, and lid cookies for now.
a. Flip over the panel cookies so that the flat sides that were in contact with the baking sheet now face up. Work on one cookie at a time. Apply stiff-consistency brown royal icing to the entire surface of the panel with a damp flat paint brush. Use long vertical brush strokes to create the wood grain. Add a tiny bit more water with the brush if you want a less defined texture. If desired, use the pointed tip of the paint brush to add knots or other imperfections in the wood. Repeat with the other panel cookies.
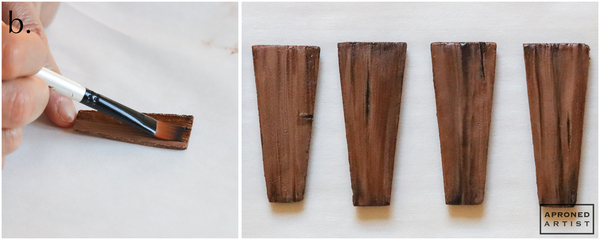
b. Apply undiluted brown gel paste coloring to just a few bristles of a damp flat paint brush. Starting at the top of one panel, drag the brush down to the bottom of the panel in a single stroke to create streaks of color. Rinse your brush, reapply gel paste coloring to a few bristles, turn the cookie 180 degrees (so that the bottom is now on top), and drag the brush in a vertical line adjacent to the first. Continue alternating the direction of your strokes (always vertically) until the entire panel is covered. Use a tiny liner paint brush dipped in the undiluted gel paste coloring to darken the imperfections in the wood. Allow the panels to dry completely.
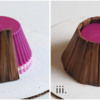
c. Stack three silicone cupcake liners, and place them upside down (with the opening at the bottom). Using stiff-consistency brown royal icing and a PME #2 tip (or equivalent), pipe a line of icing on one of the sides of a panel cookie (i). Press the icing into the side of another panel cookie and rest the cookies against the cupcake liners so that the small ends are pointing up (ii). Pipe icing along the side of another panel, and gently press it against the side of one of the cookies leaning against the cupcake liners. Continue attaching cookies in this manner until all of the cookies are attached (iii). Let the icing dry completely before painting the indentations between the panels using a tiny liner paint brush and undiluted brown gel paste coloring.
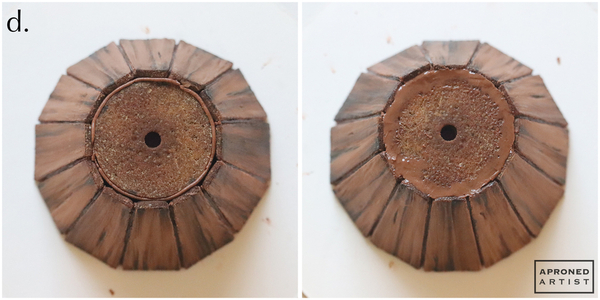
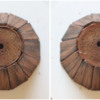
d. First, check the fit of the barrel base cookie. Without applying any icing, place the cookie inside the circle at the top of the cupcake liners created by the attached panel cookies. (The barrel base cookie has a small hole in the center into which you can slip the end of a paint brush or scribe tool to act as a lever to easily remove the cookie after confirming its fit.) If the cookie is too large, file the edges with a food-safe file until it fits within the circle. Using stiff-consistency brown royal icing and a PME #2 tip (or equivalent), pipe a line of icing around the side of the barrel base cookie, and place it within the circle to close the bottom of the barrel. Use a damp flat paint brush to smooth the icing and fill in any cracks. Allow the icing to dry completely.
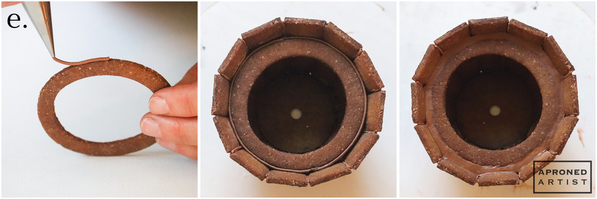
e. Carefully turn over the barrel, and remove the cupcake liners. Using stiff-consistency brown royal icing and a PME #2 tip (or equivalent), pipe a line of icing around the side of the inner support cookie, and place it within the opening of the barrel so that it sits level about 1/2 inch (1.3 centimeters) below the rim of the barrel. Add more icing to fill any cracks between the barrel and the outside edge of the support cookie. Smooth the icing with a damp flat paint brush, and allow it to dry completely. (The inner support cookie will support the lid of the barrel.)
Step 3: Decorate lid, and assemble final cookie
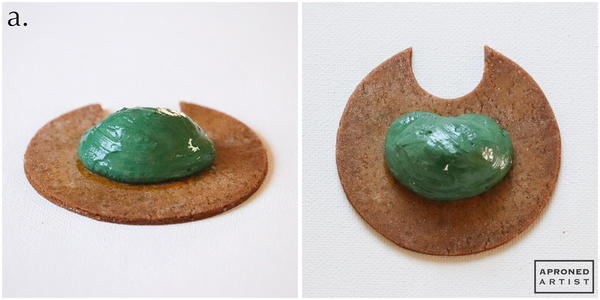
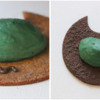
a. Using stiff-consistency green royal icing and a Wilton #12 tip (or equivalent), pipe a large kidney-shaped mound of icing on the center of the lid, and smooth it with a damp flat paint brush. This icing will provide an inner support for the strawberry bush. It should roughly follow the perimeter of the cookie, but leave enough empty border so that you can attach the leaves to the mound without them extending beyond the edge of the cookie. Allow the icing to dry completely.
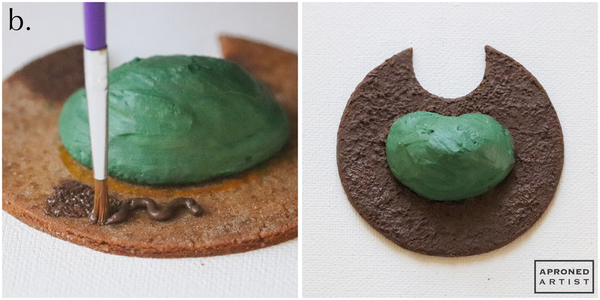
b. Using stiff-consistency dark brown royal icing and a PME #2 tip (or equivalent), pipe a small squiggle of icing on an area surrounding the green mound piped in Step 3a. Use a round paint brush to stipple the icing, dabbing vertically to create a rough, soil-like texture. Repeat, piping and stippling, until the entire surface surrounding the green mound is covered.
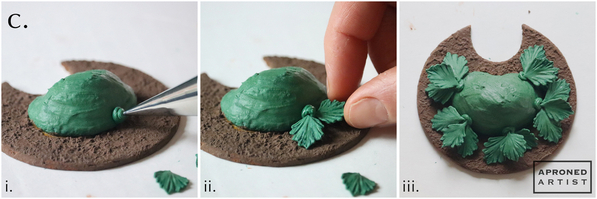
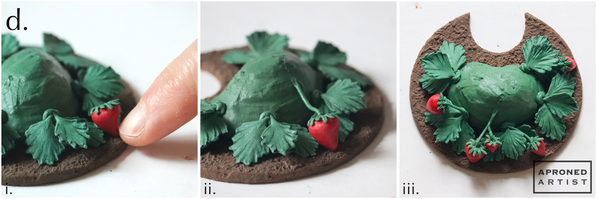
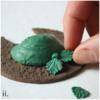
c. Using stiff-consistency green royal icing and a PME #1.5 tip (or equivalent), pipe a large dot of icing at the base of the green mound piped in Step 3a (i). Insert two leaves into the icing so that they fan out in opposite directions (ii). Insert a third leaf above the center of the two leaves. Continue attaching leaves in threesomes around the base of the lid (iii).
d. Using the same icing and tip, pipe a small dot of icing on a lower leaf, and gently press a strawberry transfer into the icing (i). Pipe a stem from the center of the strawberry calyx to the green mound (ii). Add a few more strawberries and stems around the lower tier of leaves (iii).
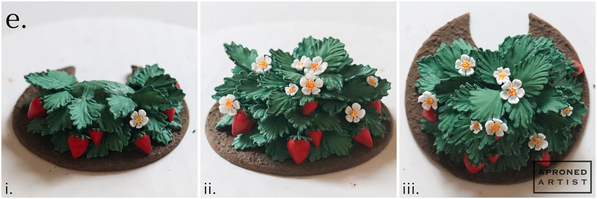
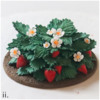
e. Continue adding more tiers of leaves in threesomes (just as you did in Step 3c). Begin attaching a few flower transfers with a small dab of icing (i). As you add tiers of leaves, add more flowers and fewer strawberries the higher you go (ii). When you get to the top of the bush, disguise any visible connections with flower transfers (iii).
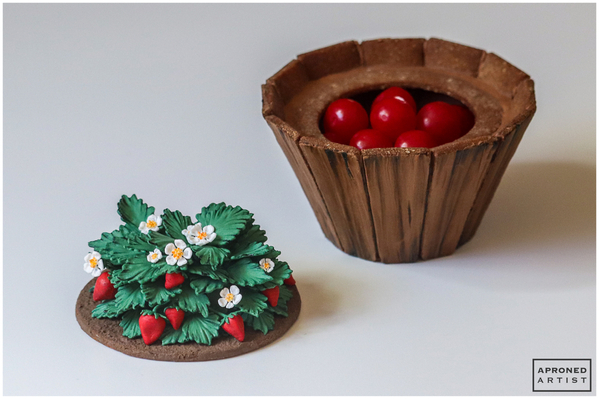
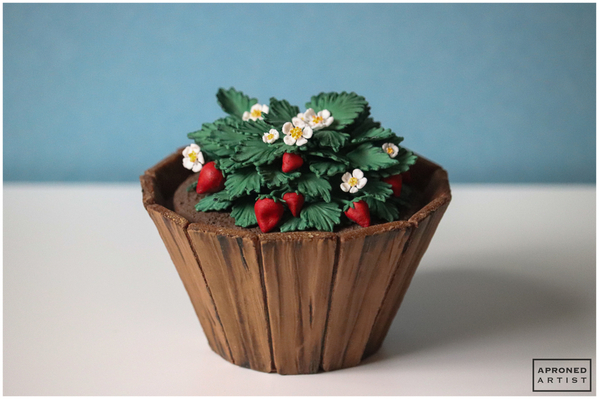
f. Fill your barrel cookie with strawberry-flavored candies or your preferred treat. Pick up the lid using the finger hole in the back of the cookie, and place it on top of the barrel.
Finished! I hope you are all enjoying strawberry season as much as we are.


Samantha Yacovetta began cookie decorating in 2013. While working at a local bakery, Samantha became captivated by cookie art when a customer requested princess-themed cookies. Attracted initially to the precision of cookie decorating, Samantha soon found that the limitless design opportunities turned it into her artistic passion. Samantha began regularly stocking the bakery case with decorated cookies and for several years sold cookies through her own company, Aproned Artist, a cottage food operation. Having retired from the business life, Samantha now enjoys making cookies just for fun from her home in San Jose, California, USA. To learn more about Samantha, please check out her Cookie Connection portfolio, her Facebook page, and her past Every Little Detail tutorials here.
Photo and cookie credits: Samantha Yacovetta
Note: Every Little Detail with Aproned Artist is a monthly Cookie Connection blog feature written by Samantha Yacovetta focused on the special little details that make big statements in cookie design. This article expresses the views of the author, and not necessarily those of this site, its owners, its administrators, or its employees. To read all of Samantha's past Every Little Detail tutorials, click here. And to see all of Cookie Connection's tutorials, click here.












Comments (18)