 There are so many reasons to love sunflowers. Their cheerful, sunny yellow petals always brighten my mood, and their late-summer blooms are a welcome reminder that autumn is just around the corner. But perhaps the best thing about sunflowers is the mesmerizing geometry of their seeds. The arrangement of their seeds follows the Fibonacci sequence, one of the most famous mathematical formulas. Each number in the series is the sum of the two numbers that precede it. Ultimately, this sequence is responsible for the striking spirals that radiate from the center of the flower. Luckily for us, you don’t have to be a mathematician to make this sunflower cookie.
Supplies:
- Sunflower Seeds and Petals Template (see “Files” in “Attachments” at the end of this post)
- Parchment paper
- Royal icing (I used AmeriColor gel paste coloring to tint the icing):
- Stiff-consistency light green (4 parts Gold/2 parts Lemon Yellow/1 part Taupe/1 part Electric Green)
- Stiff-consistency gold (4 parts Gold/2 parts Lemon Yellow/1 part Taupe)
- Stiff-consistency light orange (4 parts Gold/2 parts Lemon Yellow/2 parts Apricot/1 part Taupe)
- Stiff-consistency yellow (5 parts Lemon Yellow/1 part Apricot)
- Tips: PME #1, 1.5, 2 (or equivalents)
- Medium flat paint brush
- AmeriColor Apricot gel paste coloring (or equivalent), for painting
- 2 3/4-in (6.9-cm) round cookie
- 5-in (12.7-cm) square cookie flooded with blue royal icing (4 parts Teal/2 parts Electric Blue/1 part Regal Purple)
Step 1: Pipe sunflower seeds royal icing transfer
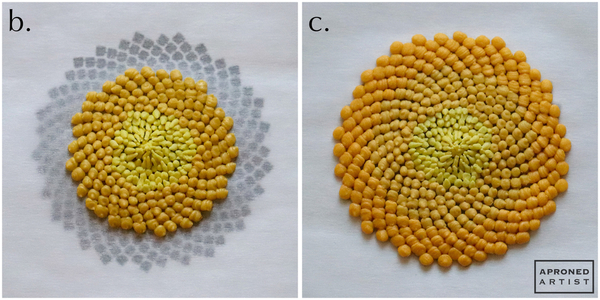
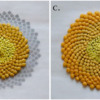
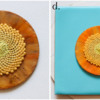
a. Print out the Sunflower Seeds and Petals Template (located in “Files” in “Attachments” at the end of this post), and tape a square of parchment paper over the seed spiral template. For the center of the seed spiral (the green section of the template), you will need stiff-consistency light green royal icing and a PME #1 tip (or equivalent). Starting from the center, pipe a few densely clustered teardrops of icing, tilting them inwards to form a small peak at the very center of the flower (i). Pipe more teardrops around the center that lean in to slightly overlap the inner peak. Continue in this fashion, covering the entire green section of the template (ii). Don’t worry too much about creating a visible spiral pattern for this center portion; just make sure that all of the teardrops are making direct contact with each other so that the transfer remains intact when it’s removed from the parchment paper.
b. To cover the black section of the template, use stiff-consistency gold royal icing and a PME #1 tip (or equivalent). Pipe slightly larger beads of icing that follow the dots in the template to create five concentric rings around the inner seeds piped in Step 1a. The seeds in this section should not overlap as they did in the center, but they should still be in contact with one another to maintain the structural integrity of the transfer.
c. To cover the red section of the template, use stiff-consistency light orange royal icing and a PME #1.5 tip (or equivalent). Pipe even larger beads of icing that follow the dots in the template for five more rings. Allow the transfer to dry completely before carefully peeling the parchment paper away from the transfer.
Step 2: Pipe sunflower petal transfers
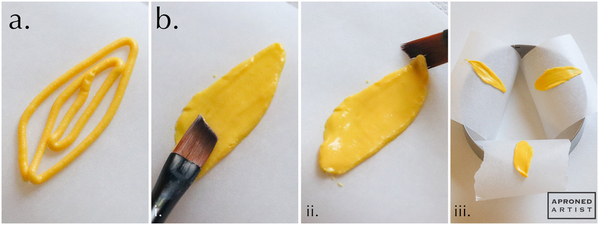
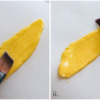
a. Cut several 2-inch (5.1-centimeter) squares of parchment paper for the petal transfers. If your parchment paper curls, orient the square of parchment paper so that the curl is convex (concave side is facing down) and curls from the top to the bottom (rather than side to side). Hold the parchment paper square in this position over the petal template, and use stiff-consistency yellow royal icing and a PME #2 tip (or equivalent) to pipe the outline of the petal. (Again, pipe the petal from top to bottom, so it follows any curl in the paper.) Loosely fill the inside of the petal with a few lines of icing.
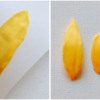
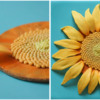
b. Use a damp flat paint brush to flatten, combine, and smooth the icing. Brush lengthwise so that any visible lines mimic the subtle ridges of real petals (i). If the icing is not smooth enough, add a tiny bit more water with your paint brush. Be careful not to add too much water, or you will lose the sharp edges and ridges of the petal. If you want to create a curl at the top of the petal, allow the icing to set for a minute, slide the flat end of the brush beneath the icing at the tip, and lift gently (ii). Place the petal with the parchment square over the rim of a cookie cutter or a baking sheet so that it dries with a slight curl (iii). Repeat to create about 40 petals in total, varying the size and shape of the petals slightly. (I’ve included a few petal shapes and sizes in the template, but feel free to make more variations as desired.) Let the petals dry completely.
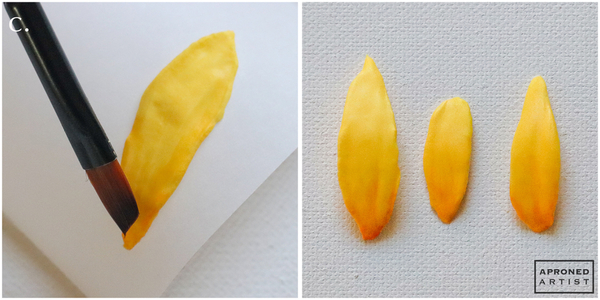
c. Dilute a small dab of Apricot gel paste coloring with water. Paint the base of the petals (the part that will connect to the center of the flower) with the diluted coloring, and blend it towards the top of the petal with a clean, damp paint brush.
Step 3: Assemble sunflower cookie
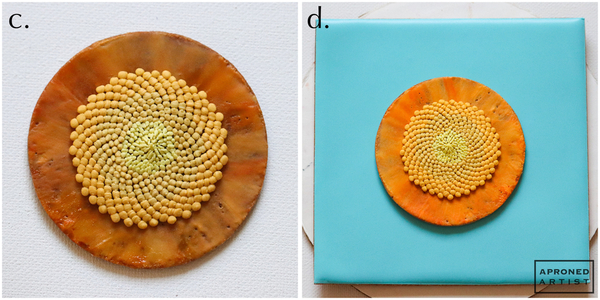
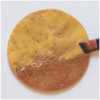
a. Pipe a squiggle of stiff-consistency light orange royal icing onto the 2 3/4-inch (6.9-centimeter) round cookie. Use a damp flat paint brush to spread and smooth the icing into a thin, slightly transparent layer. Repeat to cover the entire cookie. Don’t worry about making it look perfect; almost all of the cookie will be covered by the seed and petal transfers. Allow the icing to dry completely.
b. Paint the icing with a thin coat of diluted Apricot gel paste coloring.
c. Pipe a dab of icing in the center of the round cookie, and place the seeds transfer on top of the icing to adhere the transfer to the cookie.
d. Pipe a dab of icing in the center of the flooded 5-inch (12.7-centimeter) square cookie, and place the round cookie on top of the icing to adhere the two cookies.
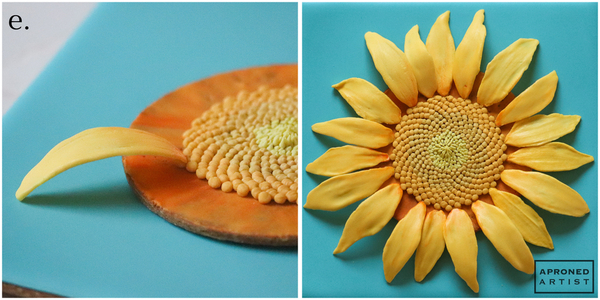
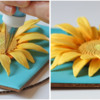
e. Using stiff-consistency light orange royal icing and a PME #1.5 tip (or equivalent), pipe a bead of icing adjacent to the outer ring of seeds. Place the painted base of a petal transfer onto the icing. Continue attaching petals in this manner, leaving a small amount of space between the bases of the petals so you will have room to attach the next tier of petals.
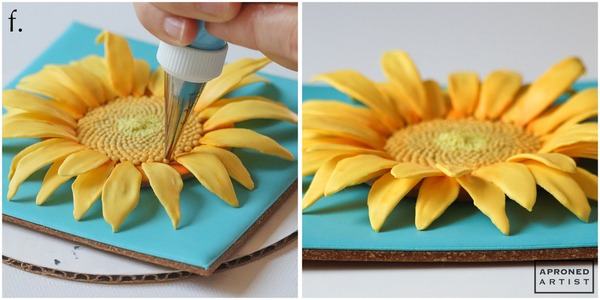
f. Pipe a bead of light orange icing in the gap adjacent to the outer ring of seeds (between two attached petals). Place the painted base of a petal transfer onto the icing at a slight angle so that it sits above the first tier of petals. Continue attaching petals until all of the gaps have been filled.
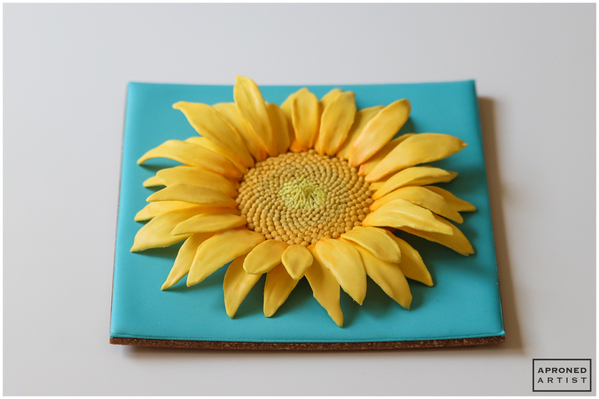
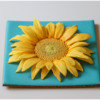
Finished! Math has never looked so good.
Source: Jaymi Hemibuch, Nature Blows My Mind! The Hypnotic Patterns of Sunflowers, Treehugger (2020)


Samantha Yacovetta began cookie decorating in 2013. While working at a local bakery, Samantha became captivated by cookie art when a customer requested princess-themed cookies. Attracted initially to the precision of cookie decorating, Samantha soon found that the limitless design opportunities turned it into her artistic passion. Samantha began regularly stocking the bakery case with decorated cookies and for several years sold cookies through her own company, Aproned Artist, a cottage food operation. Having retired from the business life, Samantha now enjoys making cookies just for fun from her home in San Jose, California, USA. To learn more about Samantha, please check out her Cookie Connection portfolio, her Facebook page, and her past Every Little Detail tutorials here.
Photo and cookie credits: Samantha Yacovetta
Note: Every Little Detail with Aproned Artist is a monthly Cookie Connection blog feature written by Samantha Yacovetta focused on the special little details that make big statements in cookie design. This article expresses the views of the author, and not necessarily those of this site, its owners, its administrators, or its employees. To read all of Samantha's past Every Little Detail tutorials, click here. And to see all of Cookie Connection's tutorials, click here.




Comments (20)