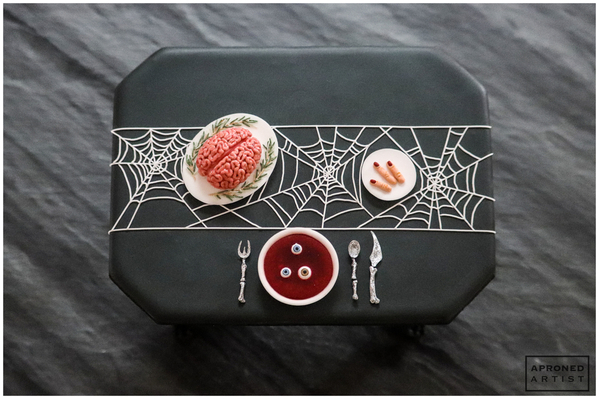
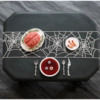
 This tutorial combines two of my favorite things: miniatures and Halloween. The result is a spooky play on my previous miniature projects, Breakfast in Bed for Mom and Dad’s Breakfast. Complete with eyeball soup, roast brain, and ladyfingers, a monster’s menu has never looked so cute!
Supplies:
- Acetate (or parchment paper)
- Royal icing (I used AmeriColor gel paste to color the icing):
- Flooding-consistency white
- Stiff-consistency light brown (3 parts Warm Brown/1 part Leaf Green)
- Stiff-consistency light green (add white icing to the dark green icing below)
- Stiff-consistency dark green (1 part Leaf Green/1 part Electric Purple/1 part Gold)
- Stiff-consistency pink (2 parts Super Red/1 part Leaf Green)
- Flooding-consistency dark red (3 parts Super Red/1 part Maroon)
- Stiff-consistency peach (Ivory with touch of Super Red)
- Thick flooding-consistency white
- Thick flooding-consistency black (Super Black)
- Stiff-consistency black (Super Black)
- Flooding-consistency black (Super Black)
- Tips:
- Parchment paper, cut roughly into 2-in (5-cm) squares
- Large flat paint brush
- Small flat paint brush
- Corn syrup mixed with touch of red gel paste
- Scribe tool (or equivalent)
- Tiny liner paint brush
- Gel pastes for painting: Wilton Delphinium Blue, AmeriColor Super Black, AmeriColor Bright White, Wilton Brown
- 1 1/4-in (3.2-cm) disc-shaped silicone mold
- Small spatula with rounded silicone handle
- Two large, heavy containers or boxes
- Silver luster dust mixed with alcohol
- Table Cookie Template (See “Files” in “Attachments” at the end of this post.)
- Cookie dough that bakes with minimal spread
- Small sharp knife
*Notes on consistency: Thick flooding-consistency icing should be thick enough that it won’t settle without some help from your scribe tool.
Step 1: Create roast brain transfer
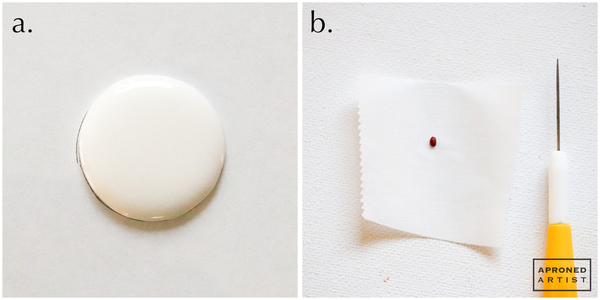
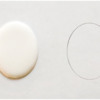
a. To create a piping guide for the roast brain platter, draw a 2-inch-long (5-centimeter-long) oval on a piece of paper, and place it beneath the acetate (or parchment paper). Pipe the oval platter with flooding-consistency white royal icing and a PME #2 tip (or equivalent). Allow the icing to dry completely before carefully peeling the acetate (or parchment paper) from the transfer. Flip over the transfer so that the side that was in contact with the acetate (or parchment paper) now faces upwards.
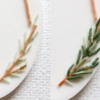
b. Using stiff-consistency light brown royal icing and a PME #0 tip (or equivalent), pipe rosemary stems that follow the curves on the vertical sides of the platter. Pipe a few tiny needles extending from the stems using stiff-consistency light green royal icing and a PME #00 tip (or equivalent). Add a few tiny needles of stiff-consistency dark green royal icing using a PME #00 tip (or equivalent). Continue adding needles, varying the two shades of green icing and overlapping needles occasionally until the stems look like sprigs of rosemary.
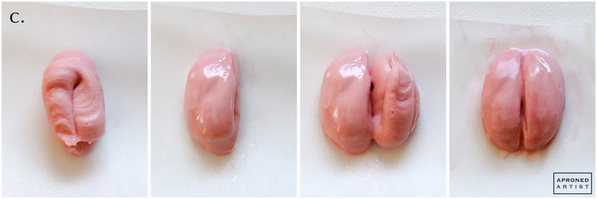
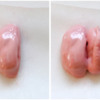
c. On a small square of parchment paper, use stiff-consistency pink royal icing and a Wilton #12 tip (or equivalent) to pipe an ovular blob of icing about 1 inch (2.5 centimeters) long. Use a wet, large flat paint brush to smooth the icing and shape it into the brain’s left hemisphere. Pipe another ovular blob of icing directly adjacent to the left hemisphere of the brain. Again, use the paint brush to shape it to mirror the left hemisphere. If necessary, use the tip of the flat paint brush to accentuate the divide between the left and right hemispheres. Allow the icing to dry completely.
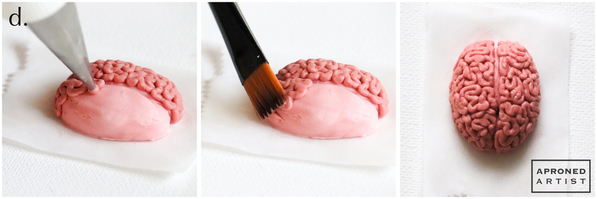
d. Once dry, use the same pink icing and a PME #2 tip (or equivalent) to pipe a dense squiggle of icing on a section of one hemisphere. Use a damp, large flat paint brush to slightly flatten the squiggle. Continue piping squiggles and flattening them with the paint brush until one hemisphere is completely covered. Repeat with the opposite hemisphere, being careful to maintain the divide between the two hemispheres. Allow the squiggle texture to dry completely. Attach the brain to the platter with a dab of pink icing.
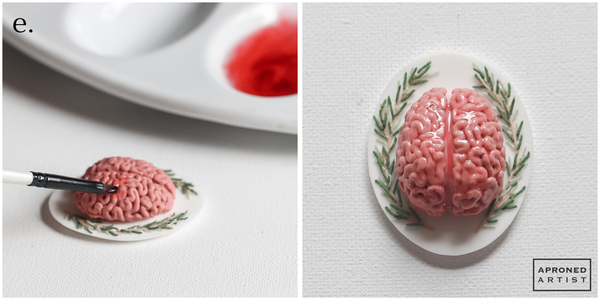
e. Use a small flat paint brush to apply a thin layer of red-tinted corn syrup to the brain so that it looks gooey.
Step 2: Create ladyfingers transfer
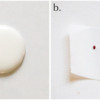
a. To create a piping guide for the plate, draw a 3/4-inch (1.9-centimeter) circle on a piece of paper, and place it beneath acetate (or parchment paper). Pipe the plate with flooding-consistency white royal icing and a PME #2 tip (or equivalent). Allow the icing to dry completely before carefully peeling the acetate (or parchment paper) from the transfer. Flip over the transfer so that the side that was in contact with the acetate (or parchment paper) now faces upwards.
b. Using flooding-consistency dark red royal icing and a PME #1 tip (or equivalent), pipe a few tiny fingernail-shaped dabs of icing on a square of parchment paper. The fingernails should be very small, only a couple of millimeters in length (see the rightmost picture below with a scribe tool for reference). Allow the icing to dry completely before removing the tiny transfers from the parchment paper.
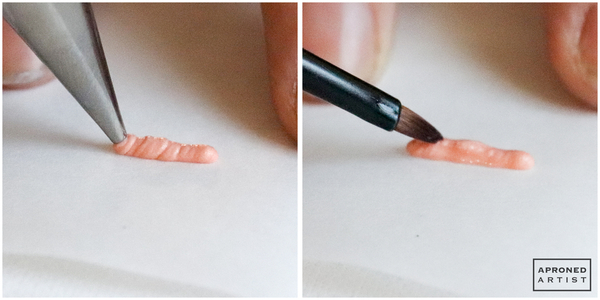
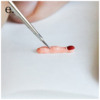
c. Using stiff-consistency peach royal icing and a PME #2 tip (or equivalent), pipe a roughly finger-shaped line of icing (thinner at the top, slightly wider at the bottom, and a bit of extra icing in the middle for a knuckle) on a square of parchment paper. Use a wet, small flat paint brush to shape and smooth the finger.
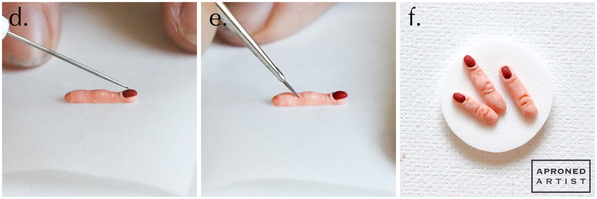
d. While the icing is still wet, place the fingernail transfer on the tip of the finger. Press it into the icing gently using a scribe tool (or equivalent) until it is slightly embedded.
e. Add a few creases in the finger around the knuckle with a damp, tiny liner paint brush.
f. Repeat Steps 2c through 2e to create a couple more ladyfingers. Once dry, remove the ladyfinger transfers from the parchment paper, and attach them to the small plate with dabs of icing.
Step 3: Create eyeball soup transfer
a. Using thick flooding-consistency white royal icing and a PME #3 tip (or equivalent), pipe several small, round beads of icing on a piece of parchment paper. The beads should measure about 1/8 to 1/4 inch (0.3 to 0.6 centimeters) in diameter. Allow the beads to dry completely.
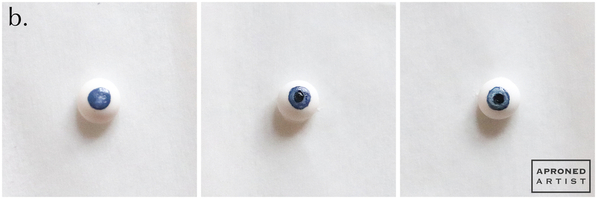
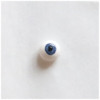
b. If the beads detach themselves from the parchment paper, reattach them with small dabs of icing before painting. To paint the eyeball, mix a small dab of blue gel paste coloring with a touch of white gel paste coloring. Use a tiny liner paint brush to paint a blue circle in the center of the transfer. Add a small circle of undiluted black gel paste coloring to the center of the blue circle. Finally, paint around the outside of the black pupil with undiluted white gel paste coloring so that the perimeter of the blue circle remains dark, but the interior of the blue circle becomes a lighter blue. Repeat this process to create several eyeballs for the soup. If desired, use brown gel paste coloring in place of the blue to vary the eye color.
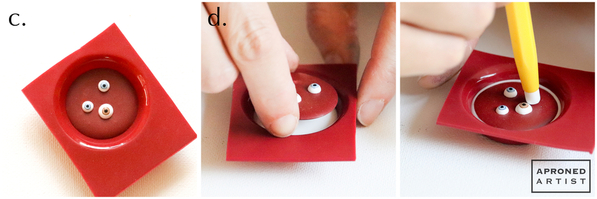
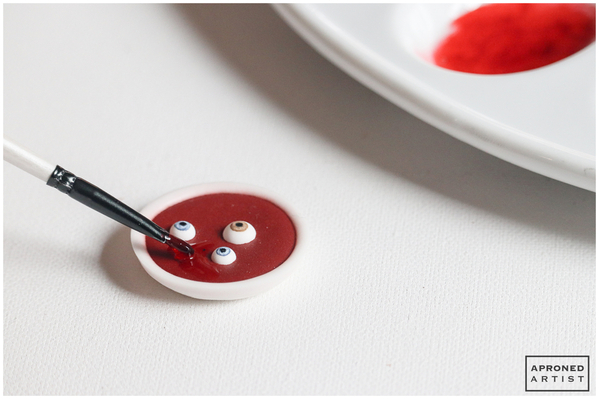
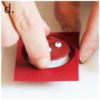
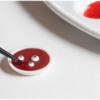
c. To create the soup, fill one cavity of the silicone disc mold with a thin layer of flooding-consistency dark red royal icing (it should be just enough icing to create a thin wafer that fills only the base of the mold). While the icing is still wet, add three eyeball transfers, pushing them into the icing with the handle of a scribe tool (or equivalent). Once dry (I waited 24 hours), carefully remove the wafer of icing from the mold.
d. To create the soup bowl, fill a clean cavity of the silicone disc mold about half full with thick flooding-consistency white royal icing. While the icing is still wet, place the soup wafer on the surface of the icing. Use the handle end of a scribe tool (or equivalent) to gently push the wafer into the white icing until the icing creates a shallow rim around the wafer. Allow the icing to dry completely (I waited two days) before removing the soup bowl from the mold.
e. Use a small paint brush to transfer globs of red-tinted corn syrup to the top of the soup wafer. Carefully guide the corn syrup around the eyeballs and rim with the tip of the brush until there is a uniform layer of corn syrup.
Step 4: Create silverware transfers
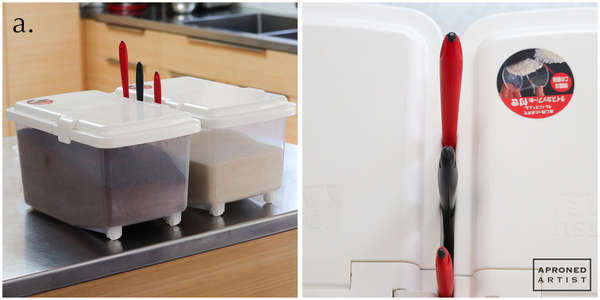
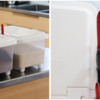
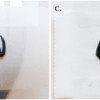
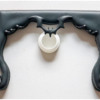
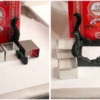
a. Brace a small spatula with a rounded silicone handle between two large, heavy containers so that the rounded tip of the handle is facing upwards. Pipe a 1/4-inch (0.6-centimeter) oval on the tip of the spatula using thick flooding-consistency black royal icing and a PME #1.5 tip (or equivalent). This will be the head of the spoon. Allow the icing to dry completely before gently removing the transfer from the handle. (I piped several spoon heads, however, only one is necessary for this project.) Flip over the transfer so that the concave side (the side that was in contact with the handle) faces upwards.
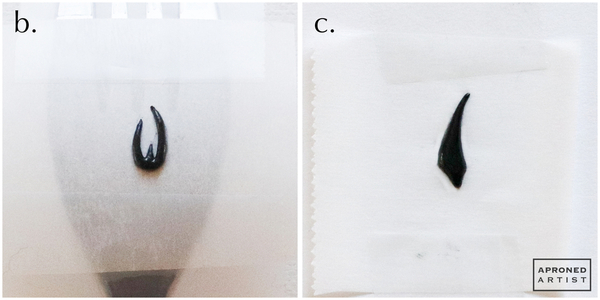
b. For the head of the fork, use the same icing and tip to pipe three small tines onto a small square of parchment paper. The tines should look sinister and uneven like the head of a devilish trident. (I taped my parchment square to the arch of a real fork; I was hoping to achieve some curve, however, I don’t think it really made much of a difference.) Allow the icing to dry before removing it from the parchment paper. Flip over the transfer so that the flat side (the side that was in contact with the parchment paper) faces upwards.
c. On another square of parchment paper, pipe the head of a knife about 3/4 inch (1.9 centimeters) long. The knife should look more like a dagger than a butter knife. Keep in mind that we’ll be flipping over the transfer to use the flat side, so make sure you pipe it in reverse. Allow the icing to dry before removing the knife head from the parchment paper. Flip over the transfer so that the flat side (the side that was in contact with the parchment paper) faces upwards.
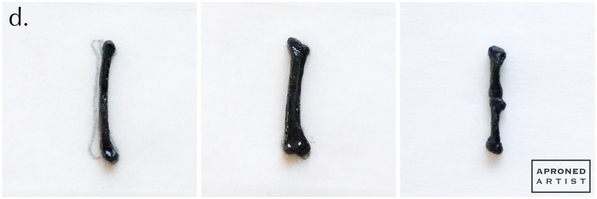
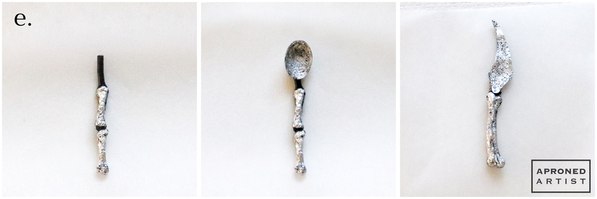
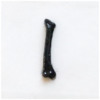
d. Use stiff-consistency black royal icing and a PME #1.5 tip (or equivalent) to pipe the handles for the silverware. Draw a bone shape measuring about 3/4 inch (1.9 centimeters) on the back of a parchment square. Flip over the square, and pipe the right half of the bone. Then, pipe the left side of the bone, slightly overlapping the right. This will be the handle for the knife. For the fork handle, use the same process to pipe two small bones stacked vertically. Pipe another stacked bone handle for the spoon. When all of the pieces are dry, paint the flat side of the fork and knife, the concave side of the spoon, and the textured side of the handles with silver luster dust.
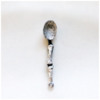
e. To attach the fork and spoon heads to their handles, use stiff-consistency black icing and a PME #1.5 tip (or equivalent) to pipe a thin, short line on a clean parchment square. Lay the handle on one end of the icing. Leave a small portion of the line exposed, and press the head into the other end of the icing until it sits at a slight angle (like a real fork or spoon). For the knife, lay the handle on one end of the icing. Lay the head on the other end of the icing so that its end is flush against the handle (no line exposed). Once the icing dries, paint any exposed black icing with more silver luster dust.
Step 5: Create and decorate table pieces
a. Print out the Table Cookie Template. (See “Files” in “Attachments” at the end of this post.) Cut out the shapes, lay them on top of rolled cookie dough, and use a sharp knife to cut out dough for the tabletop, legs, and supports.
Note: I rolled all of my dough to a 1/8-inch (0.3-centimeter) thickness. Upon baking, I was worried that the thin table leg cookies would not be able to support the weight of the tabletop, so I stacked two cookies on top of each other to reinforce each leg and support piece. If you go this route, you will need four leg cookies and four support cookies. If you prefer, you can roll the dough to a 1/4-inch (0.6-centimeter) thickness for the table leg pieces, and cut only two leg cookies and two support cookies. I kept the dough thin, however, for the tabletop cookie to reduce the overall weight.
Bake the cookies (and, if desired, stack the appropriate cookies with icing in between to glue them together).
b. Using undiluted black gel paste coloring, paint the exposed sides of the cookies (everything but the top surface) so that you won’t be able to see any cookie peeking out when the table is assembled. Then, flood the top surface of each table piece with flooding-consistency black royal icing.
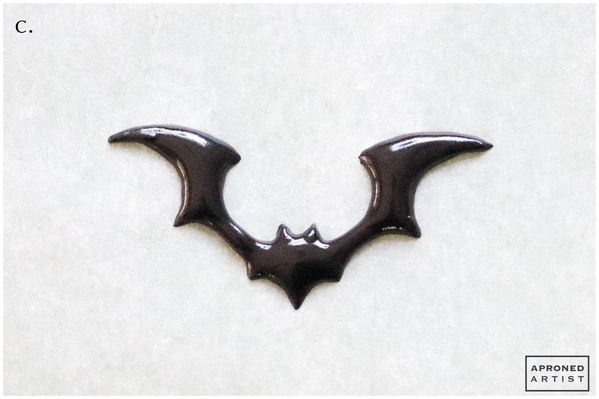
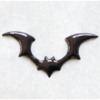
c. Place the bat transfer template (included in the Table Cookie Template) beneath a piece of parchment paper. Use thick flooding-consistency black royal icing and a PME #1 tip (or equivalent) to pipe the transfer. Allow the icing to dry completely before carefully peeling the parchment paper away from the transfer.
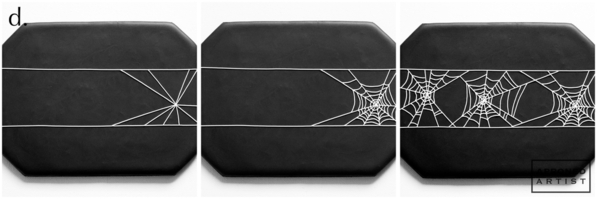
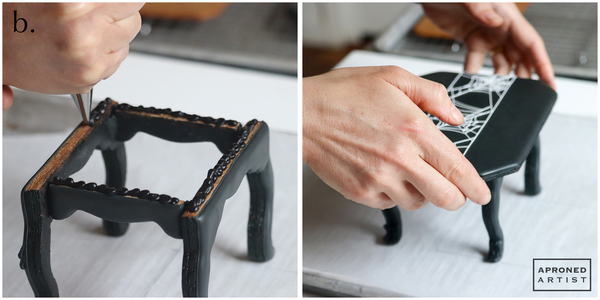
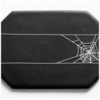
d. When the flooded tabletop cookie has dried, pipe a spiderweb table runner across the length of the table using stiff-consistency white royal icing and a PME #0 tip (or equivalent). Begin by piping a horizontal line about 1 inch (2.5 centimeters) above and 1 inch (2.5 centimeters) below the center of the table to create a border for the table runner. To pipe a spiderweb, pipe several lines extending from a single point to the edges of the borders. Connect these lines with somewhat irregular arcs that form concentric circles. Continue piping spiderwebs in this manner until you’ve covered most of the area within the borders.
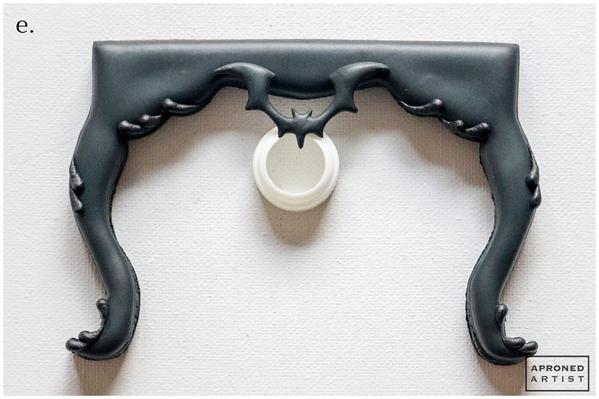
e. Pipe a few scroll details on the legs of the table with stiff-consistency black royal icing and a PME #3 tip (or equivalent). Attach the bat transfer piped in Step 5c to one leg with a dab of icing on each wing so that it hangs just below the center of the leg. Support the transfer with an icing coupler (or equivalent) while it dries.
Step 6: Assemble table cookie
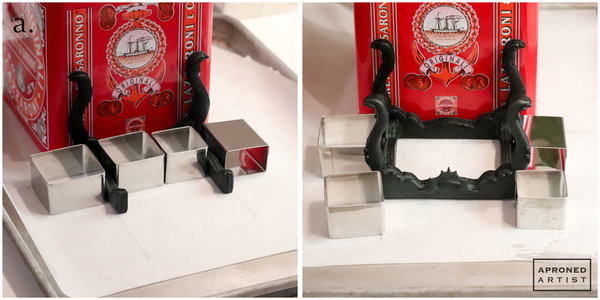
a. Assemble the table upside down. Attach one side of each of the two support cookies to the back of the rear leg cookie (the one that does not have the bat transfer) with stiff-consistency black royal icing. Use straight-sided objects (like large boxes or square cookie cutters) to help support the cookies while they dry. Allow the icing to set before attaching the front leg cookie with more stiff-consistency black icing. Allow the table leg assembly to dry completely before turning it right side up.
b. Pipe stiff-consistency black royal icing icing on the top edges of the leg assembly, and gently lower the tabletop cookie onto the legs.
c. Attach the soup, the silverware, the ladyfingers, and the roast brain transfers with small dabs of icing.
Finished! Let the feast begin!


Samantha Yacovetta began cookie decorating in 2013. While working at a local bakery, Samantha became captivated by cookie art when a customer requested princess-themed cookies. Attracted initially to the precision of cookie decorating, Samantha soon found that the limitless design opportunities turned it into her artistic passion. Samantha began regularly stocking the bakery case with decorated cookies and for several years sold cookies through her own company, Aproned Artist, a cottage food operation. Having retired from the business life, Samantha now enjoys making cookies just for fun from her home in San Jose, California, USA. To learn more about Samantha, please check out her Cookie Connection portfolio, her Facebook page, and her past Every Little Detail tutorials here.
Photo and cookie credits: Samantha Yacovetta
Note: Every Little Detail with Aproned Artist is a monthly Cookie Connection blog feature written by Samantha Yacovetta focused on the special little details that make big statements in cookie design. This article expresses the views of the author, and not necessarily those of this site, its owners, its administrators, or its employees. To read all of Samantha's past Every Little Detail tutorials, click here. And to see all of Cookie Connection's tutorials, click here.










Comments (30)