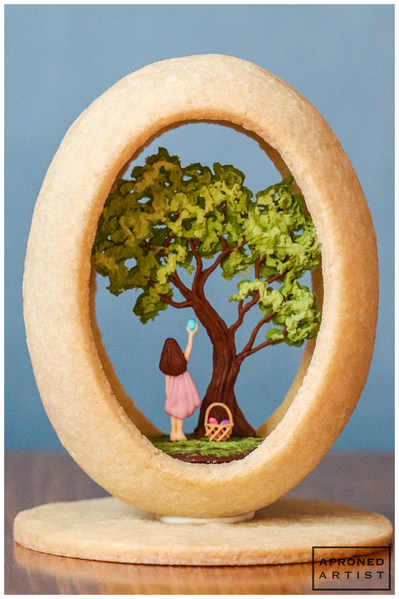
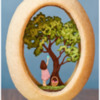
 Easter has been one of my favorite holidays since I was a child. I remember how my sisters and I would spend hours drawing designs on cooked eggs with crayons before carefully dipping them into little cups of dye. Once we had amassed dozens of brightly colored eggs, the treasure hunts would begin. We’d take turns hiding them for each other in the backyard, again and again until the daylight dwindled. For my family, Easter was never about candy, with one exception . . . One year, while we were busy decorating our eggs, my mom presented a panoramic sugar egg to each of us. I was instantly enraptured, marveling at the sparkling egg and the tiny scene hidden inside. It was a treasure too beautiful to eat (which was probably for the best since it was pure sugar). This panoramic cookie egg merges my two favorite Easter memories, and the result feels like a little window into my childhood.
Supplies:
- Cookie dough suitable for contoured cookies (I used Cookie Countess’ recipe, packing the flour like you would brown sugar and baking the shapes at 375° F/190° C. For more information about how to adapt recipes for contoured cookies, see @Julia M. Usher's video, here.)
- Large (5 3/4-in/14.6-cm) oval cookie cutter
- Medium (3-in/7.6-cm) oval or egg-shaped silicone mold (I used this oval one because I’d already purchased it for another purpose.)
- Small, sharp knife
- Small (2 3/4-in/7-cm) oval cookie cutter
- Tape
- Parchment paper
- Projector (optional)
- Panoramic Egg Design Template (See “Files” in “Attachments” at the end of this post.)
- Royal icing (Unless otherwise specified, I used AmeriColor gel paste to color the icing):
- Stiff-consistency dark green (3 parts Gold/1 part Leaf Green)
- Stiff-consistency brown (Chocolate Brown)
- Stiff-consistency medium green (add uncolored icing to a portion of the dark green icing)
- Stiff-consistency light green (add uncolored icing to a portion of the medium green icing)
- Medium stiff-consistency* white
- Medium stiff-consistency pale peach (2 parts Ivory/1 part Deep Pink)
- Medium stiff-consistency pink (Wilton Aster Mauve)
- Medium stiff-consistency brown (Chocolate Brown)
- Stiff-consistency tan (1 part Chocolate Brown/1 part Ivory)
- Stiff-consistency white
- Tips: PME #1.5, 1, 2 (or equivalents)
- Medium paint brush
- Scribe tool (or equivalent)
- Wilton gel pastes for painting: Teal, Rose, Violet
- Small paint brush
- Coffee mug and pastry tip (or equivalents) for supports during drying
- 1 (3 1/2-in/8.9-cm) baked circle cookie
*Notes on consistencies: For medium stiff-consistency, the icing should be thick enough that it won’t settle without some help from your scribe tool.
Step 1: Shape and bake cookies
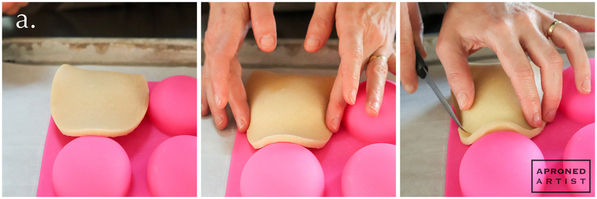
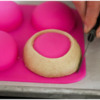
a. Cut an oval shape out of the cookie dough with the large oval cookie cutter. Gently drape it over the silicone mold, being careful not to stretch the dough. Use your fingers to guide the dough around the edges of the mold, but try not to indent the dough with your fingertips. Cut away any excess dough with a small, sharp knife.
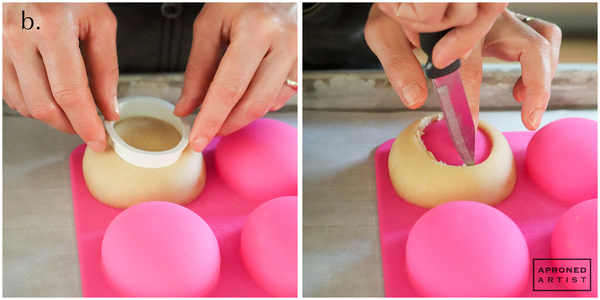
b. Press the small oval cookie cutter into the center of the dough on the silicone mold. You may need to rock the cutter slightly to make contact with the dough. As a result, the cutter may not cut cleanly like it would on a flat surface. Carefully peel away the smaller oval (we will not be using this interior oval dough). Clean up any rough edges with a small, sharp knife.
c. Repeat Steps 1a and 1b on top of another mold for the back of the panoramic egg. (Note: Traditional panoramic eggs only have a hole on one side; I chose to open up both sides to let in more light, however, feel free to skip Step 1b for the second cookie if you prefer.) Freeze the molded dough for several hours.
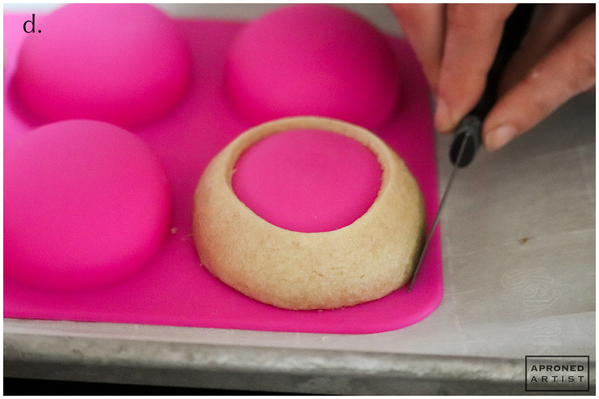
d. Bake the cookie dough for 5 minutes. Remove the cookies from the oven (the dough should be only partially baked and still malleable), and press the flat side of the paring knife against any bumps to smooth the edges. Return the cookies to the oven. Check the cookies again after another 5 minutes, and repeat the process if necessary. Continue baking until the cookies are fully cooked.
(Note: For an alternative method for shaping and baking panoramic egg cookies, see Julia's video, here. She trims the dough away from the base of the mold before baking to prevent a "foot" from forming as the dough spreads in the oven, and to eliminate the need for pressing out bumps during baking. She bakes without any freezing, but later files the bottom edge so it's completely flat.)
Step 2: Pipe tree transfer
a. Tape a piece of parchment paper to your work surface so that it doesn’t move or curl as you pipe the transfer. Project the tree from the Panoramic Egg Design Template (see “Files” in “Attachments” at the end of this post) onto the paper. Alternatively, print the template, and place the image beneath the parchment paper before taping it down.
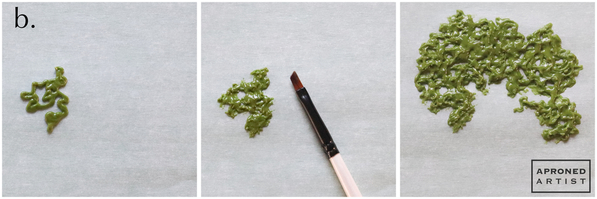
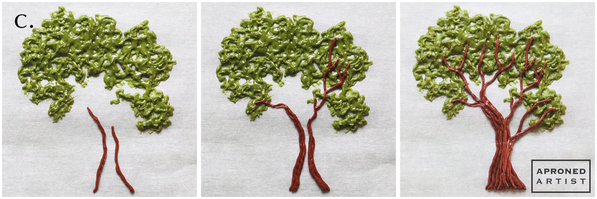
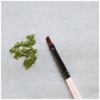
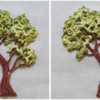
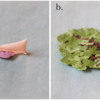
b. Using stiff-consistency dark green royal icing and a PME #1.5 tip (or equivalent), pipe a squiggly line over a section of the tree leaves. With a medium damp paint brush, dab at the icing to apply a bumpy texture. Repeat this process, piping and texturing the icing in sections until the entire crown of the tree is covered.
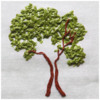
c. Pipe the trunk of the tree with stiff-consistency brown royal icing and a PME #1.5 tip (or equivalent). Begin with a line of icing along either edge of the trunk, starting from the bottom and extending to just below the branches. Then add two lines of icing adjacent to the first two, stretching up into the outer branches. Continue adding lines of icing on alternating sides, working from the outside of the trunk to the inside until the entire trunk is covered and all of the branches have been piped. You may want to add a few extra lines to the center of the trunk to add shape and to reinforce the transfer.
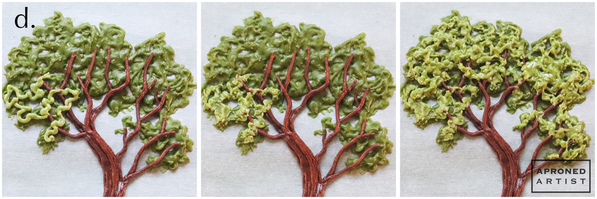
d. Use stiff-consistency medium green royal icing and a PME #1.5 tip (or equivalent) to add the next tier of leaves. Pipe a squiggly line of icing on top of a section of the dark green leaves and branches. Use the damp paint brush to dab at the icing, but leave some of the underlying dark leaves uncovered. Continue this process, piping and texturing the icing in sections across the crown of the tree.
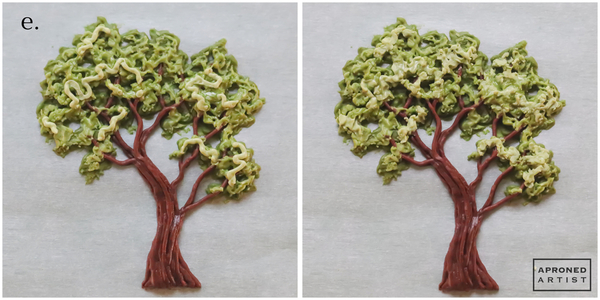
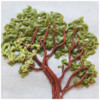
e. Add a few squiggles of stiff-consistency light green royal icing to the crown of the tree with a PME #1.5 tip (or equivalent). As before, dab at the icing with the paint brush to texture it. Set the transfer aside to dry completely before removing the tape and carefully peeling the parchment paper away from the transfer. (Do not pull on the transfer - only on the paper - or otherwise the transfer may break.)
Step 3: Pipe girl transfer
a. Project the girl from the Panoramic Egg Design Template (see “Files” in “Attachments” at the end of this post) onto a piece of taped parchment paper. Alternatively, print the template, and place the image beneath the parchment paper before taping it down.
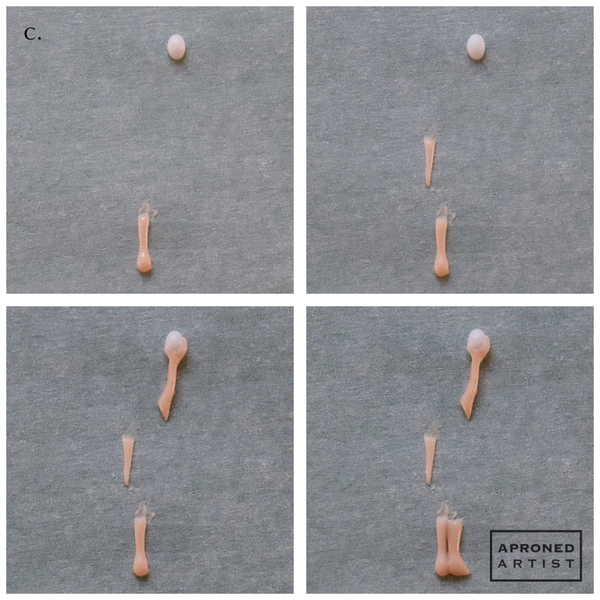
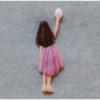
b. Pipe the small egg in the girl’s hand with medium stiff-consistency white royal icing and a PME #1 tip (or equivalent).
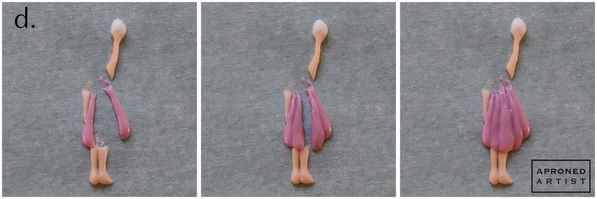
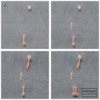
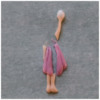
c. Using medium stiff-consistency pale peach royal icing and a PME #1 tip (or equivalent), pipe the left leg first so that it can set while you pipe the other elements. Use a damp paint brush to remove any excess icing at the top of the leg. Next, pipe the left arm. By now, the egg piped in Step 3b should have crusted (if not, wait a few minutes before proceeding). Pipe the right arm and the hand. Use a scribe tool or the damp paint brush to shape the icing so that the hand wraps around the egg. Once the left leg has crusted, pipe the right leg slightly overlapping the left. (Allowing crusting time between parts will keep those parts distinct.)
d. Using medium stiff-consistency pink royal icing and a PME #1.5 tip (or equivalent), pipe the outermost pleats of the girl’s dress. Remove any excess icing with a damp paint brush. Allow the icing to crust slightly before piping the two adjacent pleats. Again, allow the icing to crust slightly before piping the center pleat.
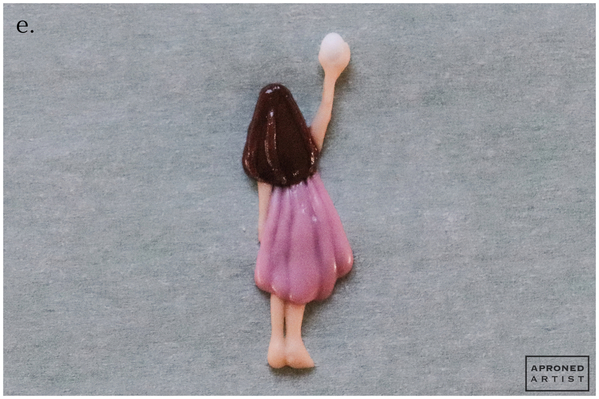
e. Pipe the girl’s hair with medium stiff-consistency brown royal icing and a PME #1.5 tip (or equivalent). Use the scribe tool to settle the icing before piping a few long strands of hair on top. Set the transfer aside to dry completely before removing the tape and carefully peeling the parchment paper away from the transfer.
Step 4: Pipe basket transfer and paint eggs
a. Project the basket from the Panoramic Egg Design Template (see “Files” in “Attachments” at the end of this post) onto a piece of taped parchment paper. Alternatively, print the template, and place the image beneath the parchment paper before taping it down.
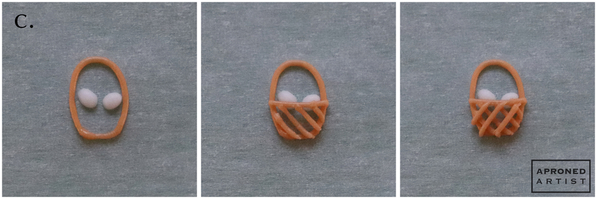
b. Pipe the two eggs with medium stiff-consistency white royal icing and a PME #1 tip (or equivalent).
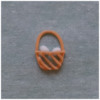
c. Using stiff-consistency tan royal icing and a PME #1 tip (or equivalent), pipe the perimeter of the basket. Pipe a horizontal line from one edge to the other, draping across the eggs. Add the basketweave in the bottom half of the basket by first piping parallel diagonal lines extending from top left to bottom right; then pipe opposing parallel lines over them. Allow the basket transfer to dry completely.
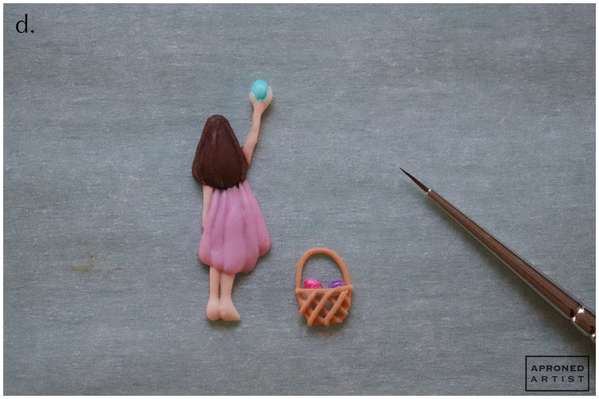
d. Once the transfers are dry, use a small paint brush to paint the eggs (the one in the girl’s hand in addition to the eggs in the basket) with teal, pink, and purple gel pastes diluted with water.
Step 5: Pipe support and base transfers
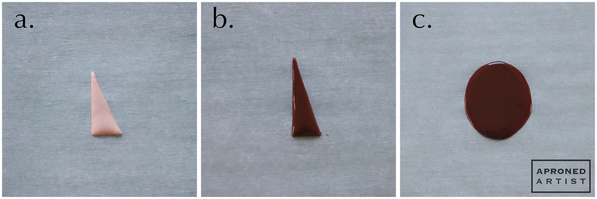
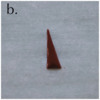
a. Prepare another piece of parchment paper for transfers. Using medium stiff-consistency peach royal icing and a PME #1 tip (or equivalent), pipe a right triangle measuring about 1/2 inch (1.5 centimeters) in height and 1/4 inch (0.75 centimeters) in width. This triangle will support the girl transfer.
b. Using medium stiff-consistency brown royal icing and a PME #1 tip (or equivalent), pipe another right triangle measuring about 3/4 by 1/4 inch (2 by 0.75 centimeters). This triangle will support the tree.
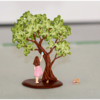
c. With the same brown icing and tip, pipe an oval measuring about 1 1/2 by 1 3/8 inches (4 by 3.5 centimeters). This oval will be the base of the scene. Allow all of the transfers to dry completely before carefully peeling the parchment away from them.
Step 6: Attach support transfers and assemble scene
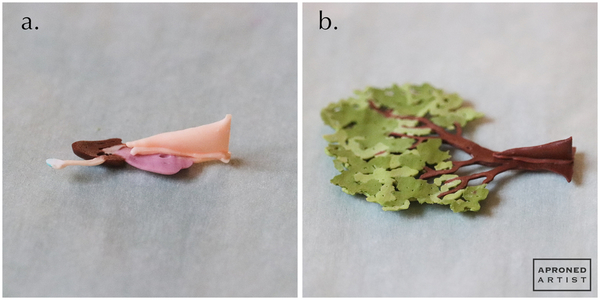
a. Carefully flip the girl transfer over so that the flat side that was against the parchment paper is now facing up. Pipe a line of medium stiff-consistency peach royal icing along the tall side of the peach triangle piped in Step 5a. Press the icing against the back of the girl transfer, lining up the short side of the triangle with the bottom of the girl’s feet (so that when we stand her upright, both her feet and the short side of the triangle will evenly touch the ground).
b. Repeat the process in Step 6a with the brown triangle and the tree. Flip over the tree, pipe a line of medium stiff-consistency brown royal icing along the tall edge of the brown triangle transfer, and press it against the back of the tree. Allow the icing on both transfers to set completely before proceeding.
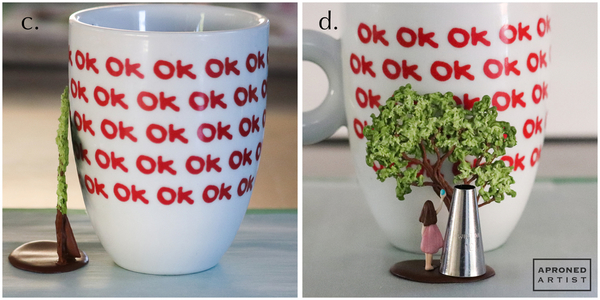
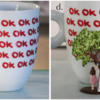
c. Orient the brown oval transfer so that the length runs horizontally. Pipe a line of medium stiff-consistency brown royal icing along the bottom of the tree transfer support. Attach the tree to the back right of the oval transfer. Use a coffee mug or similar item to support the tree while it dries.
d. Pipe a line of medium stiff-consistency brown royal icing along the bottom of the girl transfer support. Attach the girl to the oval transfer in front of and to the left of the tree transfer. Use a piping tip or similar item to support the girl while the icing dries.
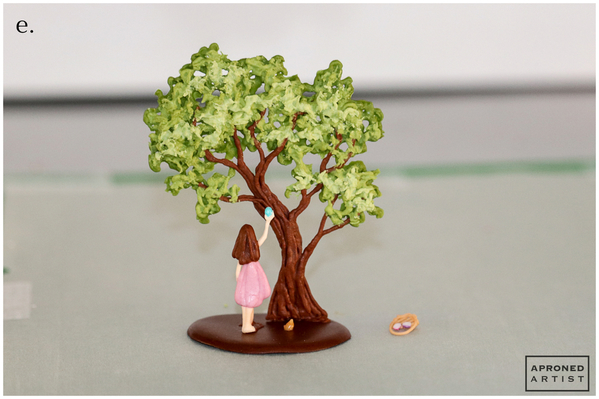
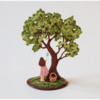
e. Pipe a small dab of stiff-consistency tan icing to the right of the girl transfer. Hold the basket transfer upright in front of the dab of icing, and back it into the icing until it makes contact. The basket should stand up against the icing without any icing oozing out from underneath.
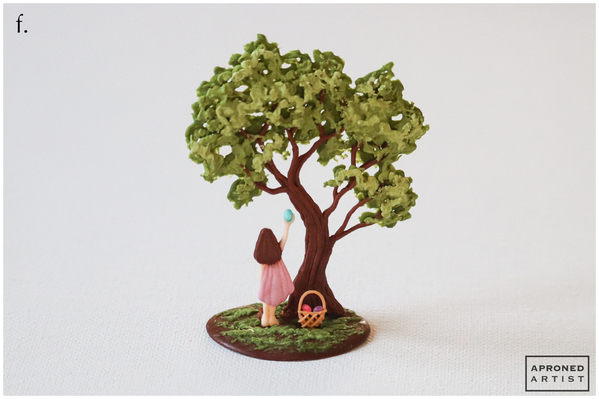
f. Once the icing used to attach the transfers has dried, add some grass to the little scene by following the same process used to texture the tree in Step 2. Pipe a squiggle of stiff-consistency dark green icing on the brown oval base around the attached transfers. Use a damp paint brush to dab at the icing. Repeat the process with stiff-consistency medium green icing, adding a squiggle on top of the dark green icing and dabbing at it with the paint brush to add texture.
Step 7: Insert scene into cookie
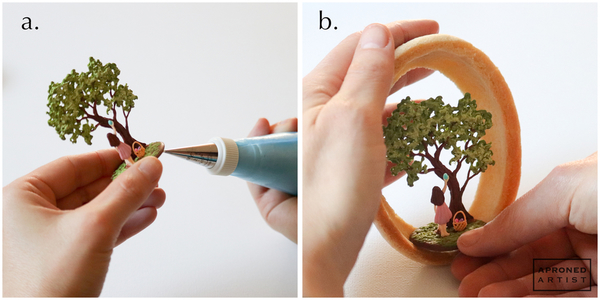
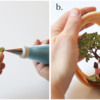
a. Use a PME #2 tip (or equivalent) to pipe a dab of stiff-consistency white royal icing on the bottom left and right sides of the oval base transfer.
b. Cup one of the cookies in your hand, and use the other hand to insert the scene so that the icing on the bottom sides of the oval base makes contact with the lower inner edge of the cookie.
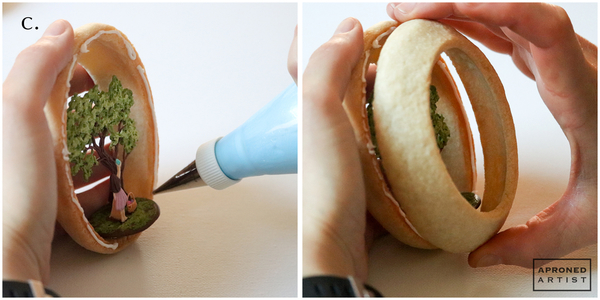
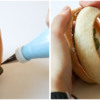
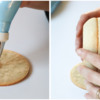
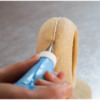
c. Pipe white icing all along the flat edge of the cookie. Press the flat edge of the second oval cookie into the icing. Remove any excess icing that squeezes out with a damp paint brush.
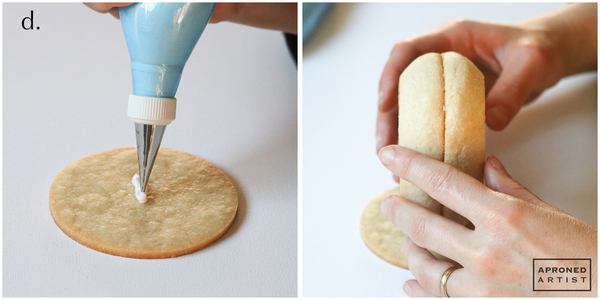
d. Pipe a dab of white icing in the center of the round circle cookie, and set the cookie egg on top. Again, remove any excess icing that squeezes out at the bottom with a damp paint brush. I didn't find it necessary to brace the egg to keep it upright, but if you do, by all means prop it while the icing is drying. Let the icing dry completely.
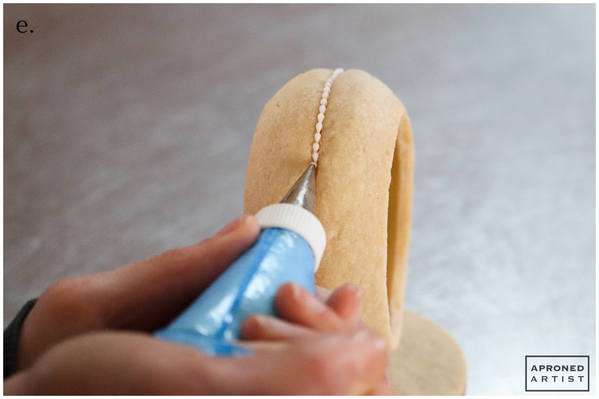
e. If desired, use stiff-consistency white royal icing and a PME #2 tip (or equivalent) to pipe beads along the seam of the two joined cookies. For a more traditional panoramic egg, you can also add beads around the opening (although I preferred the more minimal look of the naked cookie).
Finished!
Hope you all have a wonderful Easter holiday!


Samantha Yacovetta began cookie decorating in 2013. While working at a local bakery, Samantha became captivated by cookie art when a customer requested princess-themed cookies. Attracted initially to the precision of cookie decorating, Samantha soon found that the limitless design opportunities turned it into her artistic passion. Samantha began regularly stocking the bakery case with decorated cookies and for several years sold cookies through her own company, Aproned Artist, a cottage food operation. Having retired from the business life, Samantha now enjoys making cookies just for fun from her home in San Jose, California, USA. To learn more about Samantha, please check out her Cookie Connection portfolio, her Facebook page, and her past Every Little Detail tutorials here.
Photo and cookie credits: Samantha Yacovetta
Note: Every Little Detail with Aproned Artist is a monthly Cookie Connection blog feature written by Samantha Yacovetta focused on the special little details that make big statements in cookie design. This article expresses the views of the author, and not necessarily those of this site, its owners, its administrators, or its employees. To read all of Samantha's past Every Little Detail tutorials, click here. And to see all of Cookie Connection's tutorials, click here.



Comments (22)