 Do you have some extra time on your hands? Are you a perfectionist with the patience of a saint? Do your friends marvel at your love of tedious projects?
If you answered “yes” to any of these questions, then this, my friends, is the cookie project for you.
Supplies:
- 4-in (10-cm) oval cookie cutter
- Cookie dough of choice
- Winter Flora Mosaic Design Template (See “Files” in “Attachments” at the end of this post.)
- Small, sharp knife
- Food-safe marker
- Royal icing:
- Flooding-consistency white
- Stiff-consistency white
- Acetate or parchment paper
- Food-safe file
- PME #2 tip (or equivalent)
- Scribe tool (or equivalent)
- Gel paste coloring for painting:
- AmeriColor: Maroon, Chocolate Brown, Super Black
- Wilton: Juniper
- Paint palette
- Alcohol or water for diluting gel paste colorings
- Medium flat angled paint brush
- Food-safe tweezers
Step 1: Cut and modify cookie dough shape
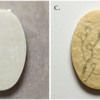
a. Use the oval cookie cutter to cut your cookie dough.
b. Reference the Winter Flora Mosaic Design Template (located in “Files” at the end of this post) for the location and shape of the berry that extends at the top right of the cookie. Use a small, sharp knife to cut a small half circle of dough, and attach it to the cut oval dough using the dull back of the knife blade to help meld the pieces together and further refine the shape. Alternatively, you can skip Step 1a, print out the Mosaic Design Template, and handcut the entire shape.
c. Bake the cookie. Once cool, lightly sketch the design onto the surface of the cookie with a food-safe marker.
Step 2: Pipe royal icing transfers
a. Use flooding consistency white royal icing to pipe a large rectangle (approximately 5 x 7 inches or 12.7 x 17.8 centimeters) of icing onto a piece of acetate or parchment paper. The shape of the transfer is not important (as we’re just going to break it into little pieces later on). Make sure there is at least enough icing to cover twice the size of your cookie so that you will have many shards from which to choose when constructing the mosaic. One of the rectangles depicted below should be sufficient for one cookie. Allow the transfer to dry completely before carefully peeling it from the acetate or parchment paper.
Step 3: Create and attach berry mosaic shards
a. Use your hands to break the royal icing transfer into many small shards about the size of your fingernail.
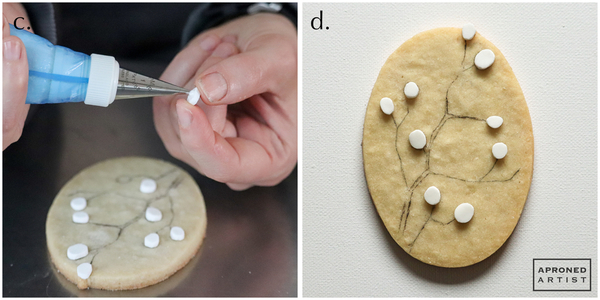
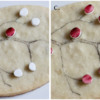
b. Choose a shard slightly larger than one of the berries drawn on the surface of the cookie. Use a food-safe file to shape the edges of the piece into a rough circle.
c. Pipe a small dot of stiff-consistency white royal icing on the back of the round shard with a PME #2 tip (or equivalent), and place it on top of the drawn berry, pressing gently to adhere. Remove any icing that squeezes out from under the sides with a scribe tool (or equivalent).
d. Continue shaping the shards with the file and adhering them to the cookie with stiff-consistency white royal icing until all of the berries in the design are attached.
Step 4: Paint berry shards
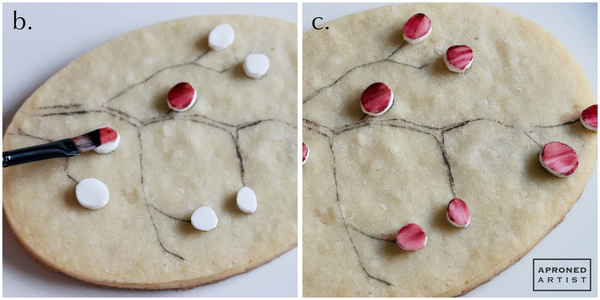
a. Squeeze a drop of Maroon gel paste coloring onto your paint palette. Add a drop of alcohol (or water) on top of the gel paste, but do not mix them together. The liquid should dissolve a small amount of the gel paste, leaving you with a pool of diluted red paint and a smear of more concentrated paint.
b. Dip a medium flat angled paint brush into the paint so that some of the bristles of the brush pick up the diluted paint and just a few bristles pick up the more concentrated paint. Drag the brush along a berry in a single direction. The brush strokes resulting from the different concentrations of paint should be quite visible (to emulate stone).
c. Paint the other berries in the same fashion, changing the direction of the brush stroke with each berry.
Step 5: File and attach branch shards
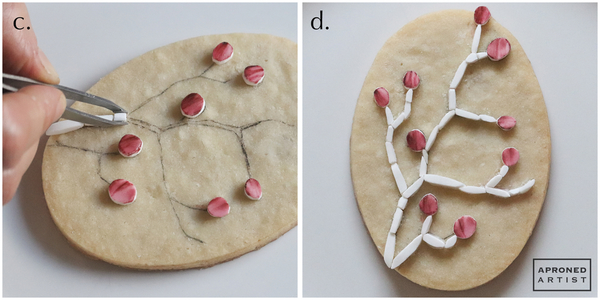
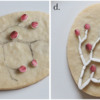
a. Select a skinnier shard, and shape it with the file until it is the width of the branch.
b. Holding the shaped shard with tweezers, apply a dab of stiff-consistency white royal icing to the underside with a PME #2 tip (or equivalent). Use the tweezers to position the shard on the cookie.
c. Find another skinny shard, and shape it with the file so that it sits flush against the shard you just adhered. (This is where the “patience of a saint” comes into play, as it may take a bit of trial and error to get the pieces to fit together just right.) Attach the shard with another dab of icing.
d. Continue shaping shards and attaching them until all of the branches in the design are attached.
Step 6: Paint branch shards
a. Squeeze a drop of Chocolate Brown gel paste coloring onto your paint palette. Add just a touch of Super Black gel paste coloring, and swirl it lightly with the brown gel paste. Add a drop of alcohol (or water) on top of the gel pastes, but do not mix them together. The liquid should dissolve a small amount of the gel pastes, leaving you with a pool of diluted dark brown paint and a smear of more concentrated paint.
b. Paint the branch shards just as you did the berries in Step 4. Dip a medium flat angled paint brush into the paint so that some of the bristles of the brush pick up the diluted paint and just a few bristles pick up the more concentrated paint. Drag the brush along a branch shard in a single direction. Change the direction of the brush stroke with each shard.
Step 7: Shape and attach background shards
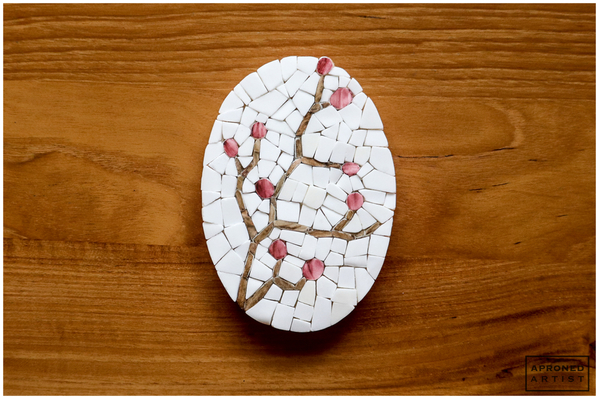
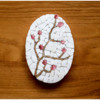
a. Where possible, select shards for the background pieces that are the size of the berries or slightly larger. Ideally, look for pieces that already have an edge in common or that fit nicely against an area of the design so that you have fewer edges to file. Work from the inside of the cookie to the outside, shaping and attaching each shard until the entire background is covered.
Phew! Many hours later, you and your entire workspace will be covered in a fine layer of sugar dust. But you’ll also have a beautiful mosaic cookie!


Samantha Yacovetta began cookie decorating in 2013. While working at a local bakery, Samantha became captivated by cookie art when a customer requested princess-themed cookies. Attracted initially to the precision of cookie decorating, Samantha soon found that the limitless design opportunities turned it into her artistic passion. Samantha began regularly stocking the bakery case with decorated cookies and for several years sold cookies through her own company, Aproned Artist, a cottage food operation. Having retired from the business life, Samantha now enjoys making cookies just for fun from her home in San Jose, California, USA. To learn more about Samantha, please check out her Cookie Connection portfolio, her Facebook page, and her past Every Little Detail tutorials here.
Photo and cookie credits: Samantha Yacovetta
Note: Every Little Detail with Aproned Artist is a monthly Cookie Connection blog feature written by Samantha Yacovetta focused on the special little details that make big statements in cookie design. This article expresses the views of the author, and not necessarily those of this site, its owners, its administrators, or its employees. To read all of Samantha's past Every Little Detail tutorials, click here. And to see all of Cookie Connection's tutorials, click here.







Comments (35)