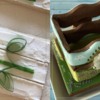
 A wafer paper flower placed on a cookie spread with royal icing makes a charming and simple beginner cookie project. In fact, that's exactly what I made a few years ago, using a wafer paper sunflower (pictured left, below), when I was still struggling to properly flood a cookie .
More recently, I have used wafer paper daisies to decorate the variations of my June and July project tutorials (pictured right, above). Pamoda Vanderwert’s Cookie Connection tutorial and @Heather Bruce Sosa’s recent flower post were my sparks of inspiration. Please check them out!
This beginner project tutorial can be easily realized with some very basic tools and the tips I've put together (below) based on my experience with wafer paper. So let’s start the fun!
- 1 large ring (12-cm/4 3/4-in outer diameter; 7.5-cm/3-in inner diameter) cookie
- Offset spatula
- Royal icing and pastry tips:
- Sky blue medium thick-consistency, to spread over cookie
- Green piping-consistency in pastry bag with PME #3 tip (or equivalent; I used a tip-less bag)
- Yellow medium-consistency in pastry bag with PME #3 tip (or equivalent; I used a tip-less bag)
- Parchment paper (or acetate)
- Small paint brush
- 1 A4 (21 x 29.7-cm/8 1/4 x 11 3/4-in) sheet white wafer paper
- Scissors
- Paper towels (or foam pad used for shaping fondant)
- Ball tool
- Scribe tool
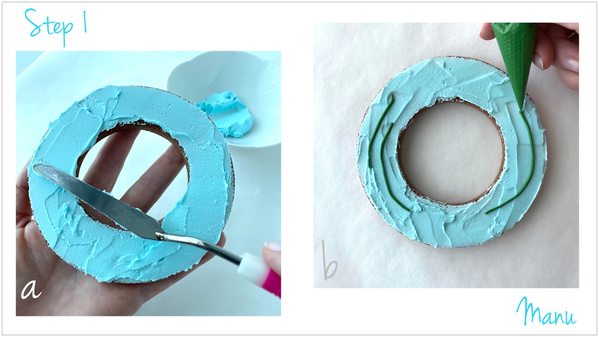
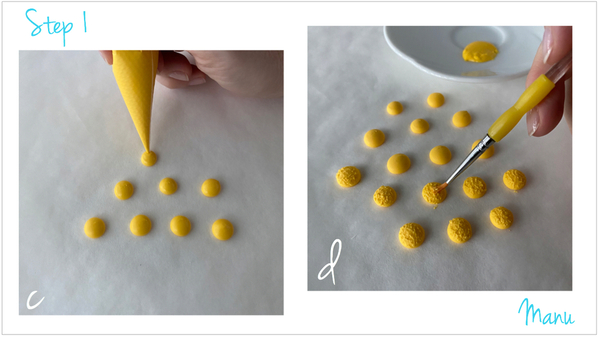
Step 1: Decorate ring cookie and prepare daisy centers
a. Using an offset spatula, spread sky blue medium thick-consistency royal icing over the ring cookie, and let the icing dry. Do not smooth the icing. Make sure that some spatula marks remain, as their texture will add interest to the finished cookie.
b. Using green piping-consistency royal icing and a PME #3 tip (or equivalent), pipe two curved stems on the left of the ring. Pipe another curved stem on the opposite side.
c. On a piece of parchment paper or acetate, pipe a few 1-centimeter (7/16-inch) dots with yellow medium-consistency royal icing. These dots will become the centers of the wafer paper daisies. Let the icing dry. Since these dots will last indefinitely, I piped several to store and have ready for my next flower project. Only three dots (for three flowers) are needed for this project.
d. Pipe a tiny amount of the same yellow icing onto a saucer. Using a small paint brush, apply the icing randomly (with up-and-down motions) to the top of each dot to add texture. Set the dots aside to fully dry for use in Step 2i.
Step 2: Create wafer paper daisies and assemble on cookie
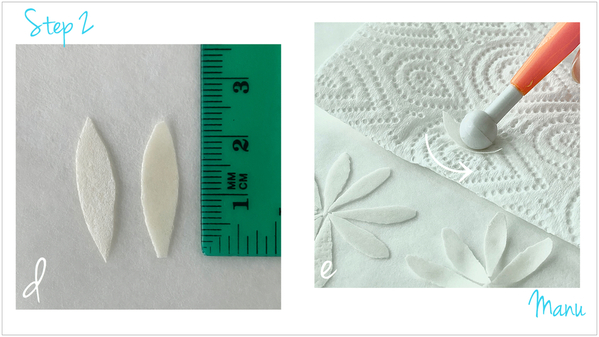
Each of the three daisies in this project has about 20 wafer paper cutout petals, each of which measures roughly 0.5 by 2.5 centimeters (3/16 by 1 inch). Half a sheet of A4 wafer paper should be more than enough to make three flowers. I used scissors to make the cutouts, but a craft punch or an electronic cutting machine could be used if you have either.
a. First, cut a strip of wafer paper to about 1 by 9 centimeters (3/8 by 3 1/2 inches); then cut the strip into three equal parts. (These measurements are a rough guide only; I actually didn't measure precisely.)
b. Now stack the three small strips, and cut out a petal shape to approximately the dimensions indicated above.
c. Cutting in this way, you will get three petals. Keep cutting until you have enough petals for three daisies (again, around 60). If you'd like, stack more strips (up to five work well) to cut more petals at one time.
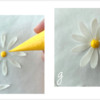
d. Important detour: Wafer paper has a different texture on each side. One side is smooth, and the other side is rough, as you can see in the petal close-up photo below. Wafer paper can be shaped using steam or a damp paint brush, but, because it is made of starch, it is very sensitive to moisture and can easily dissolve if water is over-applied.
e. That all being said, we are going to give a curve to the petals without applying any moisture by using a ball tool instead, like one would use with fondant. First, create a soft work surface by lining yours with paper towels. (Alternatively, you could use a foam pad for shaping fondant, if you have one.) Work on one petal at a time. Place a petal on your paper cushion with the smooth side facing up, and use a ball tool to apply pressure along its length. The petal will get curved and a bit thinner. Repeat on all of the petals.
f. Pipe a dot of yellow medium-consistency royal icing on a piece of parchment paper or acetate.
g. Attach a first round of ten petals to the yellow dot, by inserting the sharper end of each petal into the icing. Tip: If the petals don't insert easily, cut sharper points at their ends. The sharper the points, the easier this task!
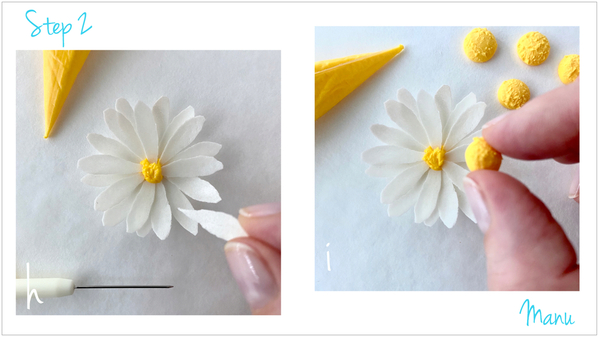
h. Randomly add more petals in additional layers, applying more yellow icing "glue" as necessary. Use a scribe tool to move and adjust the petals.
i. Once all 20 petals have been attached, pipe one last dot of royal icing in the center of the flower, and set one of the dry dots made in Steps 1c and 1d on top. The finished daisy should be about 5 centimeters (2 inches) in diameter.
j. Repeat Steps 2f to 2i to get two more daisies. When the yellow royal icing is completely dry, the daisies will pop easily from parchment paper. They might need a slight nudge to be removed from acetate.
k. Arrange the daisies around the ends of the stems on the ring cookie. Once you've settled on your wreath design, attach each daisy to the cookie with a little dot of yellow icing. The daisies are edible, but not everyone likes to eat wafer paper, or to eat it with a cookie. A little dot of icing will be enough to secure the flowers to the cookie, while, at the same time, not being so much that the flowers can't be easily removed when it comes time for eating. (Note: In case you were wondering, the big yellow spot underneath the daisy in the right photo, below, is the now-dry icing used to glue the first round of petals in Steps 2f and 2g.)
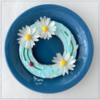
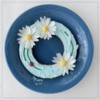
And, ta da! Here is my finished wafer paper daisy wreath cookie. I added some leftover petals and a royal icing ladybug for added color and interest. (Note: The ladybug is a royal icing transfer: a dot of royal icing piped onto parchment paper and decorated using a black food marker once completely dry.)
I have more wafer paper flowers in the making, but that’s all for this month!
Ciao,
Manu 🌼🐞

Manuela Pezzopane, affectionately called Manu by her friends and family, is a fan of everything handmade, and professes to have tried every possible hobby. However, it wasn’t until the end of 2014, when an American friend invited her to a Christmas cookie exchange, that she first discovered decorated cookies. In 2015, after watching Julia M. Usher's videos and signing up on Cookie Connection, Manu finally attempted her own. Since then, cookie decorating has become Manu’s passion. You can follow Manu on Facebook and Instagram, or email her at manubiscottidecorati@gmail.com.
Photo and cookie credits: Manuela Pezzopane
Note: Made by Manu is a Cookie Connection blog feature written by Manuela Pezzopane, where each month she shares the method behind a magical cookie of her own making. This article expresses the views of the author, and not necessarily those of this site, its owners, its administrators, or its employees. To read all of Manuela's past Made by Manu tutorials, click here. And to see all of Cookie Connection's tutorials, click here.










Comments (20)