It's "cookie kryptonite" time again here in Practice Bakes Perfect land! Since it is either spring or fall for you, depending on your hemisphere, now is the perfect time to wrestle with the ever-changing temperature and humidity conditions that play such a critical role in executing wet-on-wet cookie designs. In other words, now is the perfect time to face and conquer the very worst of our wet-on-wet fears!
Before we get to the meat of this challenge, let's talk about the awesome prize we have in store for you! For this challenge, as with all of our Practice Bakes Perfect challenges, the prize will be awarded to one lucky challenge entrant, whose name will be chosen at random from among all of the challenge entrants. Specifically, for this challenge, this one lucky entrant will receive a $100 gift certificate from Global Sugar Art, donated by Cookie Connection owner and founder @Julia M. Usher. Can't you just picture me writing your name on this card?!
Now, while you're figuring out how to spend that cool $100, let's talk about the challenge itself.
What is the wet-on-wet technique?
Normally, when decorating cookies with royal icing, we create a "base layer" of royal icing by flooding the cookie, allowing that base layer to dry hard, and then piping details on top. However, when using the wet-on-wet technique, you decorate your cookie immediately after flooding your base layer, when that base layer is still completely liquid or "wet." The details on top settle into the underlying wet icing, leaving you with a smooth, flat surface that incorporates the design. Typically, the top details are either piped and left to settle or piped and then "marbled" by dragging a trussing needle or scribe tool through them to create lavish patterns. Of course, once the wet-on-wet and/or marbled areas are dry, you can then choose to pipe additional decorations on top, or leave them as is.
Some of the advantages of wet-on-wet designs are: (1) they easily allow for multiple levels of details (if you pipe on top of a dried wet-on-wet base, for instance); (2) they are easier to package and ship (no fears of piped decorations breaking off); and (3) they are dried and completed in one step (no need to fully dry a base layer and then have a second round of drying time for details piped on top).
Wet-on-wet decorating is not without its challenges, however. As I touched on briefly at the beginning of this post, the success of a wet-on-wet design is fairly weather-dependent. Too dry, and your base layer will start to dry before your design is complete; too humid, and your design may go wonky or even suffer from color bleeding issues.
The easiest way to explain the wet-on-wet method is to show you a few examples from some of our own Cookie Connection contributors.
Wet-on-Wet Sunflower Cookie by Manu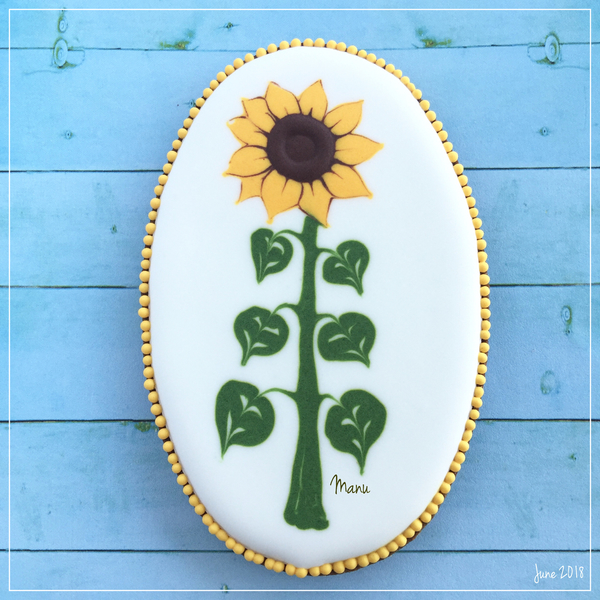
Here, the entire sunflower - stalk, leaves, and flower - was made with the wet-on-wet technique. The "veins" in the leaves and petals were marbled by dragging a scribe tool through the icing.
Wet-on-Wet Poppy Cookies by Manu
Again, @Manu biscotti decorati used the wet-on-wet technique for every element of these poppy flowers and seed pods. She also did a teeny bit of marbling along the sides of the green buds and through the black dots at the top of the seed pods.
Wisteria and Butterflies by Lucy (Honeycat Cookies)
@Lucy (Honeycat Cookies) used classic wet-on-wet and marbling techniques throughout the gorgeous purple and yellow wisteria background; the butterfly, however, is a handpainted royal icing transfer.
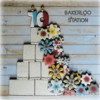
Special 70th Birthday by Bakerloo Station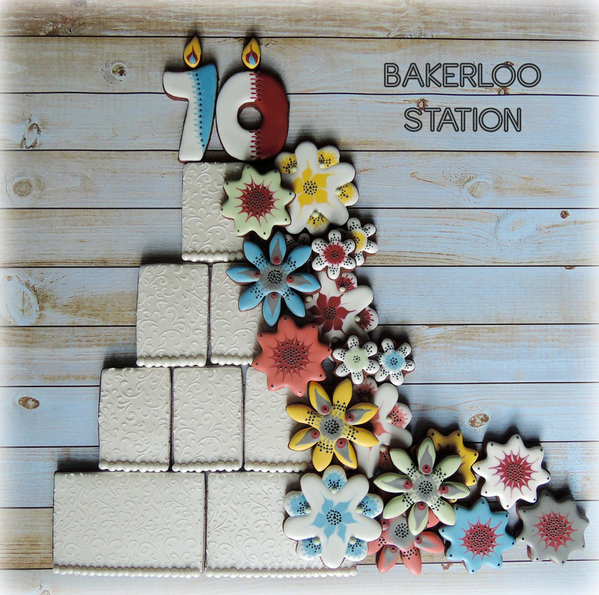
Here, I made the centers of the larger flowers with both wet-on-wet and marbling techniques.
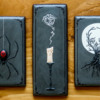
Gothic Candle with Spooky Smoke by Aproned Artist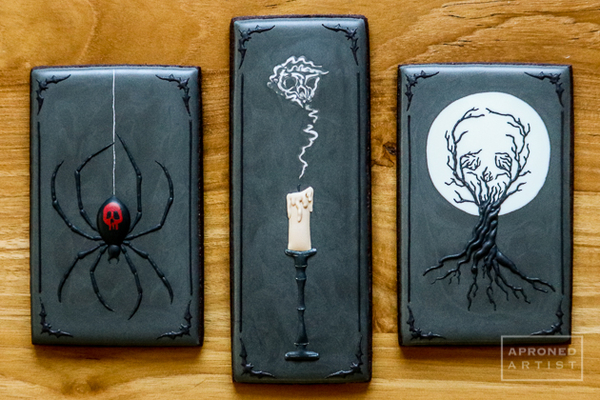
And, here, Samantha of @Aproned Artist used the wet-on-wet technique (with a touch of marbling) to make the candle smoke (center) and straight-up wet-on-wet for the moon and upper tree branches (right).
The very best advice I can give you on how to find success with your wet-on-wet (and marbled) decorating comes from@Julia M. Usher, as previously noted in @Manu biscotti decorati's tutorials for her wet-on-wet poppies and sunflowers . . .
Important wet-on-wet tips from Julia:
(1) Work speed. The key to nice, smooth wet-on-wet effects is to work quickly, especially under dry conditions, without stopping between steps. All icings must be wet and easily "worked" throughout the entire decorating process. If you work too slowly, the icing can crust, and, when you drag your scribe tool through it to create marbled effects, you can leave behind "tracks" or cracks. It's wise to bag all of your icings before you start any wet-on-wet project, so you won't have to interrupt your work flow midstream.
(2) Icing consistency. All icings should be at roughly the same thick flooding-consistency. If icings are at different consistencies, two things may happen. Either they won't settle into each other smoothly or you'll end up with "ragged" marbled effects.
The icing thickness is also critical for reasons related to humidity. A humid environment will give you more working time before icings set, but it will also prolong the drying time when you are done. And the longer the icing takes to dry, the greater the risk of colors bleeding into one another while drying . . . yikes! The good news is you can minimize or avoid bleeding with thicker icing, because it dries more quickly. Always push the icing to the thickest possible consistency for this task. It should have some body, but still settle smoothly into other icings and not leave anything but faint tracks (that eventually close) when a scribe tool is drawn through it.
(3) Drying method. Again, the faster the icing dries (once you're done), the less chance you'll have of any bleeding. For final drying, set the cookie in front of a fan or in a dehydrator (set at about 90°F to 95°F) to accelerate the process. But not too long in the dehydrator - icing can sometimes expand and crack if it gets too hot. Colors can also get blotchy.
- Made by Manu: Wet-on-Wet Sunflower Cookie
- Made by Manu: Wet-on-Wet Poppy Cookies
- What's New, Honeycat?: Wisteria and Butterflies
- Every Little Detail with Aproned Artist: Gothic Candle with Spooky Smoke
So with all of that in mind, let's get to the rules for this challenge . . .
Rules:
1. Create a set of five (5) or more cookies using the wet-on-wet (and/or marbling) techniques. (The predominant feature of your design should be the wet-on-wet base of your cookie.)
2. Your design must be completely original, and not a copy of any other artist's design, including the tutorial authors featured here in this post. (In my eyes, the more original the entry, the better! And as always, no copyrighted designs may be used without written permission.)
3. As always, we ask that you make a brand new set of cookies for this challenge.
4. Think outside the box, take some healthy risks, and HAVE SOME FUN.
To enter:
- Please post an image of your cookie set to the site under the Practice Bakes Perfect clip set no later than December 8, 2018 at 5 pm central.
- Because these challenges are ongoing, we ask that you put "Practice Bakes Perfect Challenge #31" in your photo caption AND in a tag, so that we can tell the challenges apart from month to month. Please use the main title field to uniquely name your cookies as you normally would.
- Please also assign other relevant clip sets and tags to your images, as you normally would. (Meaning don't just use the Practice Bakes Perfect clip set and leave it at that, or your photos won't easily be found with keyword searches.)
- You can enter more than once, but please post only one clip of each distinct entry/cookie set. Multiple clips of the same entry/cookie set are not allowed unless added in a comment beneath the one primary clip.
After the challenge has closed on December 8, we will announce the winner in the Saturday Spotlight the following weekend (December 15, 2018). The next challenge will be announced about a week after that Spotlight.
And one last thing . . . This is NOT meant to be a competition. The only person you should be competing against is yourself. Period. These challenges are intended to inspire the artist in you and push you to be the best cookie artist YOU can be at this snapshot in time. Remember, the whole point of this exercise is to get you out of your comfort zone - to "take healthy risks," as my wise-beyond-his-years son always reminds me. Plus, prizes are given entirely at random, so healthy risk-taking has its own rewards!
I would love to chat with you as you journey through this process, so if you have any questions about the challenge, are having trouble getting started, need help bringing an idea to life, or want technical advice, please leave a comment below or send me a Cookie Connection private message.

 Christine Donnelly began her professional baking career at 16, when she was hired on the spot at her local bakery to work the counter and decorate cakes. After detours to college and law school, she worked as a trial lawyer in Chicago for many years, ultimately leaving that career to become a stay-at-home mother to her two children. In her “retirement,” she continued to bake at home, at last finding her preferred artistic medium in decorated cookies. In February 2013, Bakerloo Station was born with a presence on both Facebook and Instagram. Christine makes cookies to balance her left brain, to inspire and share creative ideas, and to feed those needs that only art can satisfy.
Photo credit: Christine Donnelly
Note: Practice Bakes Perfect is a bimonthly Cookie Connection blog feature written by Christine Donnelly that poses inspiration or challenges to get you to stretch as a cookie artist - for practice, for prizes, and for fun! Its content expresses the views of the author and not necessarily those of this site, its owners, its administrators, or its employees. Catch up on all of Christine's past Cookie Connection posts here.




Comments (9)