Watch-Learn-Create Challenge #53: Watercolor Florals on Fondant with Laura Saporiti


Hi, everyone, and welcome to a new Watch-Learn-Create challenge! In this 53rd challenge, our featured guest @Laura Saporiti shares all of the tools, techniques, and tips needed to paint watercolor florals on fondant. Laura showcases her personal "watercolor veiling" technique by painting some lovely pansies in her demo. In her opinion, painting flowers is pretty forgiving, so they're a great way to start a painting challenge!

Important: Laura has the license to use the pansy illustrations that appear during the video demo. She paid a fee to secure that license, with these image references and credits: Illustration 39057452 ©️ Anemad |Dreamstime.com.

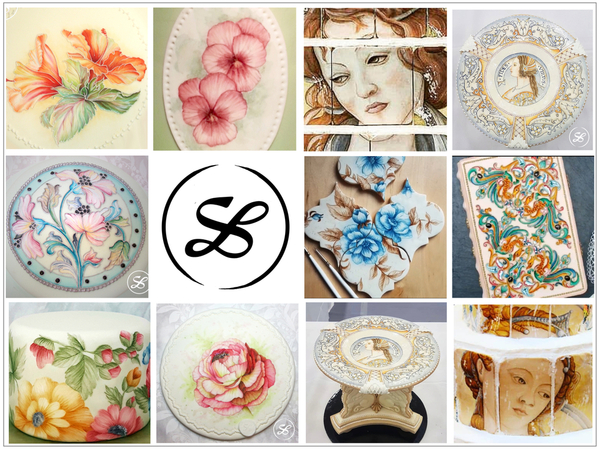
With her “veiling” technique, Laura is trying to mimic real painted watercolors on paper, though obviously her technique had to be adapted to water-sensitive fondant. She calls her method the "watercolor veiling" technique because she paints one thin layer (like a veil) on top of another layer in order to achieve a gradual layering of color. Laura's method, which she developed over the years, is just one approach to painting on fondant. There are, of course, a lot of different ways to simulate a watercolor effect, but there's no denying that Laura's approach is extremely effective. (Just take a look at some of her paintings below!)

Laura is an award-winning pastry chef and cake and cookie artist based in Italy who loves to travel the world sharing her passion, knowledge, and experience in the sugar arts. Laura has competed and placed in numerous shows and judged many international competitions. In fact, in 2020, she won first place in the 3-D Cookie category of Julia M. Usher’s Cookie Art Competition™, and, since then, Laura has been part of Julia’s judging team. (You can read Laura's complete bio under the pink link.) In the collage below, I have highlighted some of Laura’s work featuring watercolor paintings on fondant - not only florals, but also a number of very finely painted figures on cakes and cookies.

59B571FE-E52C-49D3-B8A5-A8F45B0D8C76

Topic

When you watch Laura’s demo, you will learn how to paint florals on fondant using a watercolor effect. Laura and I are challenging you to think of a unique way to use her "veiling technique" on a cookie project of your own design that is covered totally or partially with fondant. For this challenge, we will focus only on painting on fondant, as painting on royal icing could be the topic of a future challenge. You have plenty of time to get inspired and practice, as we are going to keep this challenge open until the beginning of April. Taking your own picture of a flower or flowers would be a good way to get inspiration.

And now, let’s take a look at Laura’s demo, but first . . .

Important: Laura's video was recorded exclusively for Cookie Connection for the sole purpose of helping Cookie Connection members develop their skills and apply those skills to this challenge and future projects of their own design. This video recording, and the content contained therein, cannot be used as material for cookie classes, for purposes of financial gain, or for any other purpose than stated above without obtaining written permission from Laura in advance. Thank you!

Below is a sneak peek of Laura's video. To gain access to the entire tutorial and associated resource list, click here, and you will be taken to Julia's business site, where you will need to pay a small fee in order to view the video. Note: A large portion of challenge video fees goes to our featured guests to compensate them for the time and costs associated with prepping these masterful classes. The remainder covers the costs of video production, editing, and hosting.


Again, you can access the entire video with resource list here, as well as read a complete description of the video contents.

Thank you so much, Laura, for sharing your talent with us!

Don't forget: If there is anything that you would like to ask Laura regarding the technique she has showcased, you can do so at any time in the comments under this post. Laura will be available to reply for the duration of the challenge.

Cookiers of all skill levels are encouraged to participate. Remember that this challenge is not a competition among cookiers, but rather a way to have fun and challenge yourself. The purpose is to stretch skills, learn, and try new things. That’s also why prize winners have always been determined through random drawings, and that’s why we encourage you to participate with multiple entries. All entries are eligible to win the prize drawing. And let me add . . . even if you are not the lucky winner, you will benefit from a great learning experience just by watching Laura’s demo, practicing her painting techniques, and creating an entry.

Prize

Now, about that prize! Laura is giving away one of her prerecorded online classes to the one entrant whose name, again, is drawn at random at the close of the challenge. Thank you, Laura!

A2DD5677-3E72-446B-B70D-732A0FD409C2

Read more about the content of Laura’s online class here, or by visiting Laura Saporiti Pastry and Cake Art Online School.

Rules

The rules for participating are few and very simple. Please make sure you read them before you post your entry:

  1. Watch Laura's demo, get inspired, and challenge yourself to create a brand-new cookie project of your own design using Laura's "watercolor veiling" technique applied to a floral design on fondant.
  2. Your entry could be a set of cookies or even a single 2-D cookie covered totally or partially with fondant. You can also enter with a 3-D cookie project. You can use royal icing and other media/techniques to embellish your cookie/cookies, but the technique showcased by Laura, watercolor florals on fondant, should be the main feature. It should stand out - that is, it should be the first thing one notices when looking at your cookie entry. And, remember, florals should be painted on fondant (not royal icing).
  3. Your work (cookie project and floral design) must be original and not a copy of someone else’s work/design/art/image unless you obtained a license for the art and/or written permission from the author in accordance with Cookie Connection site rules and US copyright laws. All permissions received and accompanying art credits (similar to those shown for the pansies at the start of this post, including a link back to the source art) should be posted in a comment under your entry. HOWEVER, we would much prefer for you to take inspiration from nature or your own photos of flowers. Please always read Cookie Connection's photo posting guidelines before posting on the site.
  4. Please share in the comments under your entry what you learned, any difficulties you encountered and how you overcame them, and any suggestions to help and inspire your fellow cookiers. If English is not your native language and you feel more comfortable using your own language, you can. We will add translations if we can.
  5. Have fun!

To Enter

  • If you have any questions for Laura as you are developing your entry, that's great! We encourage questions and learning at every step of the process. Please enter all questions in the comments area under this post, so that everyone can benefit from the Q&A. And please tag @Laura Saporiti so she is sure to see your question and respond in a timely way.
  • Please post an image of your cookie project to the site under the Cookie Connection Challenge clip set no later than April 8, 2023 at 5 pm central time. (Yes, we are giving you lots and lots of time to create - 10 weeks!)
  • Because these challenges will be ongoing, we ask that you put "Watch-Learn-Create Challenge #53" in your photo caption (subtitle field) AND in a tag, so we can tell the challenges apart from month to month. Please use the title field to uniquely name your cookies as you normally would.
  • Please also assign other relevant clip sets and tags to your images, as you normally would. (Don't use just the Cookie Connection Challenge clip set and leave it at that, or your photos won't easily be found with keyword searches.)
  • You can enter more than once, but please post only one clip of each distinct entry. Multiple clips of the same entry are not allowed unless added in a comment beneath the one primary clip.

On April 15, in our weekly Saturday Spotlight, I will reveal the 10 top-trending entries (as determined automatically by our site-trending algorithms*) as well as the randomly drawn prize winner. The next challenge will be announced soon after this challenge has closed. *Note: The site algorithms use members' collective likes, comments, and reactions to each entry to determine our Spotlightees.

If you are new to Cookie Connection and you need help posting your entry, please let me know and I’ll be happy to help you.

We can’t wait to see your creations!

Ciao, Manu (and Laura)

[EDITOR'S NOTE: Having previewed this video, I feel compelled to point out what a treasure it is, and to thank Manu and Laura profusely for the immense amount of time, thoughtfulness, and professionalism that went into it. It is a true gem, as are these two wonderful cookie artists and past guest @Evelindecora. If you have not yet participated in a challenge, please consider doing so - each is a generous gift from a rare talent. For all past challenge recordings - to see what you may have missed - please check out the Watch-Learn-Create Challenge playlist on my YouTube channel. ~JMU]

Manuela Pezzopane, affectionately called Manu by her friends and family, is the author of the blog feature Made by Manu, where each month she shares the method behind a magical cookie of her own making. In March 2022, Manu also assumed the role of host of our rebranded and reformatted Cookie Connection Challenges: Watch-Learn-Create Series, which debuted in a virtual video format in July 2022. A fan of everything handmade, Manu professes to have tried every possible hobby. However, it wasn’t until the end of 2014, when an American friend invited her to a Christmas cookie exchange, that she first discovered decorated cookies. In 2015, after watching Julia M. Usher's videos and signing up on Cookie Connection, Manu finally attempted her own designs. Since then, cookie decorating has become Manu’s passion, and her mesmerizing video shorts have earned her a large and loyal following throughout the global cookie community. Manu harks from Rome, Italy, where she currently resides. You can email Manu at manubiscottidecorati@gmail.com, follow her on Facebook and Instagram, or explore her past challenges and large library of Made by Manu tutorials here on Cookie Connection.

Photo credit: Manuela Pezzopane

Attachments

Images (2)
  • Laura’s Artwork Featuring Watercolor Painting on Fondant: Photos and Logo Courtesy of Laura Saporiti
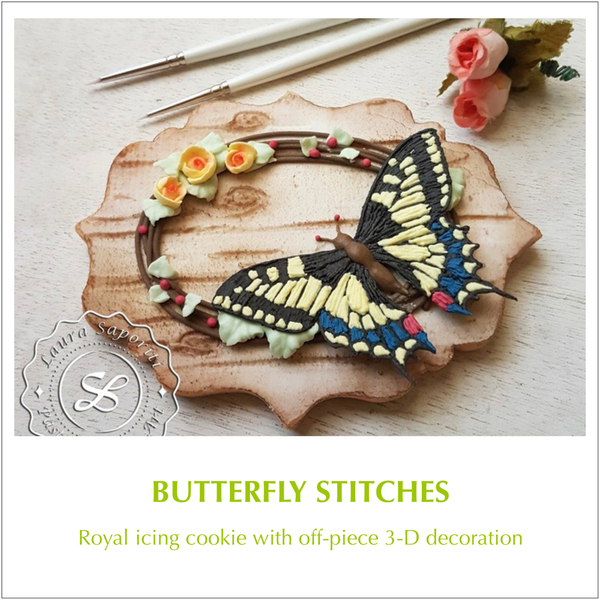
  • The Prize - A Prerecorded Online Class with Laura Saporiti: Poster Courtesy of Laura Saporiti

Add Comment

Comments (38)

Newest · Oldest · Popular

Yay!!! 👏 👏 👏  I’ve been anxiously awaiting challenge #53, and this focus really excites me. I can’t wait to get started learning with Laura. Thank you Laura, Manu, Julia and everyone involved in getting this challenge available. ❤️

WOW!!!
That sounds so fantastic!!! I'm really looking forward to watching the video! Wow, over 1 hour... Thank you very much for all the work that went into it!!! At the same time, I am already looking forward to all the submissions that will come! I can very well imagine that there will be a lively participation! I'm sooooo excited!!!
Thanks to Manu, Laura and Julia! ❤️❤️❤️

@Sandy_S posted:

Yay!!! 👏 👏 👏  I’ve been anxiously awaiting challenge #53, and this focus really excites me. I can’t wait to get started learning with Laura. Thank you Laura, Manu, Julia and everyone involved in getting this challenge available. ❤️

Enjoy @Laura Saporiti's demo, take your time to practice and enter the challenge, Sandy @Sandy S. We can't wait to see your creations!

WOW!!!
That sounds so fantastic!!! I'm really looking forward to watching the video! Wow, over 1 hour... Thank you very much for all the work that went into it!!! At the same time, I am already looking forward to all the submissions that will come! I can very well imagine that there will be a lively participation! I'm sooooo excited!!!
Thanks to Manu, Laura and Julia! ❤️❤️❤️

Yes, Gabi @Icingsugarkeks, @Laura Saporiti's demo turned in an online class, like it happened for the previous two challenges featuring @Julia M. Usher and @Evelindecora.

I am sure that while you will be watching, you will get inspired to try yourself. There's plenty of time to practice and enter and I can't wait to see your entries!

@Kimberlie posted:

Where do we find that pallet yyou are using? I love that it’s small and flat and can’t find one anywhere.

Be sure to tag @Laura Saporiti to ensure she sees your questions and can answer promptly.

@Kimberlie posted:

Where do we find that pallet yyou are using? I love that it’s small and flat and can’t find one anywhere.

Also, here's a link to a palette from **** Blick. It's not necessarily small, but it looks flat-bottomed to me: https://tinyurl.com/4bv6xemd (Weird, the site seems to be suddenly censoring questionable words, thus the "****" above.) 

@Laura Saporiti no doubt will have a better recommendation.

Last edited by Julia M. Usher
@Sandy_S posted:

Yay!!! 👏 👏 👏  I’ve been anxiously awaiting challenge #53, and this focus really excites me. I can’t wait to get started learning with Laura. Thank you Laura, Manu, Julia and everyone involved in getting this challenge available. ❤️

I can't wait to see your take on this technique of mine! It's so nice to hear you are so excited about it <3

WOW!!!
That sounds so fantastic!!! I'm really looking forward to watching the video! Wow, over 1 hour... Thank you very much for all the work that went into it!!! At the same time, I am already looking forward to all the submissions that will come! I can very well imagine that there will be a lively participation! I'm sooooo excited!!!
Thanks to Manu, Laura and Julia! ❤️❤️❤️

You are very welcome indeed!
To have lots of participants in this challenge would be a wonderful reward! Most of all, I really hope my demo will help people to overcome some fear of painting, which I know can be intimidating
That's why I also talked about my frequent frustration moments in the video!

So very informative! I am quite uncomfortable with painting, but Laura's video really helps to demystify the process.

I really hope you will consider joining the challenge: it would be a great honor for me, since I do really admire your work!! And I'm so glad my demo helped demystify the process, that is always my aim when teaching because I'm pretty aware a lot of people are intimidated by painting. Hope to see you in it!

@Kimberlie posted:

Where do we find that pallet yyou are using? I love that it’s small and flat and can’t find one anywhere.

Thank you for asking about it. I love that paint palette for the same reason, but unfortunately, I believe it has been discontinued. I originally bought it in England from Culpitt, something like 15y ago, and wasn't able to find them anymore when looking for them in recent years.
Anyway, my suggestion is -since it all depends on where you live- specifically search online, on marketplaces like Amazon, for "watercolor paint palette", since these are more commonly designed with flat bottoms. Also try adding the variant "watercolor TRAVEL/PORTABLE paint palette" since this should return smaller sizes and the variant "CERAMIC watercolor paint palette", which are almost always flat, though heavy. Watercolor WELLS  is another search I would try.
A lot of times I also simply use white coffee plates as a support for painting. 
Hope this helps

Thank you all @Laura Saporiti, @Manu biscotti decorati and @Julia M. Usher , so much for taking the time to demonstrate this technique for the 53rd Challenge .  I have no doubt that we only see "the tip of the iceberg" in planning this video demonstration. Painting is a technique I've always wanted to learn but it also has intimidated me for years. Thank you Laura @Laura Saporiti for sharing your knowledge and skills with us!

I don't know if I'll have the time to make the fondant recipe you provided. Could you kindly write the name of the fondant you recommended purchasing?  The keywords you suggested for finding the flat bottomed palette were very helpful. Thank you I really hope to participate. ❤️

Last edited by Cookies Fantastique

Thank you all @Laura Saporiti, @Manu biscotti decorati and @Julia M. Usher , so much for taking the time to demonstrate this technique for the 53rd Challenge .  I have no doubt that we only see "the tip of the iceberg" in planning this video demonstration. Painting is a technique I've always wanted to learn but it also has intimidated me for years. Thank you Laura @Laura Saporiti for sharing your knowledge and skills with us!

I don't know if I'll have the time to make the fondant recipe you provided. Could you kindly write the name of the fondant you recommended purchasing?  The keywords you suggested for finding the flat bottomed palette were very helpful. Thank you I really hope to participate. ❤️

Thank you so much for your kind words.
Indeed, there's a lot of behind-the-scenes work and planning in bringing out such demos.

The fondant I was using in the demo is the Saracino Model Paste.
I'm glad to hear my keywords helped
I really hope to see your entry!

@Gingerland posted:

Thank you @Laura Saporiti, @Manu biscotti decorati and @Julia M. Usher!

I enjoyed watching this demo a lot. Still intimidated by painting, but I might give it a try.

Please do - I think @Laura Saporiti makes it a lot less intimidating in her video!

Hello friends!
Dear Laura @Laura Saporiti

I am very new to cookie decorating so I am unsure of a couple of things that might be obvious to others, but has managed to elude this beginner. 😊

1) Regarding your Non-Fat Sugar Paste recipe … I do not have gelatin “sheets”. I only have gelatin powder. Will that work? And should I still only use 15g of powder or is there a weight adjustment for gelatin *powder*?

2) I have literally spent hours trying to search for the answer to this question:
     Is LorAnn Powder Food Color oil-dispensable? I could not find the answer so I wrote  to LorAnn Customer Service and asked the question: Can you please tell me if your Powder Food Color is considered:  Fat Dispersable?

They responded with:This can be used in oil based products, if that is what your question is regarding.

I’m still not sure if that means yes or no. 🤷‍♀️

Can you, or anyone reading this, please tell me if these will work? I already have 6 of this brand and really would be disappointed if I purchased the wrong brand. Nowhere on the packaging does it say ‘fat-dispersible’ but it does say: Powder food colors are insoluble in water.

https://www.lorannoils.com/powder-food-coloring

Thank you so much everyone and I look forward to getting started on this project as soon as I get the answers to these questions. 😃

Attachments

Images (3)
  • Laura’s Non Fat Sugar Paste
  • LorAnn Powder Food Coloring
  • Back of Packaging LorAnn Powder Food Coloring

For those of you who are still having a hard time finding flat bottom paint palette trays, I have found quite a few at Dollarama and Dollar Tree (Canada & USA).  See images below. They range in price from $1.25 - $3.00.  I have seen people selling these on art supply sites and Etsy for $12.00 or more plus shipping. I’m sure they pick them up from the dollar store and re-sell them, so save yourselves some money if you can. 😃

Attachments

Images (4)
  • #1 Walmart . com.  Royal &amp; Langnickel 16 Well Palette $2.48
  • # 2 Dollarama &lt; $3.00
  • #3 - Dollarama - 6 pk. - $1.25
  • #4 Dollar Tree - $1.25: These fit together (i.e. one is a lid)
@Sandy_S posted:

Hello friends!
Dear Laura @Laura Saporiti

I am very new to cookie decorating so I am unsure of a couple of things that might be obvious to others, but has managed to elude this beginner. 😊

1) Regarding your Non-Fat Sugar Paste recipe … I do not have gelatin “sheets”. I only have gelatin powder. Will that work? And should I still only use 15g of powder or is there a weight adjustment for gelatin *powder*?

2) I have literally spent hours trying to search for the answer to this question:
     Is LorAnn Powder Food Color oil-dispensable? I could not find the answer so I wrote  to LorAnn Customer Service and asked the question: Can you please tell me if your Powder Food Color is considered:  Fat Dispersable?

They responded with:This can be used in oil based products, if that is what your question is regarding.

I’m still not sure if that means yes or no. 🤷‍♀️

Can you, or anyone reading this, please tell me if these will work? I already have 6 of this brand and really would be disappointed if I purchased the wrong brand. Nowhere on the packaging does it say ‘fat-dispersible’ but it does say: Powder food colors are insoluble in water.

https://www.lorannoils.com/powder-food-coloring

Thank you so much everyone and I look forward to getting started on this project as soon as I get the answers to these questions. 😃

I'll answer the best I can based on my limited knowledge of gelatin sheets (which aren't so common here in the US, except among higher-end pastry shops). Not to confuse things, but gelatin sheets have different bloom (or gelling) strengths (they come in different grades, that is), though my understanding is the weight of sheets is adjusted across the strengths (sheets of different types weigh different amounts), so that a sheet of one type ends up having the same gelling power as another. That is, a sheet of one type is relatively substitutable for another when a recipe calls for gelatin measured in sheets or fractions of sheets. When a recipe calls for a gelatin sheet in grams (as Laura's does), however, that's when things get dicey, as 10g of gold bloom-strength does not have the same gelling power as 10g of silver bloom-strength, for instance. (This article explains this point pretty well, though not entirely accurately as some people point out in the comments: https://blog.modernistpantry.c...ion-over-conversion/). I don't know what the exact conversion from powder to sheet is; I've seen conversions that range from 1 teaspoon of powder equals 1 leaf to 2 leaves. Given the variability in conversions out there, I would want to test the conversion ratio myself across some different recipes to establish what works best in the context of those recipes. I haven't done this, but it might make for a good video! That all said, my recommendation is to see if @Laura Saporiti can tell us what bloom-strength she is using and then to try to find some leaves of that strength on Amazon (they are obtainable here).

With respect to your powdered colors, I am not sure what you want to use them for, but if not water soluble, then they likely won't do well in royal icing, which is basically sugar and water, but they will mix into chocolate, buttercream, and other fat-based recipes as the LorAnn people said. They will likely also extend with alcohol into paint.

Thank you so much, Julia.  Wow! You really explained this all very well and I think I know exactly what you mean.  I hope that @Laura Saporiti sees this and hopefully can answer both questions about the gelatin: 1) what bloom she was referring to in the sheets, and 2) what the conversion to powdered gelatin would be. 🤞

In answer to your question in the 2nd paragraph, about what I want to use the LorAnn Powder Food Colors for … I bought them for this #53 Challenge.  Laura makes reference to fat-dispensable vs water soluble powers at about the 13 minute mark of her video.

It’s currently 9pm here in Edmonton, and 5am in Parma, Italy so I suspect Laura will just be waking up as I’m going to bed. ha ha ha

Thank you again, Julia, for ‘everything’.  Big hugs. XXOO

@Sandy_S posted:

Thank you so much, Julia.  Wow! You really explained this all very well and I think I know exactly what you mean.  I hope that @Laura Saporiti sees this and hopefully can answer both questions about the gelatin: 1) what bloom she was referring to in the sheets, and 2) what the conversion to powdered gelatin would be. 🤞

In answer to your question in the 2nd paragraph, about what I want to use the LorAnn Powder Food Colors for … I bought them for this #53 Challenge.  Laura makes reference to fat-dispensable vs water soluble powers at about the 13 minute mark of her video.

It’s currently 9pm here in Edmonton, and 5am in Parma, Italy so I suspect Laura will just be waking up as I’m going to bed. ha ha ha

Thank you again, Julia, for ‘everything’.  Big hugs. XXOO

I figured you were using the colors for her project, but wanted to be sure before answering. I am nearly 100% certain you are fine with the LorAnn powders as they clearly say they are not water-soluble. Water soluble ones do not mix with alcohol, which is the mixing medium she uses for extending the powders into paints. That's the most important thing to know about the powdered coloring for this project, if I am not mistaken.

Last edited by Julia M. Usher

I figured you were using the colors for her project, but wanted to be sure before answering. I am nearly 100% certain you are fine with the LorAnn powders as they clearly say they are not water-soluble. Water soluble ones do not mix with alcohol, which is the mixing medium she uses for extending the powders into paints. That's the most important thing to know about the powdered coloring for this project, if I am not mistaken.

Oh that is exactly the kind of answer I’ve been hunting around for on google for hours on end … and now you have summed up the answer in one sentence: Water soluble powders do not mix with alcohol.  I’ve been fooling around with them tonight and they do, in fact, mix with alcohol, so I think I’ll be alright.  Ta-Da … 😃. 👏 👏 👏.  I should have asked you first.  Thank you! Thank you! Thank you! Julia.  You are the best in the west. HUGS

Last edited by Julia M. Usher
@Sandy_S posted:

Oh that is exactly the kind of answer I’ve been hunting around for on google for hours on end … and now you have summed up the answer in one sentence: Water soluble powders do not mix with alcohol.  I’ve been fooling around with them tonight and they do, in fact, mix with alcohol, so I think I’ll be alright.  Ta-Da … 😃. 👏 👏 👏.  I should have asked you first.  Thank you! Thank you! Thank you! Julia.  You are the best in the west. HUGS

I am sure Laura will have far better answers when she wakes up tomorrow morn!

@Gingerland posted:

Thank you @Laura Saporiti, @Manu biscotti decorati and @Julia M. Usher!

I enjoyed watching this demo a lot. Still intimidated by painting, but I might give it a try.

I know painting can be quite intimidating and that's why I always pay the most attention to trying to break down the process in its steps and details in order for people to better understand and it works. I hope you will give it a try: that's actually the aim of this challenge!

@Sandy_S posted:

For those of you who are still having a hard time finding flat bottom paint palette trays, I have found quite a few at Dollarama and Dollar Tree (Canada & USA).  See images below. They range in price from $1.25 - $3.00.  I have seen people selling these on art supply sites and Etsy for $12.00 or more plus shipping. I’m sure they pick them up from the dollar store and re-sell them, so save yourselves some money if you can. 😃

Thank you so much for sharing this with everybody! I think it's a very useful suggestion. I particularly like the last palette tray (the flower-like one), but the first one is not bad too

@Sandy_S posted:

Thank you so much, Julia.  Wow! You really explained this all very well and I think I know exactly what you mean.  I hope that @Laura Saporiti sees this and hopefully can answer both questions about the gelatin: 1) what bloom she was referring to in the sheets, and 2) what the conversion to powdered gelatin would be. 🤞

In answer to your question in the 2nd paragraph, about what I want to use the LorAnn Powder Food Colors for … I bought them for this #53 Challenge.  Laura makes reference to fat-dispensable vs water soluble powers at about the 13 minute mark of her video.

It’s currently 9pm here in Edmonton, and 5am in Parma, Italy so I suspect Laura will just be waking up as I’m going to bed. ha ha ha

Thank you again, Julia, for ‘everything’.  Big hugs. XXOO

Hello @Sandy_S.
Thank you for reaching out with your questions. Actually, @Julia M. Usher said it all and I thank her a lot for anticipating my reply. She gave you perfect answers, cause she's definitely way more expert than she wants us to believe 😂
Regarding the gelatin, I was going to share exactly the same link from the Modernist Pantry she already posted, because it's quite exhaustive to have a general understanding of the Bloom matter. Knowing the gelatin strength is very important when you are dealing with pastry recipes, especially for modern preparations like entremets, but in the case of the sugar paste, I wouldn't worry too much. Anyway, my fault for sharing the recipe with the grams of gelatin without thinking about the fact gelatin sheets are not that common in the USA and not offering a conversion for them. Being European, and a pastry chef, I only use gelatin sheets and I gave it for granted, sorry.
So the recipe I shared is for a home-style fondant recipe, which here in Italy would refer to the use of a gelatin sheet popular brand that has around 220 Blooms. I checked online and read that Knox powder gelatin, which to my understanding is one of the most common in the US, has 225 bloom, so if you are using this brand you can easily substitute the 15g of gelatin sheets in 15g of powder gelatin. If you find the fondant is too "dense" you can easily reduce the gelatin quantity to 10g. In the end, it's a matter of personal preference.
As for the LorAnn powder colors, they are definitely fat-dispersible, though they don't use this very same wording, they do state they are not water soluble and good for oil based products. You should be good with them.
Hope this helps.

Thank you @Laura Saporiti, and @Julia M. Usher - You are both so awesome at answering everyone’s questions with such thorough detail and in a way that is easy to understand. I appreciate your quick response and I will make the sugar paste today with the 15g of gelatin powder and will post my results. I’m excited to get started with this challenge.  Hugs to one and all.

Hello friends. I’m writing this for other members/visitors that may be totally new to making sugar paste and working with powdered food coloring, etc..  Beginners might find it helpful; but novices will find it boring … ha ha 🥱. So, from one beginner to another:

Re: @Laura Saporiti Non-Fat Sugar Paste Recipe
I followed Laura’s recipe ‘exactly’ and found that it was extremely dry and impossible to knead together by hand … it was just too crumbly.  It might have something to do with being in an extremely dry home  🤷‍♀️. See image 1

I panicked and was about to throw it out, but then thought, “heck, what do I have to lose…”, so I covered the bowl with a wet dishcloth and quickly mixed up more powdered gelatin and water and put it in the microwave and got it very hot. Then I added the glucose syrup (thick as molasses) and stirred until it melded into the gelatin mixture and then added some more glycerine. I can’t tell you how much of each I added as I was just free pouring, but if I had to make a “wild” guess it would be:
10g gelatin
20g water
30g glucose syrup
10g glycerine

I poured it over the original mixture and started kneading by hand. It was quite sticky so I took out about 1/3 of the mixture and kneaded it on the counter and added extra icing sugar as needed. It turned out BEAUTIFULLY.   See image 2

In future I think I will hold back about 200g of the icing sugar and use Laura’s recipe and if it is too sticky *then* I will start incorporating the addition icing sugar slowly until I reach the best consistency for my environment.

I took out a small piece to use as a test and left it over night to dry out.

I then set to work to ‘experiment’ with my LorAnn powdered colors and painted on the sugar paste. My test were just to see 1) how it flowed on the sugar paste, 2) how much liquid to have in my brush, 3) How many layers I had to apply to get the darkest color possible, etc., etc.  See image 3

As you can see from the sample tulip painting I had loaded way too much media on my brush as it ‘spead’ (?) leaked (?)  out beyond the pencil lines.

Notes:
For anyone using LorAnn Powder Food Coloring … when I first mixed it up I was a bit worried because it was all speckled and I wasn’t sure if it would dissolve to a uniform color, but thankfully it did.  See image #4

I use Spirytus for my alcohol, which apparently is the strongest alcohol/proof that you can buy in Canada. It dries up in my paint wells in under 2 minutes so I have to continually add more alcohol. Bummer. But it dries on my painting almost immediately.

And finally … I’m not sure why the packaging on the LorAnn Powders say that it is water insoluble because I mixed the power in a cup of water and dissolved quickly and thoroughly. hmmm 🤔. 🤷‍♀️

Anyway, that’s my 2 cents worth.  Have a great day, everyone.


Attachments

Images (5)
  • original recipe - unkneadable for me
  • after adding additional moisture
  • my test image
  • LorAnn powders dissolve
  • 06CE0554-8EA2-487E-BDE4-D2523C519DB7: LorAnn powders in water
Last edited by Sandy_S
@Sandy_S posted:

Hello friends. I’m writing this for other members/visitors that may be totally new to making sugar paste and working with powdered food coloring, etc..  Beginners might find it helpful; but novices will find it boring … ha ha 🥱. So, from one beginner to another:

Re: @Laura Saporiti Non-Fat Sugar Paste Recipe
I followed Laura’s recipe ‘exactly’ and found that it was extremely dry and impossible to knead together by hand … it was just too crumbly.  It might have something to do with being in an extremely dry home  🤷‍♀️. See image 1

I panicked and was about to throw it out, but then thought, “heck, what do I have to lose…”, so I covered the bowl with a wet dishcloth and quickly mixed up more powdered gelatin and water and put it in the microwave and got it very hot. Then I added the glucose syrup (thick as molasses) and stirred until it melded into the gelatin mixture and then added some more glycerine. I can’t tell you how much of each I added as I was just free pouring, but if I had to make a “wild” guess it would be:
10g gelatin
20g water
30g glucose syrup
10g glycerine

I poured it over the original mixture and started kneading by hand. It was quite sticky so I took out about 1/3 of the mixture and kneaded it on the counter and added extra icing sugar as needed. It turned out BEAUTIFULLY.   See image 2

In future I think I will hold back about 200g of the icing sugar and use Laura’s recipe and if it is too sticky *then* I will start incorporating the addition icing sugar slowly until I reach the best consistency for my environment.

I took out a small piece to use as a test and left it over night to dry out.

I then set to work to ‘experiment’ with my LorAnn powdered colors and painted on the sugar paste. My test were just to see 1) how it flowed on the sugar paste, 2) how much liquid to have in my brush, 3) How many layers I had to apply to get the darkest color possible, etc., etc.  See image 3

As you can see from the sample tulip painting I had loaded way too much media on my brush as it ‘spead’ (?) leaked (?)  out beyond the pencil lines.

Notes:
For anyone using LorAnn Powder Food Coloring … when I first mixed it up I was a bit worried because it was all speckled and I wasn’t sure if it would dissolve to a uniform color, but thankfully it did.  See image #4

I use Spirytus for my alcohol, which apparently is the strongest alcohol/proof that you can buy in Canada. It dries up in my paint wells in under 2 minutes so I have to continually add more alcohol. Bummer. But it dries on my painting almost immediately.

And finally … I’m not sure why the packaging on the LorAnn Powders say that it is water insoluble because I mixed the power in a cup of water and dissolved quickly and thoroughly. hmmm 🤔. 🤷‍♀️

Anyway, that’s my 2 cents worth.  Have a great day, everyone.


Hi @Sandy_S.
Thank you for sharing your experience with everybody. That's the best way to proceed when testing a new technique: making experiments! So you did well.
As for the fondant recipe, I have a couple of recommendations for you: 1. do not bring the gelatin/water/glycerin mixture to a very hot point or it will affect the success of the recipe. Gelatin should never boil or it changes its properties. Moreover, if you add a hot mixture to the sugar, the latter will start to melt and dissolve, again affecting the final texture of the fondant. The idea of reserving 200g of icing sugar when preparing the recipe is actually a good intuition, in this way you add the last part of icing sugar while kneading the fondant by hand in order to remove stickiness and only if you feel the dough calls for it. Correct!
As for your painting tests, they are very encouraging!
Looking forward seeing your piece!

Thank you, @Laura Saporiti. I will print this out as a reminder the next time I make the recipe.  I am grateful for your comments and I will continue to work on a picture that I don’t mind sharing.  The ones that I’ve worked on so far are frightening. LOL

I finally got a chance to watch the video. There is so much information and so many little tips. How fortunate we are to have such high quality instruction by a top-notch instructor! Thank you @Laura Saporiti for sharing you knowledge. And thank you @Manu biscotti decorati for putting all of this together.

...
As for the fondant recipe, I have a couple of recommendations for you: 1. do not bring the gelatin/water/glycerin mixture to a very hot point or it will affect the success of the recipe. Gelatin should never boil or it changes its properties. Moreover, if you add a hot mixture to the sugar, the latter will start to melt and dissolve, again affecting the final texture of the fondant...

Hello!

This challenge is quite challenging.  First dealing with creating fondant from scratch for the first time, second dealing with working with fondant for the first time, and third dealing with "watercolor" painting for the first time.

It only drew my sincere attention because I had already previously decided that I needed to learn how to watercolor paint to be able to carry out some of the "simple" cookie decorating effects I see in the professional results being posted on the Cookie Connection Website.  Even before this challenge aired I had purchased a watercolor painting techniques book (but have not yet gotten to it yet!) - so obviously I am still a watercolor painting newbe.

As for the fondant, I realized I had to try and make the fondant myself not wanting to have to purchase the working suggestion online since the local craft stores did not have a non-fat fondant product easily available.

It took me quite a while to work up to even giving the idea of creating fondant from scratch its due attention.  I finally did, which is the ultimate reason why I am posting a response to Laura's details on what might affect the texture of the fondant.

My first (and only one to date) fondant-from-scratch run resulted in lumps of gelatin obviously affecting the texture of the end product.  I used Knox  gelatin powder  (at least a ba-zillion years old) following a different recipe I found on the internet.  Good or bad, I am going to use this fondant - as of the moment I refuse to give it over to the trash (mulch pile) gods.  I will attach a picture.  At first I thought it was the powdered sugar that I did not sift (okay, that is a sign that I was not following the recipe to-the-T), but I am pretty sure it is the gelatin clumps because I couldn't cut it with a cookie cutter without encountering globs of gelatin.

I really don't know what else can go wrong with the "texture" of fondant because I am currently fixated on this lumpiness!

Do not fret! All is well, I will persevere - it is a challenge afterall! 

Thank you all for your hard work, and encouragement in the stretching of our cookie decorating skills!  @Julia M. Usher @Laura Saporiti @Manu biscotti decorati

------------------------------------ Update added below --------------------------------------------------------------------------------------------------------------

I have just attached two pics of my first trial painting.  The source image came from an internet search for "dahalia varieties" but as of right now the image only comes up being saved on pinterest with a link to the website: https://www.longfield-gardens....ooks-for-your-garden  which no longer has that picture up.  It may be that this seller no longer has this specific variety, but here is another site that has something very similar looking:  https://www.plantsofdistinctio...-dandy-improved-1404

What I have learned to date:

1) The only way to see scrapes/indentations (for the drawing outline) in the fondant is to have side lighting at your workspace.

2) Watercolor painting is crazy stuff.  The outcome does not look like a photograph so you just have to not be a perfectionist.

3) Layering of color is crazy stuff.  If your brush is too wet you just mess up everything you did in the prior layer(s).

4) Fondant flavored with a nice aromatic vanilla makes for a pleasant smell whilst anguishing over your watercolor painting design and details.

5) Feel okay about using a failed homemade fondant recipe and cheap paint brushes on your trail painting because afterall perfection takes a lot of work and you just don't need to add all of that on top of the real challenge of getting that first trail painting off the starting line, anyway.

Attachments

Images (3)
  • FirstHomemadeFondantRun: Those lumps better look good after being painted on!
  • Dahalia_1_directLighting: First Painting Try (direct lighting) with original image, refer to notes on source
  • Dahalia_1_indirectLighting: First Painting Try (indirect lighting)
Last edited by EAC
@EAC posted:

Hello!

This challenge is quite challenging.  First dealing with creating fondant from scratch for the first time, second dealing with working with fondant for the first time, and third dealing with "watercolor" painting for the first time.

It only drew my sincere attention because I had already previously decided that I needed to learn how to watercolor paint to be able to carry out some of the "simple" cookie decorating effects I see in the professional results being posted on the Cookie Connection Website.  Even before this challenge aired I had purchased a watercolor painting techniques book (but have not yet gotten to it yet!) - so obviously I am still a watercolor painting newbe.

As for the fondant, I realized I had to try and make the fondant myself not wanting to have to purchase the working suggestion online since the local craft stores did not have a non-fat fondant product easily available.

It took me quite a while to work up to even giving the idea of creating fondant from scratch its due attention.  I finally did, which is the ultimate reason why I am posting a response to Laura's details on what might affect the texture of the fondant.

My first (and only one to date) fondant-from-scratch run resulted in lumps of gelatin obviously affecting the texture of the end product.  I used Knox  gelatin powder  (at least a ba-zillion years old) following a different recipe I found on the internet.  Good or bad, I am going to use this fondant - as of the moment I refuse to give it over to the trash (mulch pile) gods.  I will attach a picture.  At first I thought it was the powdered sugar that I did not sift (okay, that is a sign that I was not following the recipe to-the-T), but I am pretty sure it is the gelatin clumps because I couldn't cut it with a cookie cutter without encountering globs of gelatin.

I really don't know what else can go wrong with the "texture" of fondant because I am currently fixated on this lumpiness!

Do not fret! All is well, I will persevere - it is a challenge afterall! 

Thank you all for your hard work, and encouragement in the stretching of our cookie decorating skills!  @Julia M. Usher @Laura Saporiti @Manu biscotti decorati

It looks like the gelatin cooled before you could get it evenly distributed, but you will prevail! I love your challenge spirit!

Post
×
×
×
×
Link copied to your clipboard.
×